|
|
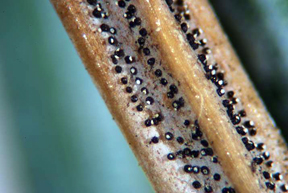
 leaf - diseased - 600dpi-A.jpg)
|
|
| White Canker Tree & Shrub Disease |
|
Our trees and shrubs are now experiencing a new and serious disease that is slowly weakening
and killing them.
This is a widespread disease, not limited to any particular geographic area.
Little is known about it, since it only seemed to make its appearance around 2003.
Yet its aggressive nature seems to overcome the natural defenses of our trees and shrubs.
How bad is it? Think of Dutch Elm disease, which has killed most of our elm trees. Also recall the American chestnut. Both of these much-loved trees are now virtually gone from our landscape. But this disease is worse, in that it seems to attack a wide variety trees and shrubs, not just a few selective species. |
|
Disease Symptom Overview
It eats away at all interior parts of the tree or shrub, eventually replacing the tissue with white fungal material, which we call canker. Eventually the tree or shrub is consumed by this canker, and it dies, unable to transport food and water throughout its body. Externally, it may appear that lack of food or water is the reason for the decline./
Note: Because I'll frequently be referring to "tree" and "shrub" (and sometimes "plant") throughout this website, for brevity I'm going to use the generic term "plant" to refer to all three.
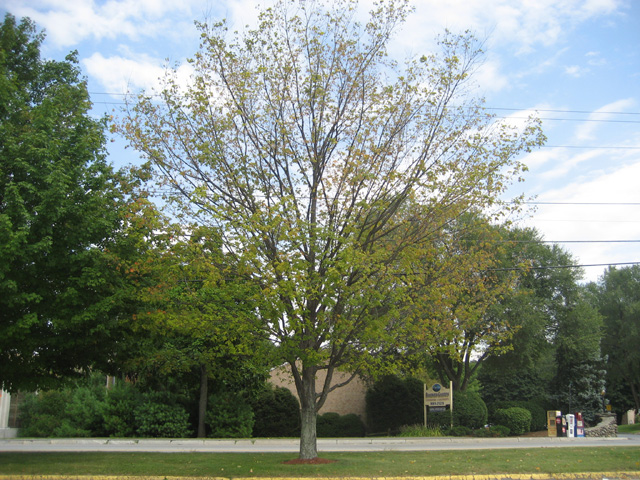
Visual Disease Symptoms: Upon initial infection, you probably won't notice anything at all that is unusual about the plant. Most plants have a surprisingly strong tolerance to infectious agents, and will continue to look well even if there is an infection underway. Actually, it's the same with people - some people can be infected with a virus and it hardly affects them at all. And among plants, the tolerance to a particular pathogen also varies. Some plants are very susceptible and others fight off the infection very well. Again, just like people do. With this fungal disease, the decline in plant health is only visually detectable after the fungus has made significant progress in consuming the tree tissue. Overall Exterior Appearance: As this infection progresses, the overall appearance of the plant will give the impression that it is lacking water or nutrients. The plant will often have a "droopy" appearance. The casual observer will surmise that food, water, drought, wetness, heat, or cold is a major contributing factor.
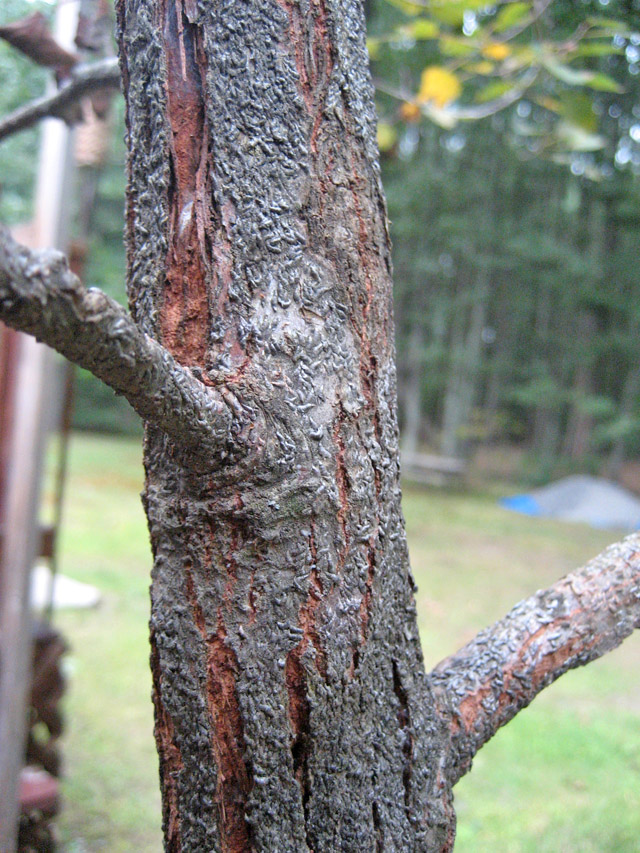
This fungal infection thus causes the bark to starve and decline in health. This unhealthy bark will look blacker than usual, and may give the general appearance that it is rotting. Sometimes this unhealthy bark will cause large bodies of lichen to move in. Another consequence of this unhealthy bark is bark splitting. The unhealthy bark loses some of its normal elasticity, so that new bark pushing outward can't evenly distribute the growth, and hence a tear, or vertical fissure sometimes occurs that is several feet long, exposing the innards of the tree. These cracks can be several feet long and can sometimes bleed sap. The tree will then see this as a normal physical injury and try to heal this split. Interestingly, the new healing tissue will not have normal bark on it due to the infested phloem! However, one must be aware that these vertical cracks can also be caused by temperature extremes during cold weather. The sick bark may also not adhere to the tree, and may simply fall off in pieces or chunks! The particular bark symptoms mentioned above are very dependent upon the species of tree. Regardless, the bark is sick. Consequently, any bark mulch made from this bark will not have the nice aromatic smell of normal/healthy bark mulch. (Have you noticed that most bark mulch you've bought in the past 10 years or so smells moldy?)
Of course, a sick leaf that lacks sufficient water and nutrients can't properly defend itself against attacks by other pathogens and insects, so they may move in to feast on the weakened leaves. An infected sick leaf is of little benefit to a plant, so the plant will sometimes shed them in an attempt to keep an infection from spreading, and to conserve water and food for the remaining leaves. The result is varying degrees of defoliation, sometimes making it seem like fall has arrived!
With other tree diseases, such as anthracnose, the tree can replace the dead leaves later that growing season, or in the next season. But in this case a lifeless appearing branch is simply dead, being filled with canker, and will never support leaves again. The entire tree may be killed in 3 to 10 years. Again, trees vary in their strategy for dealing with pathogens, so none of these symptoms is definitive in identifying this fungal disease. I'll discuss a definitive way to identify this disease later on. |
|
What the Experts Think this Disease is
Having lived and gardened at this location for over 40 years, I'd never seen an abrupt tree and shrub health decline as occurred around 2003. Trees and shrubs that had always been very healthy were now showing severe signs of disease - all at the same time! It seemed obvious to me that there must be some common underlying cause, so I started calling on the experts. First I called on the University of New Hampshire country extension office. The fellow there was very nice, but had no idea what the problem was. I then went one step up and sent a sample in to the University of New Hampshire (UNH) plant diagnostic lab. They too were unable to identify it, but guessed it was some kind of root fungus. Then I had a lawn care company representative examine the diseased trees and shrubs, and he guessed that it was anthracnose. He recommending deep root watering and fertilizing. But to me it didn't seem like anthracnose was affecting so many plants at once. Next, I called in two federal foresters, whose diagnoses ran all over the place from bugs, to viruses, to anthracnose. Surprisingly, they didn't think this massive decline was abnormal! I then sent in 8 leaf samples to the Cornell plant pathology lab. They diagnosed most of the samples as having anthracnose. The UNH plant website also said anthracnose was especially bad that year, and that the solution was to simply wait it out. So I tried that recommendation with my rapidly declining Kwanzan cherry tree. The tree continued its decline, and a few months later it totally died. That was strange, because anthracnose isn't known for killing trees. And it wasn't just trees and shrubs in my yard. Neighbors had similar problems. In fact, I began to see similar symptoms on trees all around the state, and in neighboring states. This negated the argument that I must have been doing something to cause the problem, like over/under fertilizing, watering, disturbing the roots, etc. The next year I gathered up about 24 diseased shrub and tree samples and sent them to the well-known Cornell plant pathology lab for analysis. Once again, a variety of diagnoses was returned. In summary, the experts couldn't find a common cause for this disease. Meanwhile, as I continued to study the disease symptoms in greater and greater depth on a wider and wider range of trees and shrubs, I became more and more convinced that there was one pathogen that was the source of this massive decline. |
|
My Guess as to What this Disease is
I should make one thing clear from the start - while many of the diseased trees and shrubs were diagnosed as having anthracnose, I am convinced that while they may indeed have had anthracnose, the anthracnose was there because of the weakened condition of the plant. I felt this weakening was due to a primary disease, one that plant pathology labs seem unable to find. I realize that these plant pathology labs disagree with this conclusion. Their view is that there is no disease known that attacks such a wide variety of trees and shrubs.
Armed with the range of disease symptoms I'd recorded, I did extensive searches on the Internet. I also studied a key plant pathology industry reference book called Diseases of Trees and Shrubs, Second Edition, by Sinclair and Lyon of Cornell University. They are recognized experts on plant diseases. The pathogen that best matched the disease symptoms appeared to be a fungal-like organism called a Phytophthora. I wondered if it might be Phytophthora ramorum, which is a relatively new disease killing off many trees and shrubs, mainly in California. Its common name is Sudden Oak Death. So I had a lab specifically check for Phytophthora ramorum within some samples I sent in. The diagnosis came back negative. But of all the Phytophthora species, the best species match seemed to be Phytophthora cactorum. P. cactorum grows under the bark, choking off all nourishment flowing up and down the tree bark. Furthermore, Sinclair and Lyon say it has a broad host range and a global distribution. Its symptom list is Decline, Dieback, Fruit rot, Root crown and/or collar rot, Stem canker, and Seedling decay. So P. cactorum seemed like an excellent match. Was that really it? When I sent a sample of diseased bark from a red oak tree to the Cornell plant pathology lab, the diagnosis came back positive. But another diseased bark sample from another tree sent to the UNH plant pathology lab came back as "definitely not a Phytophthora". To try to resolve the issue, I contacted a plant pathology lab on the west coast that specialized in Phytophthora diseases. They wanted a root sample. So I sent them a sample of the roots from the red oak that Cornell said was infected with Phytophthora. The west coast lab said they found no Phytophthora! Confused? I certainly was. Consequently, I still don't have a scientific name for this disease. Something else? So if white canker doesn't seem to match a fungus or phytophthora, what can it possibly be? I've asked myself that question hundreds of times over the years, and I've gradually come up with what many would consider a crazy idea - it's a new type of fungal infection, neither a true fungus nor a phytophthora. My best guess is that white canker is a genetic cross of a fungus and white pine pollen. I say this because white canker fruiting bodies are virtually identical to white pine pollen and mature and disperse at about the same time of year. Also, these white canker fruiting bodies most densely populate the lower facing part of branch junctions within a foot or two of branch tips - just where the pine cones of white pine trees form! Furthermore, as the hundreds of photos within this website show over and over, white canker behaves like a true fungus in that it has abundant fruiting bodies associated with huge amounts of supporting fungal hypha. Finally, as so many pictures on this website show, white canker seems to attack an endless number of shrubs, plants, and trees. No known fungus or phytophthora comes close to doing this, so white canker appears to be a class of pathogen that shrubs, plants, and trees have not evolved an immunity to, so it is probably very new and unique. In spite of the fact that this guess seems to make logical sense, I'm fully aware that many specialists in plant disease will find this hypothesis too radical to believe. But I think they may come around when they do the same microscopic research I did. Ultimately, though, the unquestionable truth will appear when someone finally does a DNA analysis of white canker and compares the result to the DNA of other forms of microbial life. |
|
Why I Named this Disease White Canker
Since it's awkward to keep referring to this disease as "this disease" within this document, I've decided to give it a temporary name that reflects its chief diagnostic characteristics. First and foremost, this disease shows itself as a fungal disease that produces cankers in plant tissue. A canker is a disease-like growth under the bark of a tree or plant. In fact, that's often the primary characteristic that is evident when looking over a tree or shrub with this disease. A second significant identifying disease characteristic is only evident when looking at the cankerous tissue within the internal plant tissue under a high-power (e.g., 400x) microscope. It is there that you can see the real damage being done. This damage is in the form of enormous amounts of white wax-like growths invading and consuming the plant tissue. Given these two primary disease characteristics, it seems to make sense to call this disease White Canker, even though there is nothing white about it when seen with the unaided eye. In time, researchers will no doubt determine exactly what this disease is, and assign a scientific name to it. In the meantime, white canker seems to best describe this disease with a minimum number of words. |
|
General Diagnostic Methods
There are several methods that you can use to try to determine what disease or diseases are affecting your plants. They differ in the amount of time and cost involved, and in the diagnosis confidence. Some suggestions follow. I've tried them all. Try an Internet search Call in a lawn, tree, and shrub specialist Bring a sample diseased plant to your county extension Try a Plant Pathology Diagnostic Lab For example, I've sent leaf and bark samples to both the UNH Plant Diagnostic Lab and the Cornell University Plant Disease Diagnostic Clinic. One word of caution, though. If they diagnose a Phytophthora disease, they are unable to diagnose its particular species. Consequently, that might prevent you from choosing an appropriate chemical treatment. They tell me that species determination would require expensive and time-consuming lab tests. On the other hand, since Phytophthora ramorum is a serious and rapidly spreading disease, there is a test specifically for it (at the Cornell lab, at least), and the test is free. Do your Own Testing Now, I realize that few people have the passion that I do in trying to definitively determine the identify of a strange and possibly new plant disease. Still, it is possible to use just a few diagnostic tools to greatly facilitate the identification effort. The next section describes the tools I used. |
|
My Diagnostic Tools
As I mentioned earlier, when you examine diseased plant tissue, it's very helpful to compare it to plant tissue having a known disease. While that sounds obvious, it turned out to be very frustrating to me. The reason is that different plant diseases result in similar appearances, e.g., "spotty wilted leaves". It's kind of like going to a doctor and saying "Doc, I have a headache and feel achy all over. What's wrong with me?". And when you persist in trying to understand the details a particular plant disease exhibits, the text will often say something to the effect that it's very difficult to diagnose, and you should see an expert! USB Microscope 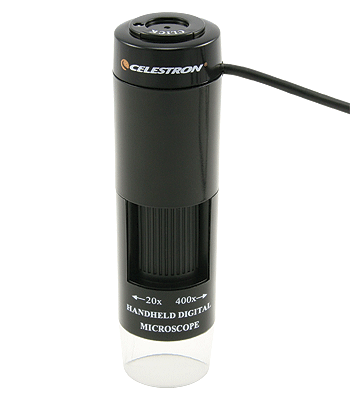
Consequently, in addition to my computer, my main diagnostic tool is a USB microscope. While there are many manufacturers of these microscopes out there, I happened to choose a Celestron model 44300 that had a maximum magnification of 400 power (400x). I would have gotten one with even higher power, but 400x is about as powerful as they come. At the time I bought this one, the cost was about $100, but the cost has come down since then. Flatbed scanner Photo editing software One handy feature of Photoshop Elements is the ability to easily interface with the USB microscope and scanner.
One limitation of Photoshop Elements is that it can only handle a maximum of 200 captured photomicrographs. Cutting tool To do a cross-section of a leaf, simply clamp the leaf in the vise, then use the single-edge razor to cut the leaf along the top of the vise jaws. Hobby vise
Photo stitching software Adobe Photoshop Elements also has the ability to stitch images together. On numerous occasions I've tried to make use of it. But it is slow and can only handle a limited number of photos (maybe less than a dozen). Sometimes it seems to hang, and sometimes it generates a distorted result. This was with version 11. Possibly newer versions have improved. On the other hand, ICE is relatively fast, never hangs, never distorts the result, and can stitch over a hundred photos. My record so far is 210 photos stitched with ICE, although it takes about 15 minutes of processing to do so. Putting it all together
Typically, a 1/8" twig will generate a JPG file having a resolution of about 2500 x 2500 pixels. Unfortunately, this entire process from start to end can take up to 45 minutes. On the other hand, the resultant picture is very insightful as to the internal health of the plant! |
|
Microscope Aided White Canker Symptoms
As discussed above, computer-connected USB microscopes are easy to use and have come down in price dramatically over the years, to the point where they are available for well under $100. So if one is serious about identifying white canker themselves, it is probably a good investment. The reason for this is that white canker can be positively identified with such a microscope. In particular, you can see the white canker's fruiting bodies and its hypha within the diseased plant tissue. You can also see the massive internal destruction of plant tissue it causes, making it obvious as to why the plant is dying. As bad as white canker is, the good diagnostic news is that it lives almost everywhere on the plant! You just have to know how to recognize it, much as you learn how to identify different flowers or mushrooms (fungi) by their color and shape. Specifically, white canker lives on the outside (bark) of plants and also inside the tissue of plants, where it does most of its harm. And by "inside", I mean in the phloem, the xylem, and the cortex. A 400x microscope can show you this. Fruiting bodies on the bark
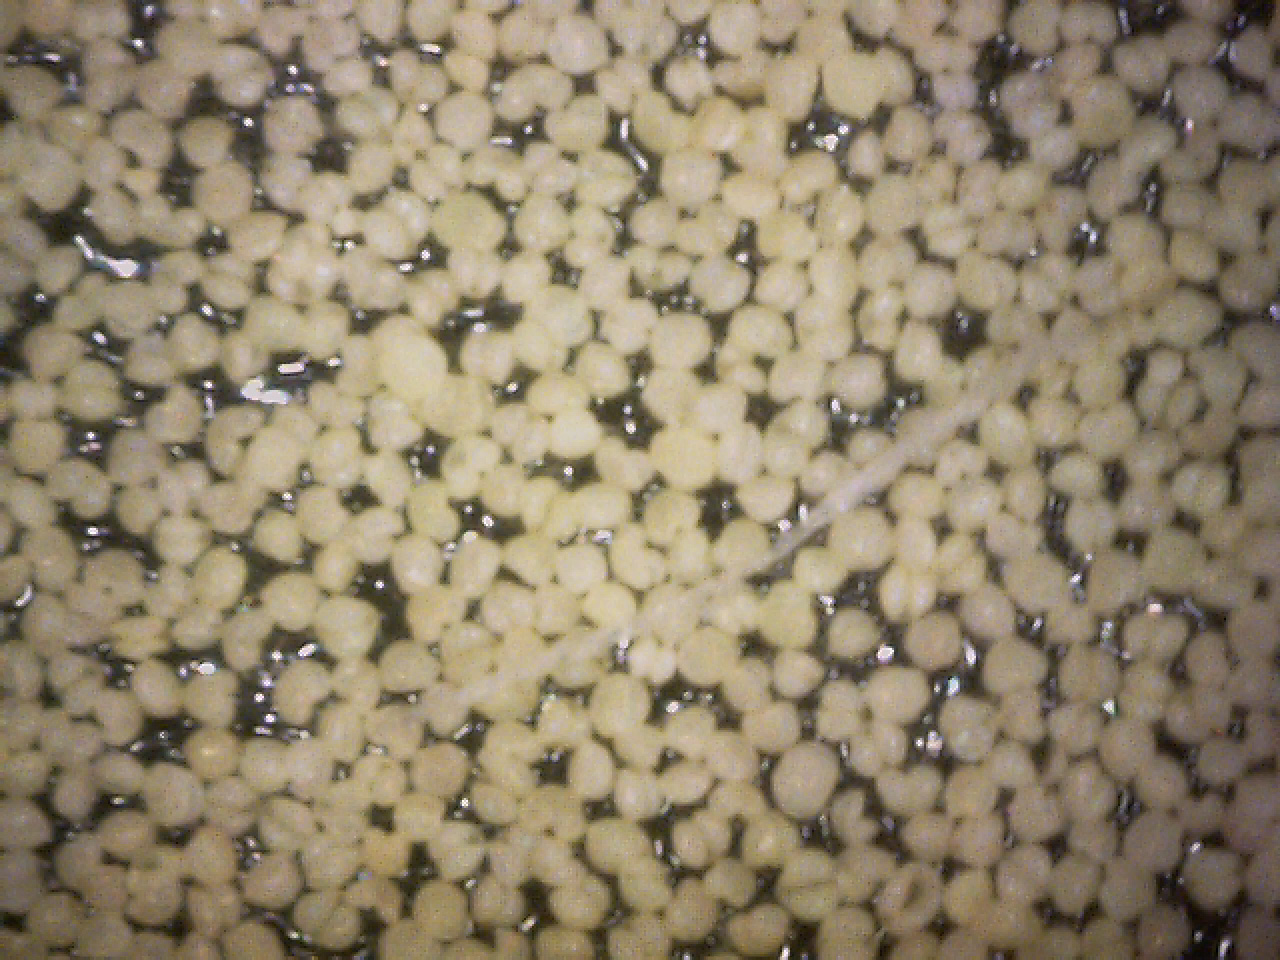
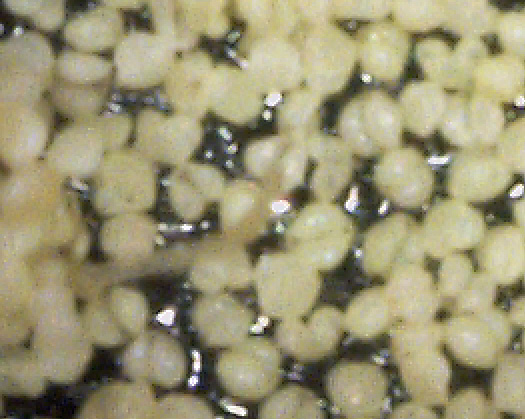
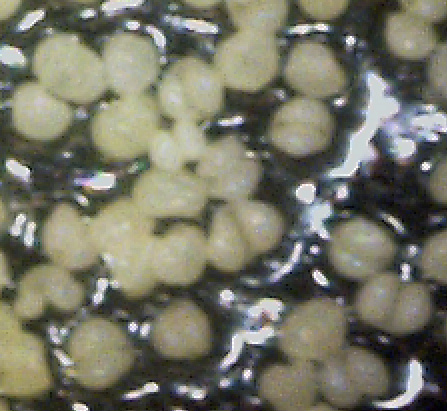
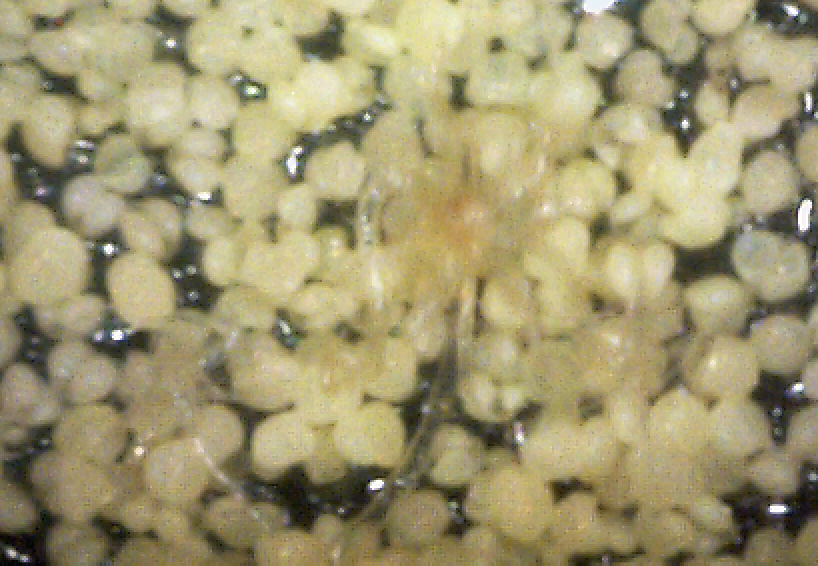
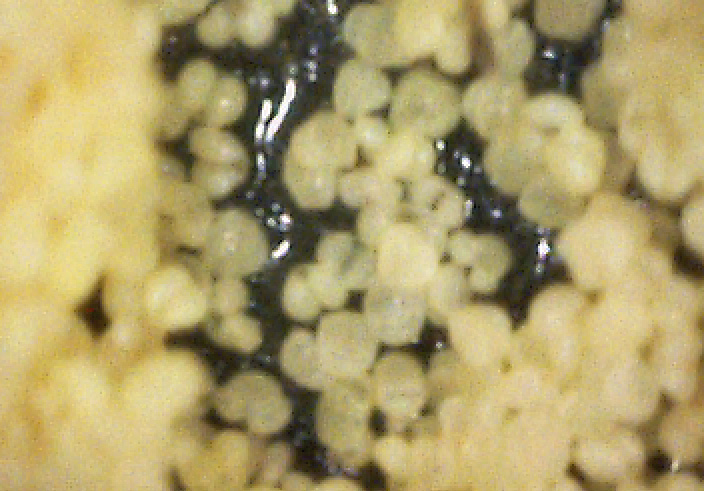
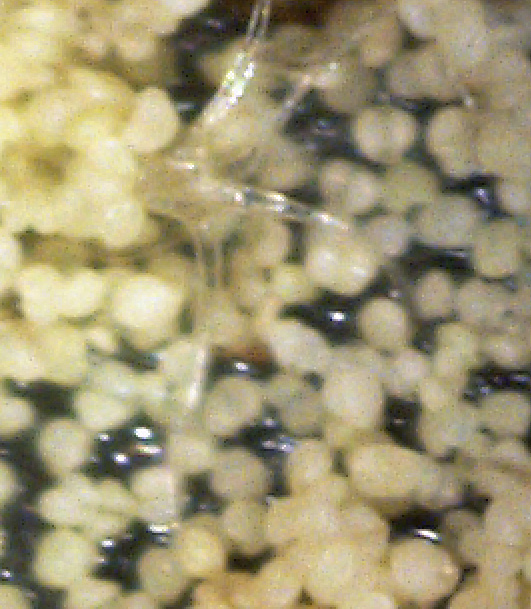
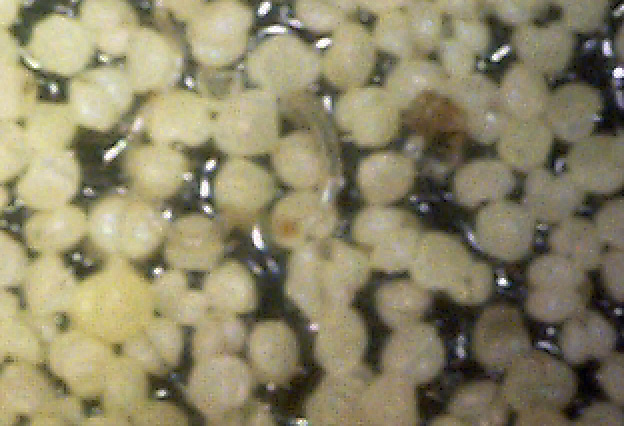
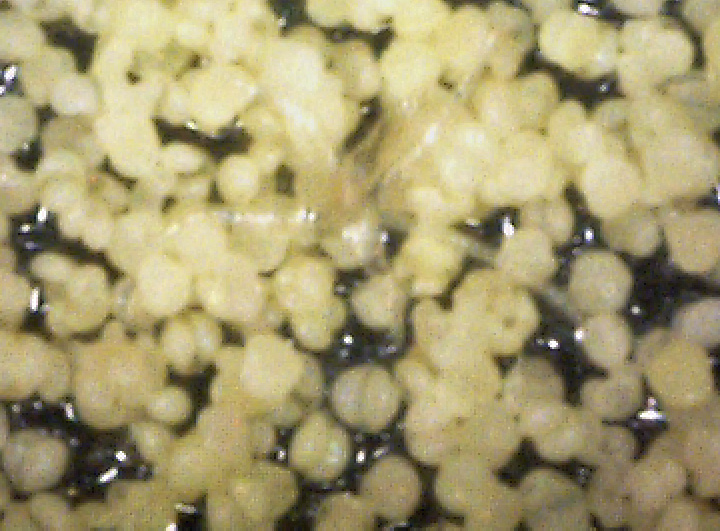
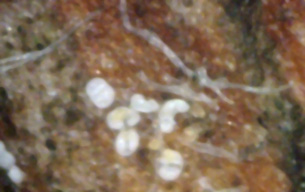
By chance, I happened to stumble upon these fruiting bodies while I was pruning an overgrown chokecherry tree. The distinctive fissures in its bark and prior leaf damage strongly indicated that this tree was infected with white canker. My prior observations seemed to indicate that white canker attacks the bark of a tree. On a hunch, I cut off a diseased-looking branch, placed it on my computer's flatbed scanner and scanned it at a high resolution (2400 dpi). Parts of the branch looked like they were covered with sawdust, or a salt-like substance. Wondering if that was significant, I checked out branches from other diseased trees. Sure enough - the same tan flecks were present. Frustrated in not being able to get a closer view, I bought a 400 power hand-held digital microscope. A microscopic view showed that this "sawdust" turned out to be a field of snow-white "pac-men-like" objects and yellow blobs. Not only that, but there were also translucent ribbons that looped from location to location, sometimes forming spider-like objects. Wow - a whole new world! But was this new set of objects meaningful in diagnosis? To find out, I looked for these disease objects on infected and non-infected wood. The correlation was there - the worse the infection, the more of these objects I found. But - you often had to know exactly where to look for them, which may be why others haven't noticed them. As my investigation progressed, I became more and more convinced that I was now seeing the fungus that was causing the disease. Then I used the microscope to examine a cross-section of some small branches. Expecting to find healthy phloem tissue and bark, I instead found a mess of transparent ribbon-like objects, white waxy blobs, and what looked similar to the fruiting bodies I had seen on the bark. Once again, the more disease the tree had, the more the bark and phloem was eaten up by this other stuff. And once again, I saw this same infection pattern on the cross-sections of other diseased trees and shrubs. It soon became apparent that these fruiting bodies and characteristic white cankerous growths were highly significant diagnostic markers for this fungal disease - which is why I call the disease white canker. Fruiting bodies on the leaves The white canker fruiting body
Plant pollen? But after studying thousands of microscopic photos of hundreds of plants, shrubs, and trees, I came to the conclusion that white pine pollen and white canker fruiting bodies actually DO look the same! Why, I don't know, but I suspect that white canker is a pathogen that somehow copied the genes for constructing white pine pollen. This issue will probably only be fully resolved in the future when a DNA analysis of white canker is performed. Very strong evidence that these fruiting bodies I found are indeed produced by white canker will be shown in later photos within this document. (Here again, I like Dr. Shigo's advice regarding conflicts: if people say one thing and trees say another, follow the trees.)
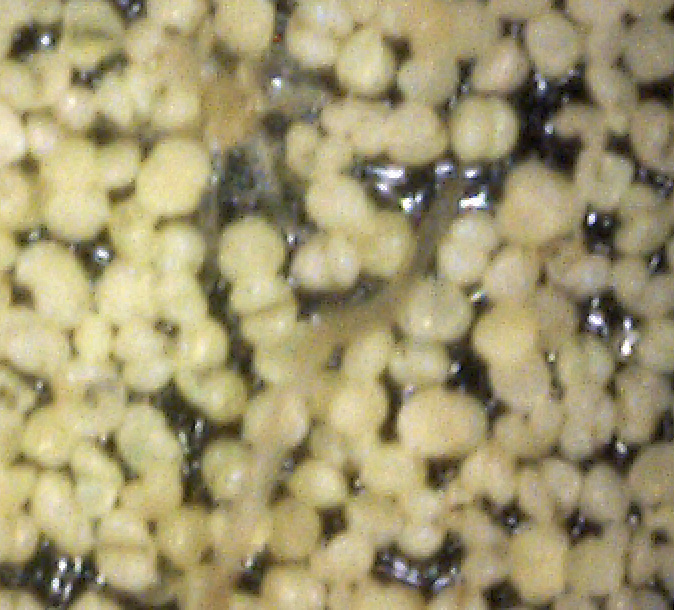
Icicle-like ribbons among the fruiting bodies A white canker hypha is a thin, translucent, ribbon-like object, with a thickness of about 15 micrometers and a width of several times that size. Their slightly bumpy appearance makes them look like icicles. While hyphae are usually embedded within the plant tissue, and thus not seen, occasionally they will appear on the surface bark along with the fruiting bodies. In that case the free end will often be pointed. Sometimes hypha will have several twists, enhancing their ribbon-like appearance. When a twig containing white canker is cut for the purpose of making a cross-section, the cutting device will sometimes drag some of these hyphae out across the surface of the cross-section, which then makes them visible with a microscope.
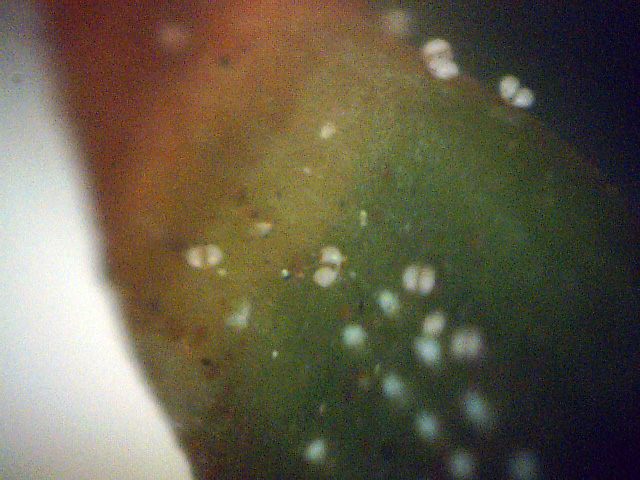
Fungal Growth Within the Plant Leaf cross-sections If the leaf is moderately to strongly infested with white canker fungus, you will see white strands and white blobs among the green leaf tissue. While this white canker may appear throughout the entire cross-section, I've found that it tends to concentrate around th leaf midrib. In fact, for light to moderate infections, this midrib area is the only area that may show the white canker. Consequently, when I examine the cross-section of a leaf for white canker, I now only examine the midrib area. Unfortunately, I've found that while the midrib area may show little infection, there definitely is a white canker infection taking place, as evidenced by twig cross-sections. Twig cross-sections
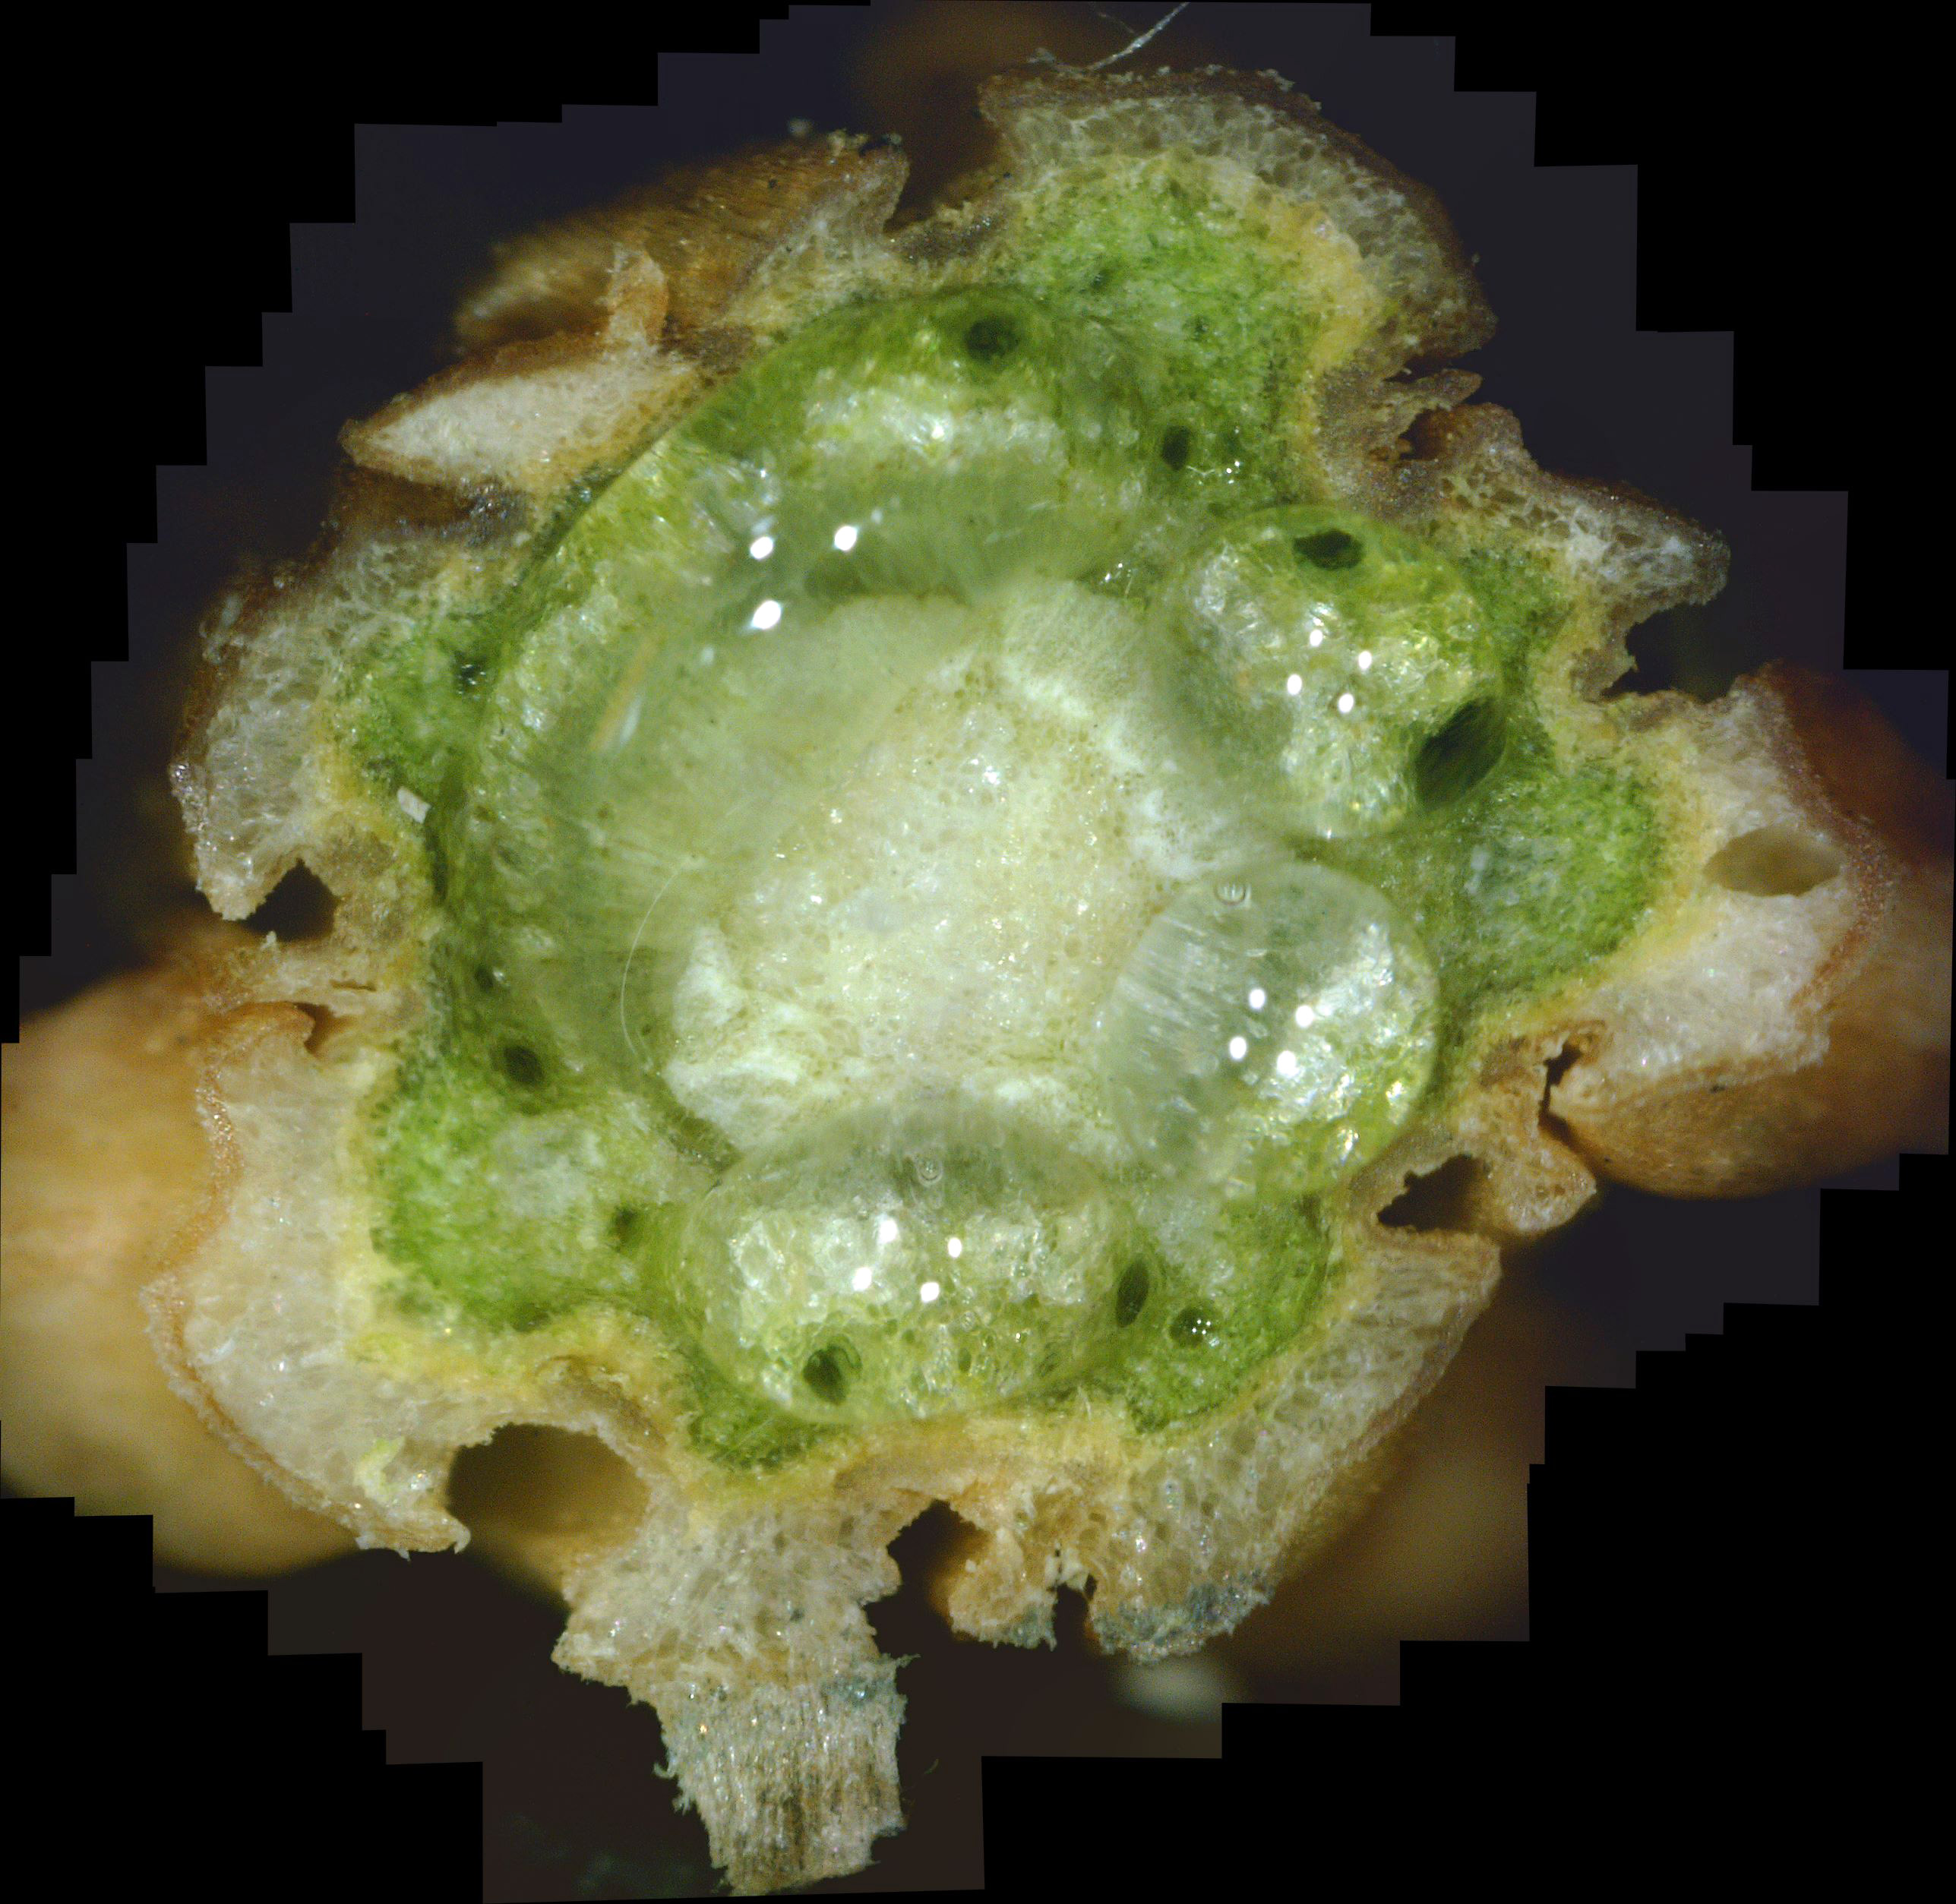
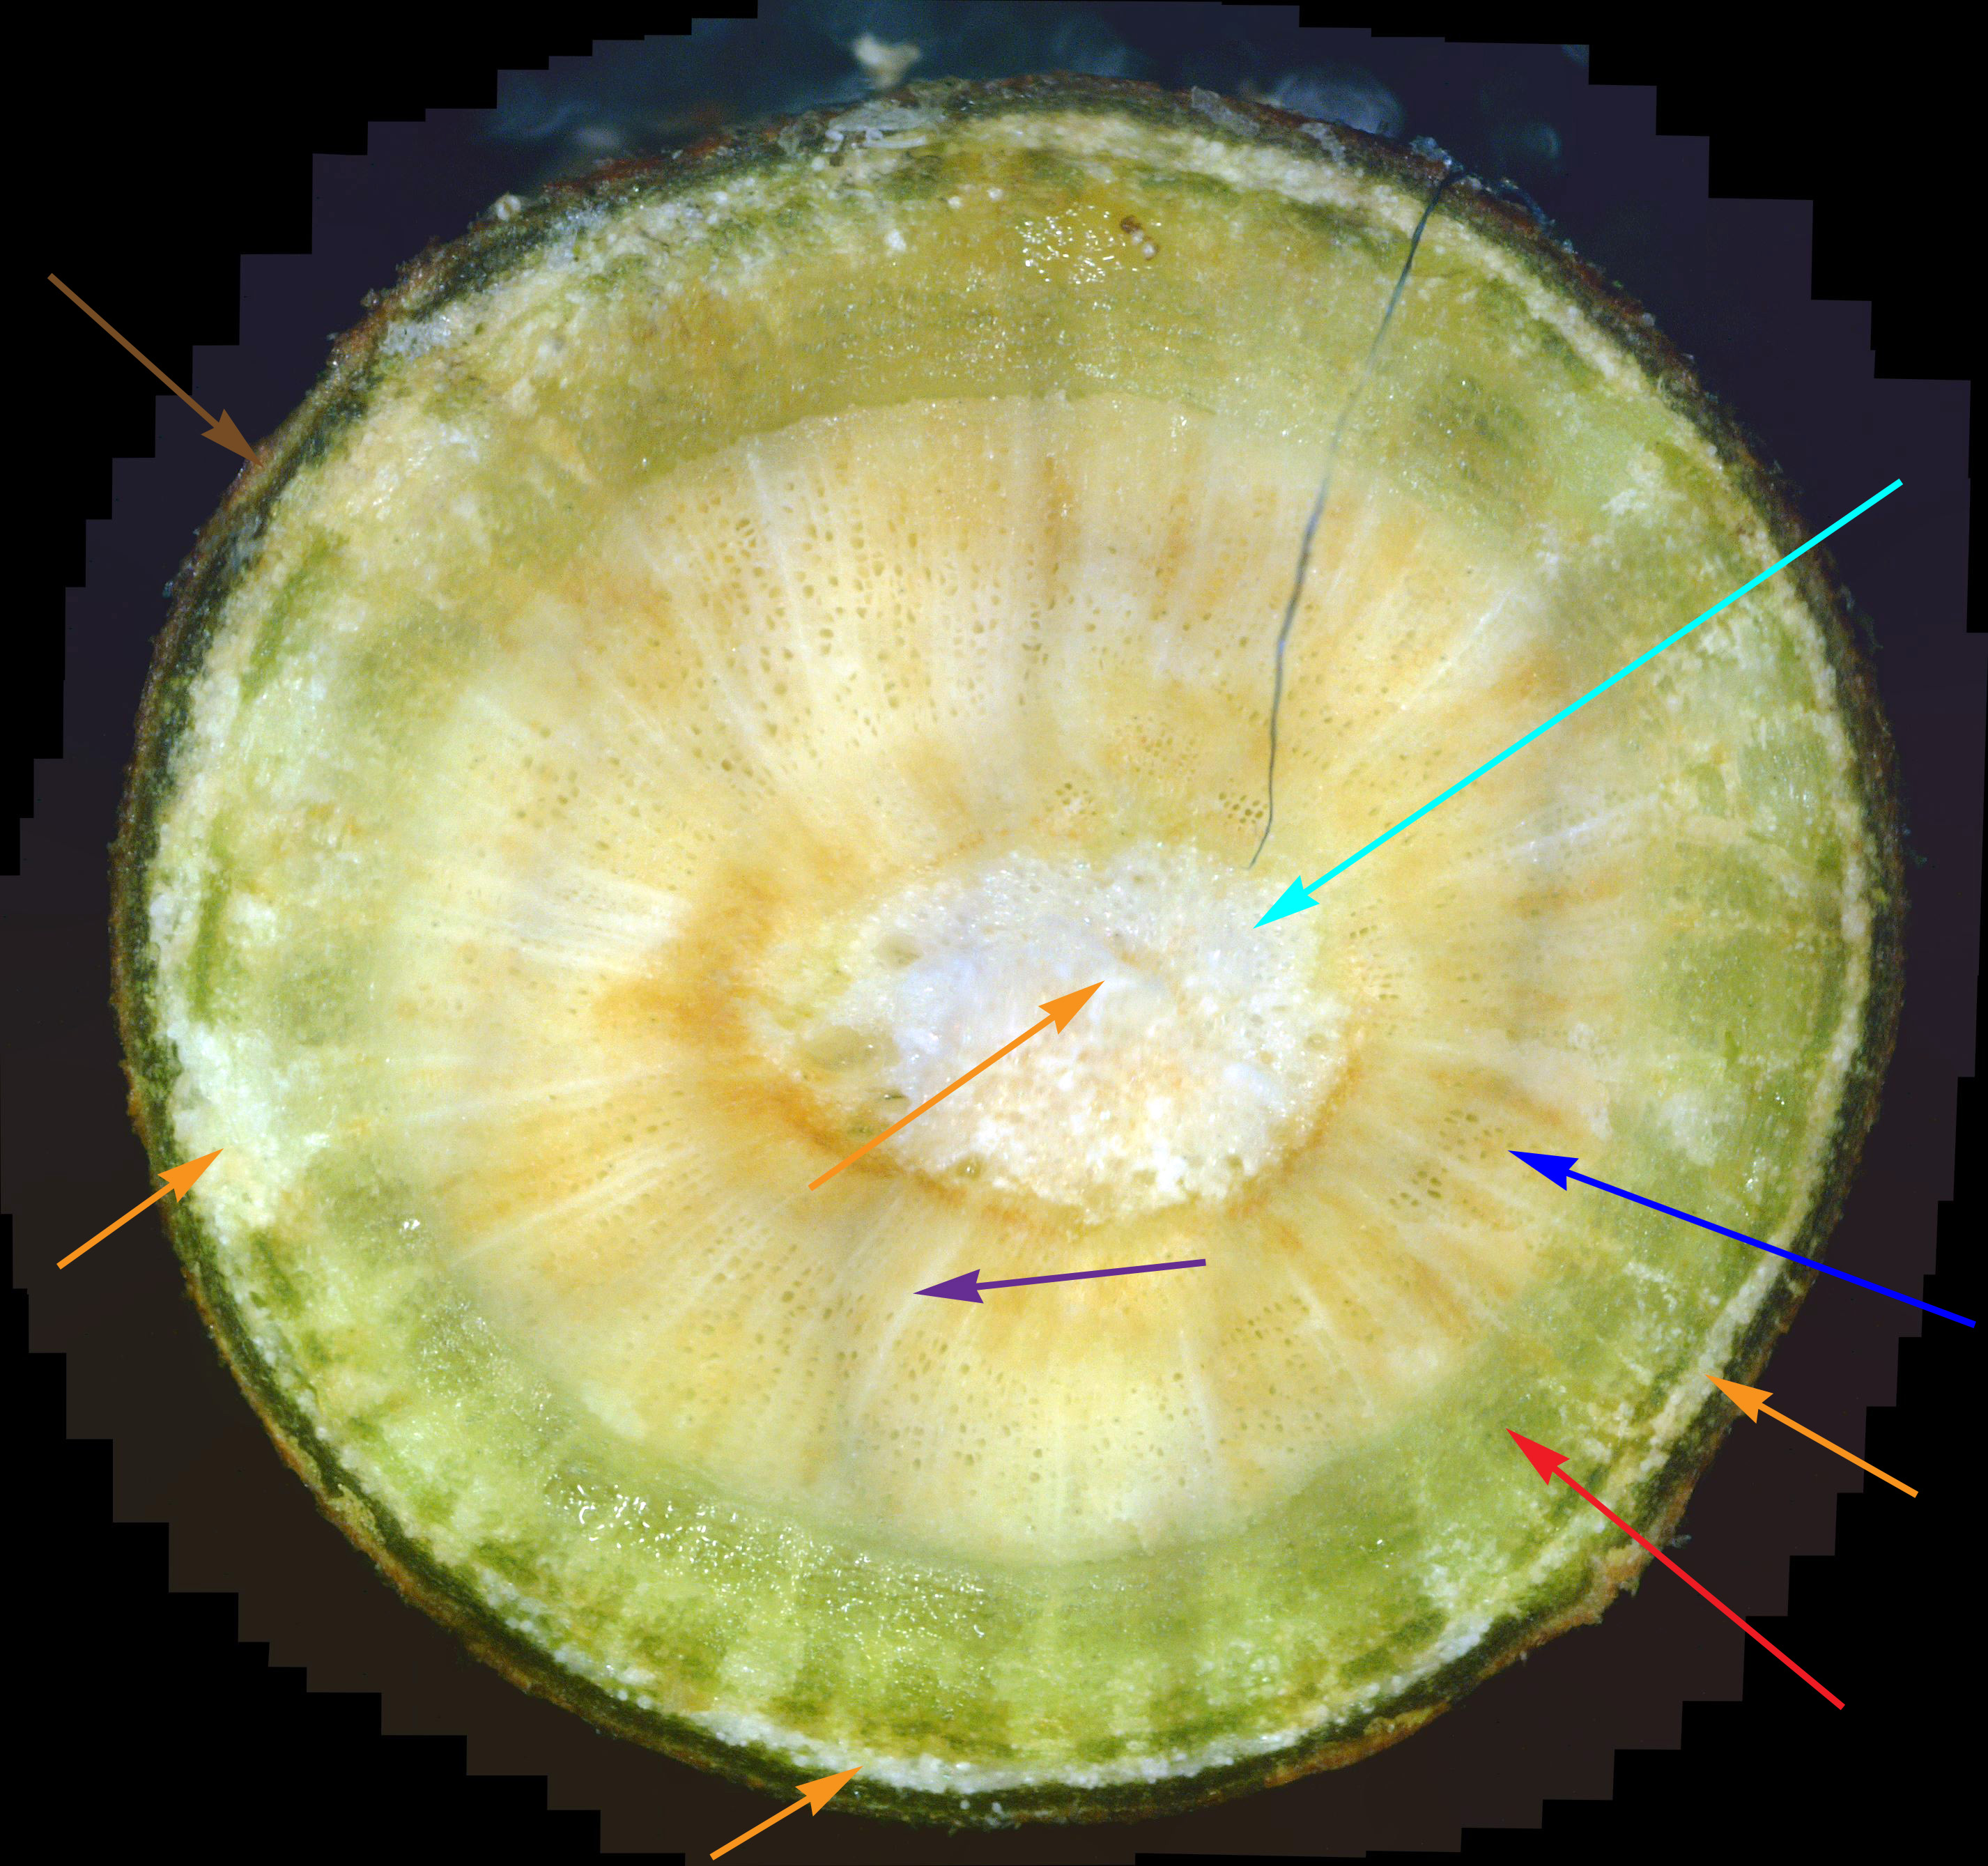
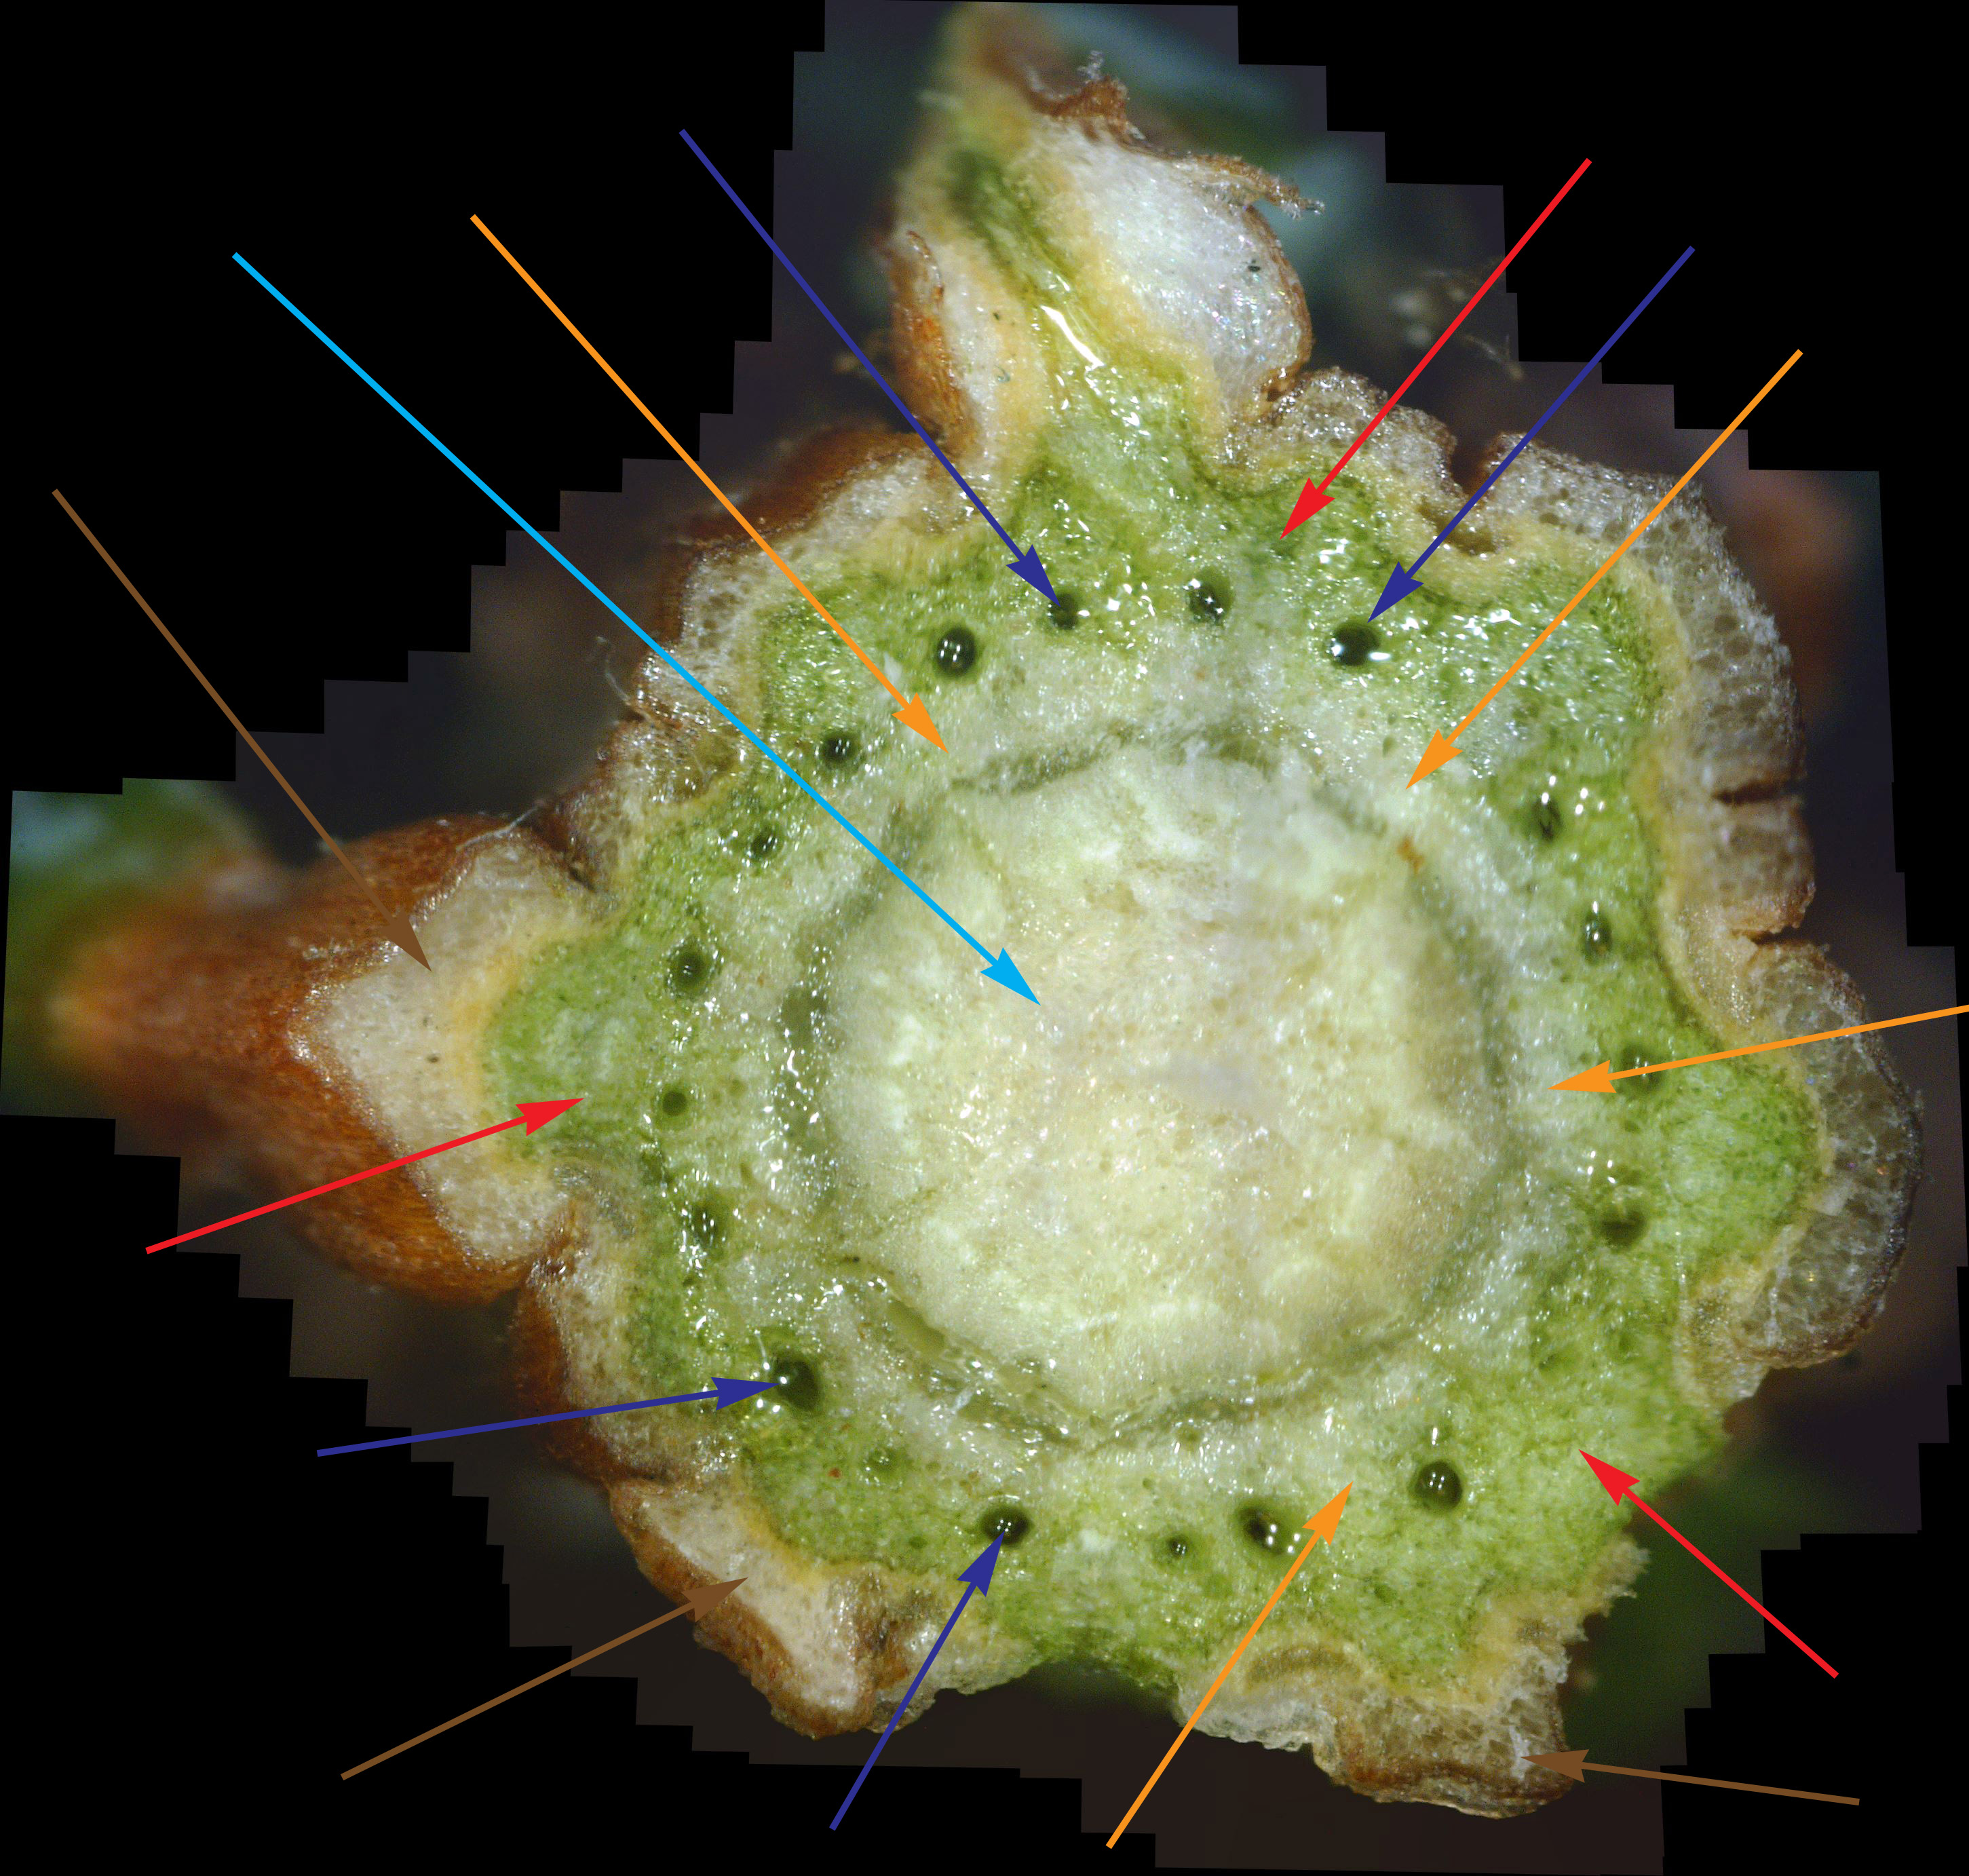
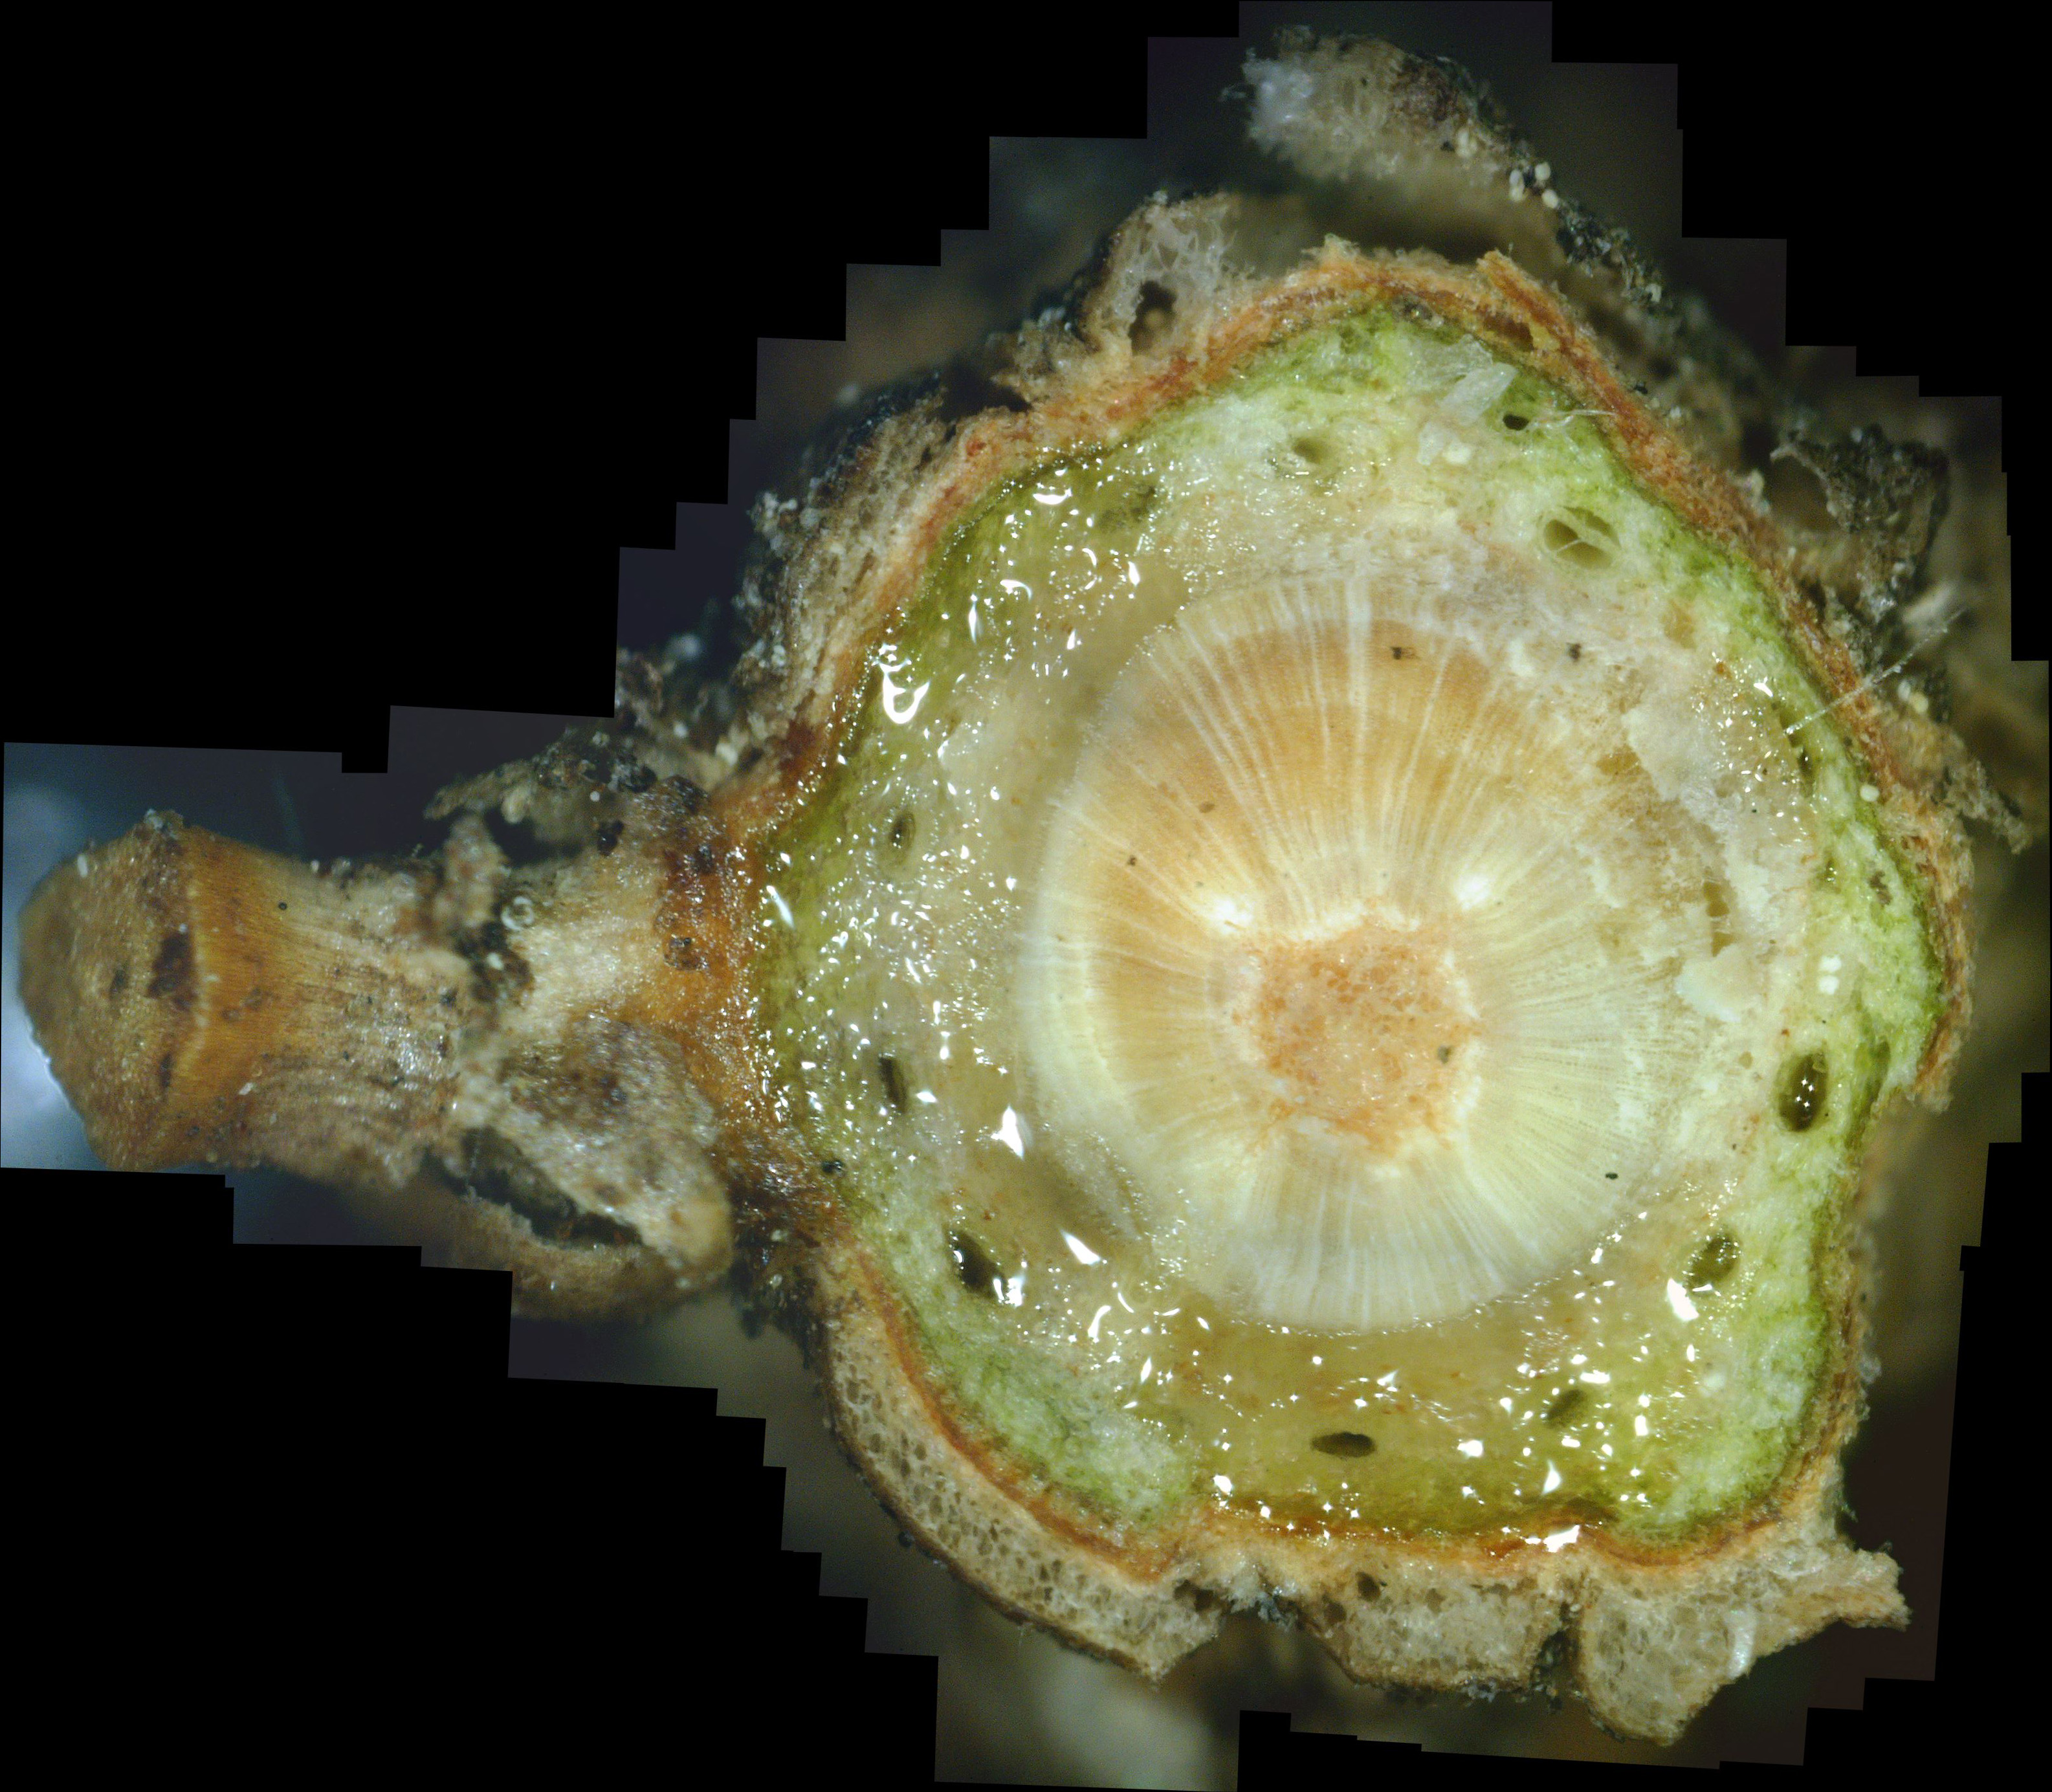
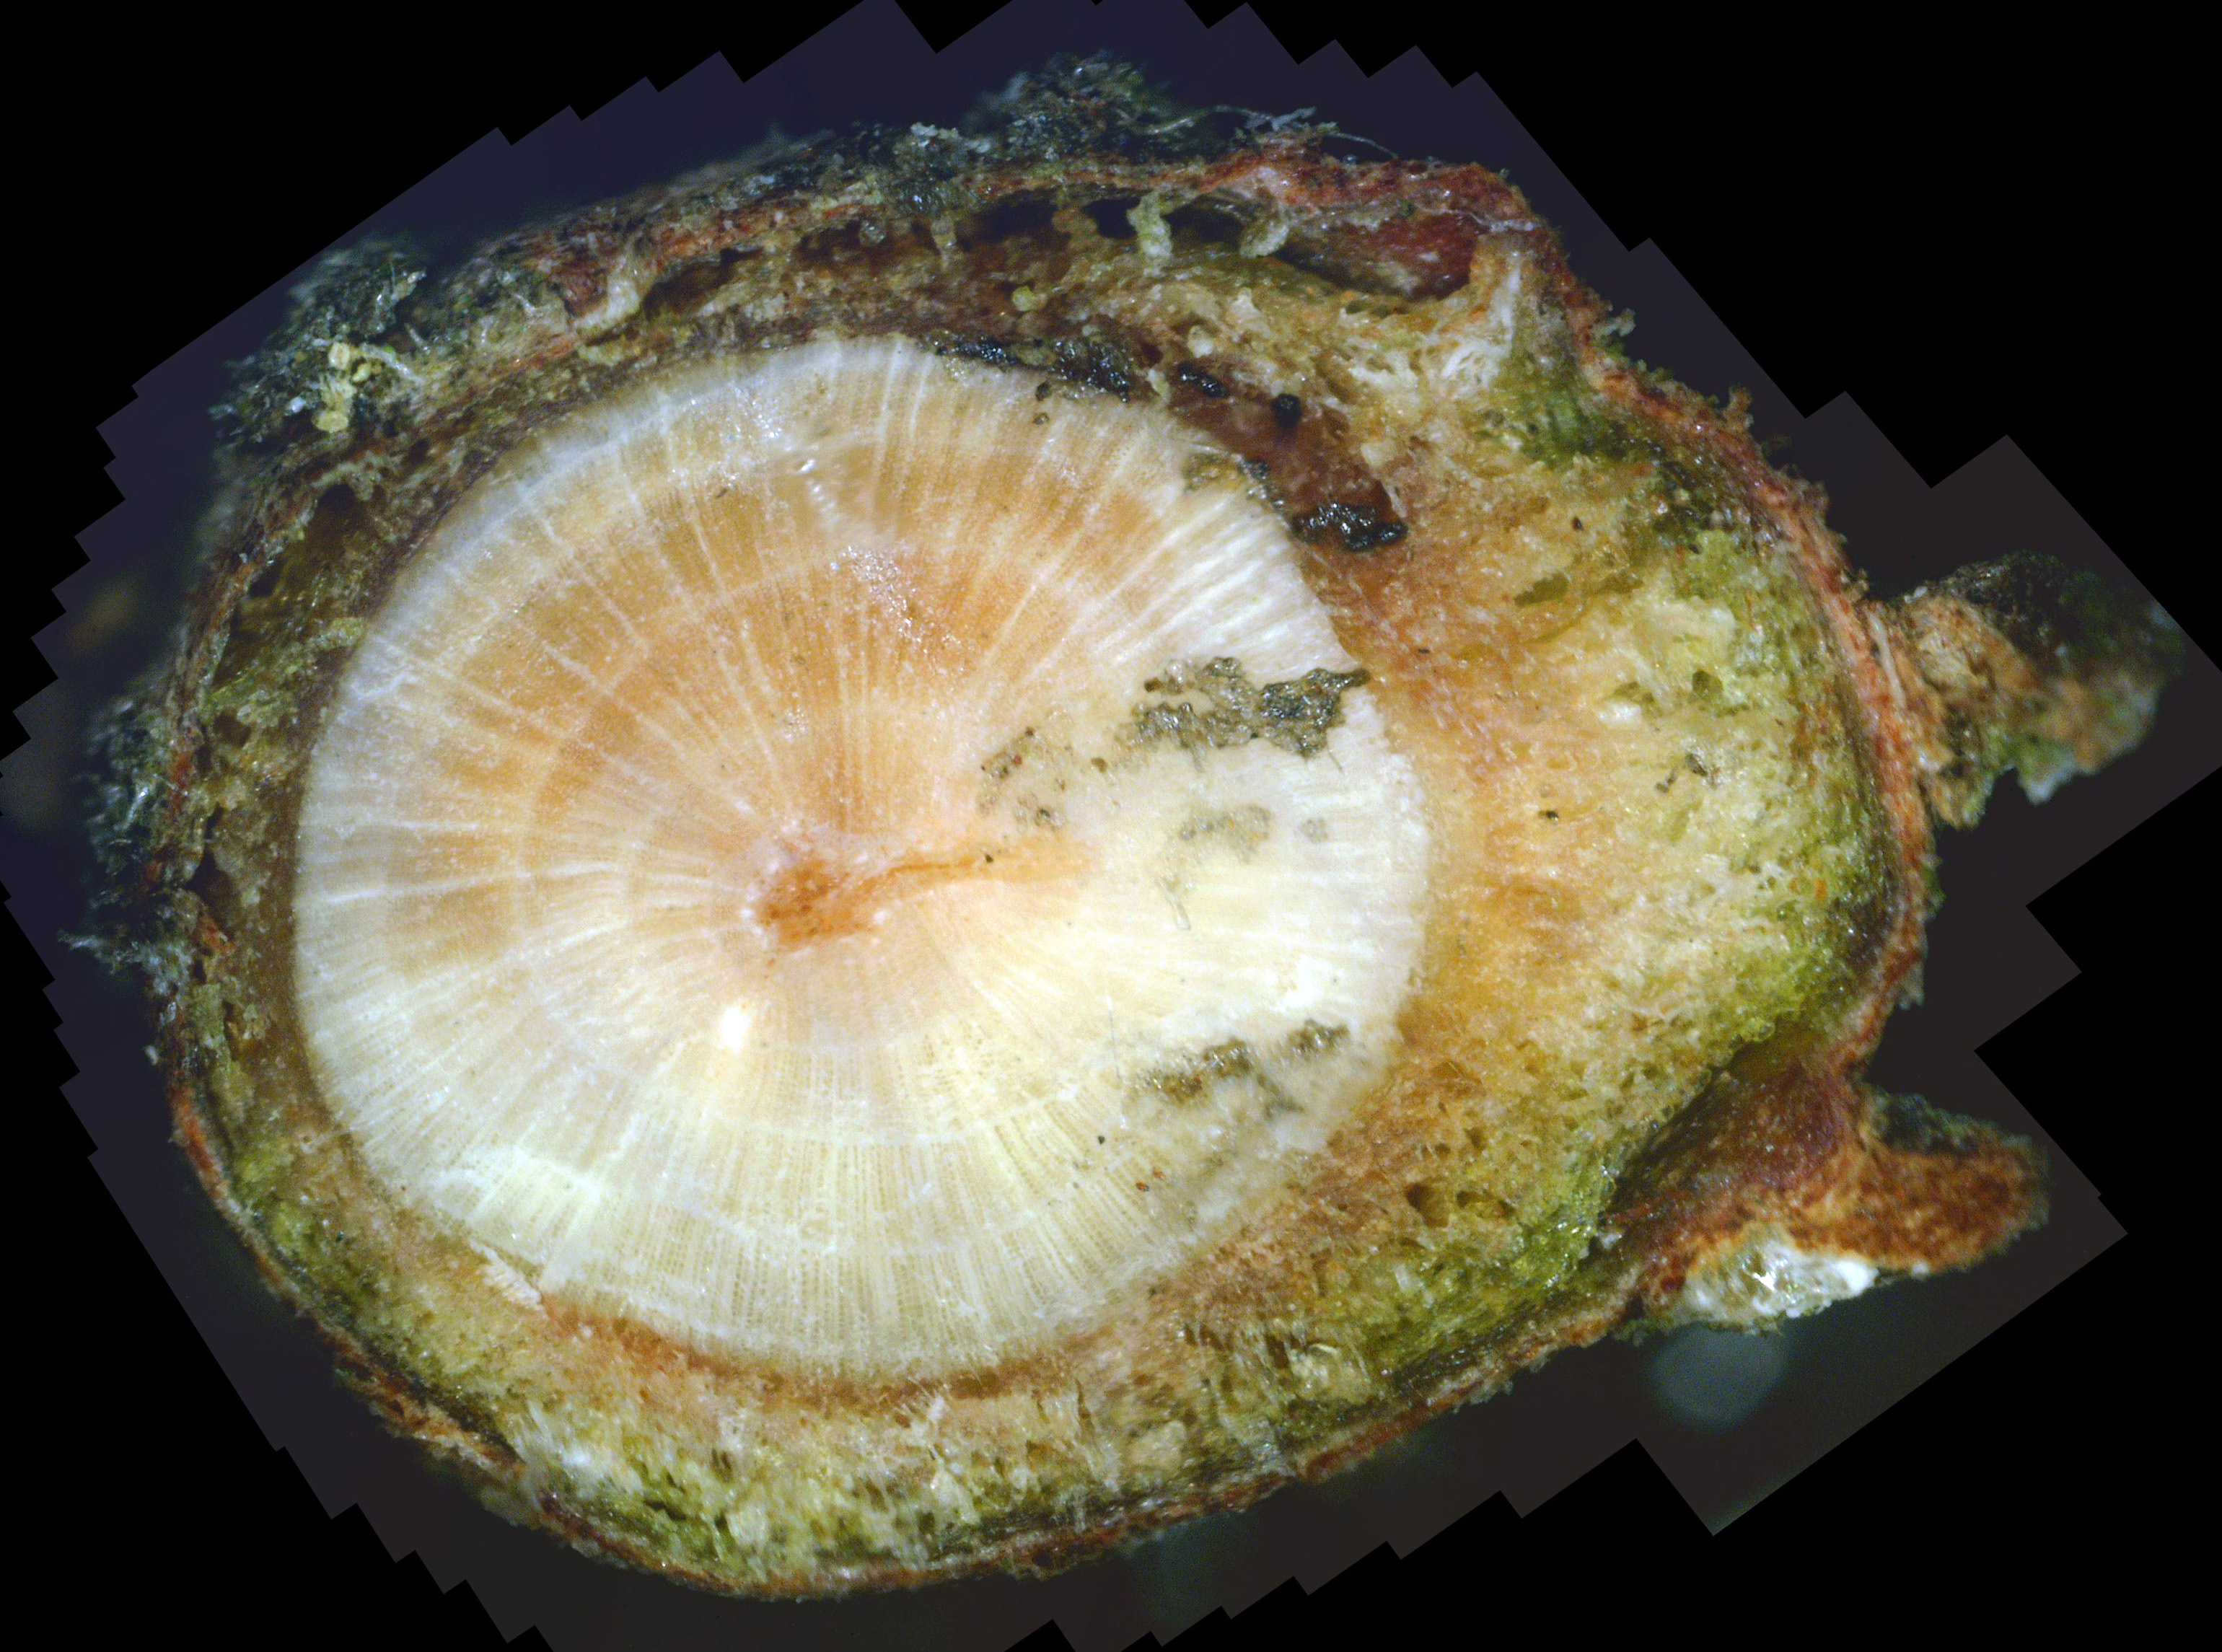
While experience has shown that a 1/8" diameter twig is ideal for doing a twig cross-section analysis, a 400x view of a twig this size only shows a very small portion of it. In fact, it's very difficult to infer much diagnostic information at all with such a small view. Hence, as covered previously, dozens of 400x photos of this twig cross-section are made, and they are all stitched together into one big picture. As interesting and potentially informative as these twig cross-section pictures are, they are only useful if one knows what to look for in them. In other words, we need to first know what what a normal cross-section looks like. Unfortunately, that's not easy. In an extensive search of the Internet for cross-sections of twigs and stems, I found NO cross-sections of real plants in natural color! There are plenty of black-and-white sketches, and some colorized drawings. Some were labeled, but even if they were, labeling seemed inconsistent. Consequently, I decided to show a few example cross-sections from among the many cross-sections I've made. Since I was so far unable to find a shrub or tree that was totally free of white canker, I selected some trees that so far haven't shown a severe white canker infection. Figure 1 shows a cross-section of a linden tree twig. I've followed this linden tree over about 8 years. Each year it visibly suffers from white canker late in the summer by having its leaves turn yellow and drop. But the tree seems to bounce back every year. Figure 2 shows a cross-section of a blue spruce twig. I've also followed this blue spruce tree over about 8 years. Each year it sheds more needles. The lower 5 feet became totally bare, so the homeowner cut off all the dead branches. But the disease continues to advance upward. Like other blue spruce trees in the area, this one will eventually die.
Next, note the colored arrows pointing to various internal structures within each cross-section. It may help to click on each picture to zoom in so the detail is more clearly shown. The colored arrows show the following:
There are several things to note in these two figures:
|
|
Treating White Canker
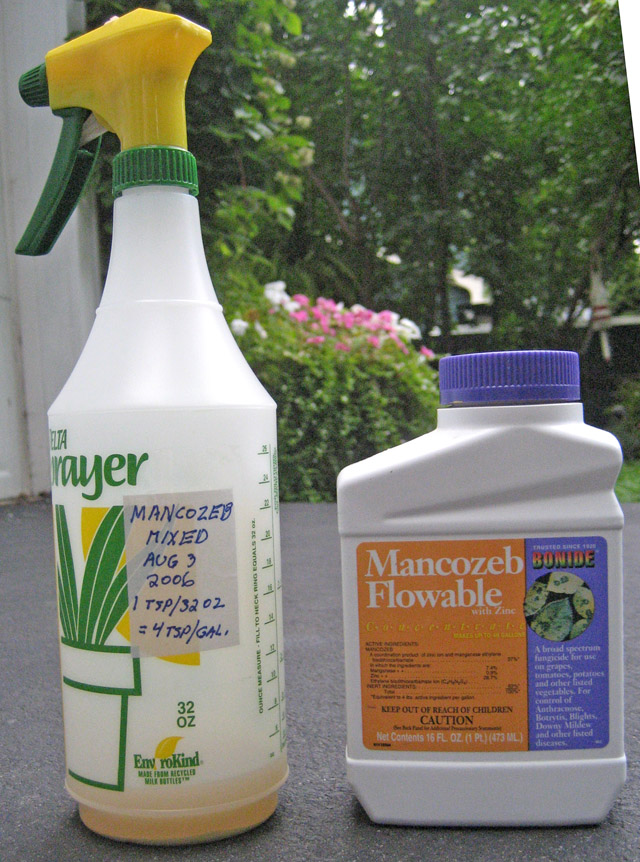
After seemingly getting nowhere while trying to determine the common cause of so many of my shrubs and trees dying or in declining health, I did a lot of searching the Internet for chemicals that might be of help. After finding a few candidates, I called a local tree/shrub/plant care company and asked them to spray my yard - something I'd never done before since I'd never had a yard disease this severe. Based upon my Internet research, I specifically asked them to also include a fungicide called Mancozeb. They did this, although they call it Protect instead. Their Protect fungicide was used in addition to their fungicide called Eagle. For the first 10 days there was no effect. But then it was like a miracle had happened. Every single diseased plant, without exception, perked up and the foliage turned a deep healthy green! I could hardly believe my eyes. It was like day and night. But… was the improvement due to Eagle or Protect? Both were fungicides. The service's agent thought it was Eagle, since Eagle was systemic (works within the plant, rather than as a disease barrier). So, as a further experiment, in the next spraying a month later, I had them exclude the Protect. The disease got progressively worse again. When it was time for my third spraying in mid-August, leaves were falling from my (and others) birch trees like rain. For the third spraying, I had the agent exclude Eagle, and just use Protect. About a week later the improvement repeated itself - the birch leaves stopped dropping and stayed green. The other diseased plants also improved. That was the proof I needed - fungicide Protect/Mancozeb was definitely effective in holding back this disease. But it didn't cure it. A treatment is needed every 3 or 4 weeks. I continued working with the tree care agent for the following year, trying out several more fungicides to see how they worked. Most were effective, one wasn't, as summarized in the following table:
The fact that several fungicides were so effective seems to imply that this disease is a fungus or fungus-like (e.g., Phytophthora) pathogen. It also argues against the suggestions that the cause of this decline was: cold weather, hot weather, not enough water, too much water, insects, too acidic a soil, lack of fertilizer, too much fertilizer, or physical damage. Yes, incredibly, all these things were suggested as the cause of the tree and shrub health problems on our property!
There is no Permanent Cure Who Does the Treatment? Hiring a commercial firm to apply fungicides has both advantages and disadvantages: Advantages:
Disadvantages:
Applying the fungicide yourself also has both advantages and disadvantages: Advantages:
Disadvantages:
Regardless of who applies the fungicide, there is the issue of getting the fungicide into the plant. Commercial firms will generally spray the entire shrub or tree. But they have a problem spraying tall trees, as their pressureized spray equipment can only reach up to about 25 feet. Personally, having everything sprayed with chemicals bothers me a bit. It bothers me even more when I do the spraying and the spray particles are close to me. I worry that a small gust of wind could blow them into my face. Fortunately, my extensive microscopic analysis of white canker shows that the fungal disease works its way up the plant through the roots and the xylem and pith of the plant. Because of that, I've experimented and found that you can spray a particular systemic fungicide, propiconazole, onto the ground around the plant. Rain or watering will wash it down to the roots which will then transport the fungicide throughout the plant. I prefer this method of application since the spray nozzle always stays inches from the ground, greatly reducing any drifting fungicide spray droplets.
Here's a troubling experience I had with a lawn care company. I contracted with them to treat my shrubs and trees for the season. But they didn't do the first treatment until the last days of May. By that time, plant growth was well established, so the bad effects of white canker were already apparent. When they did come to apply their first treatment, they didn't spray some of the trees and shrubs that badly needed a treatment! The reason was their concern for the bees - they didn't want to harm them. I commend them for that concern, but on the other hand, my declining shrubs and trees continued their decline. My solution, was to spray the ground around these shrubs and trees myself. Since I never sprayed the leaves, flowers, and trunks, there was no issue with the bees, butterflies, etc. And I believe that a healthy plant is much better able to resist insect attack. After your yard has been treated with one of these white canker fungicides, you should notice an improvement in plant health in about seven to ten days. But there are several issues to keep in mind. One is that the improvement seen depends upon the growth state of the plant. If a shrub or tree branch has no sign of life, it will NOT come back to life. If there are just a few sickly leaves on the tree or shrub, these leaves may or may not improve, since they are already formed. But any new leaves will be be well-formed and healthy. Since the white canker fungus kills the internal plant tissue, it will take time, sometimes months, for the plant to heal that internal tissue, much as it takes your body time to heal from a serious wound. Leaf appearance is a good indicator of the health of a plant. Healthy leaves will generally be 1) very flat, 2) relatively large, 3) deep green in color, and 4) have a shiny surface. In fact, I often find healthy leaves like this so pleasing that I almost appreciate their appearance as much as the flowers on the plant! Tracking Propiconazole Effectiveness over a Two-Month Period Microscopic Insight Propiconazole Safety Propiconazole is a fungicide and antimicrobial that was first used in 1981 to protect grass grown for seed. The EPA expanded its permissible uses in 1987, 1993, and 1994 to include several food crops, but it is also used to protect ornamental plants. It may be sold under names Tilt, Alamo, Banner, Orbit, and Quilt. It is available as an emulsifiable concentrate, flowable concentrate, ready-to-use liquid, liquid soluble concentrate, wettable powder, and dust (#EPA). It targets fungi, bacteria, and viruses affecting plants. This broad targeting means that it may be used as a preservative to wood, adhesives, paints, coatings, leather, paper, textiles, and other industrial products. While it is often used for garden plantings, it is registered for use on a variety of food crops, most notably banana, nuts, barley, corn, stone fruits, wheat, cereal grains, citrus, oats, rice, rye, sugarcane, and wheat. Nuts, rice, and wheat account for the heaviest usage. Field soil half-life ranges from 9 to 461 days. In humans, propiconazole has a moderately low acute toxicity. Some humans exposed to formulated products containing propiconazole have shown local irritant reactions. Research has concluded that propiconazole is unlikely to pose a carcinogenic risk to humans. Human excretion occurs at 95% in 48 hours. Exposure potential is low under actual field use and poses minimal risk of adverse effects. Propiconazole can be slightly to highly toxic to fish. It has a relatively low toxicity to birds, mammals, and bees, and other non-target organisms. When to Apply the Fungicide This early treatment is so important because when white canker gets established within plant tissue, it takes a lot of effort for a plant to get rid of it. And when the fungicide does kill the internal white canker, the plant has to grow internally to heal these internal wounds. This is less likely to happen later in the season when a plant prepares to go dormant for the upcoming fall and winter seasons. |
|
Factors Making White Canker Worse
After I realized my garden plants were virtually all infected with a serious case of this white canker fungal disease, some of my first thoughts were "how did my garden come to get this disease" and "why does it seem to be affecting my garden more than the gardens of other people". These questions kept haunting me since I considered myself a fairly good gardener, fertilizing my grass and plants, mulching my plantings, and giving them sufficient water (although I'm not that big on watering, my wife is). So our plantings certainly don't suffer in the traditional sense. Consequently, whenever I was away from home, I looked for evidence of white canker infections wherever I saw trees and shrubs growing. At first I saw no pattern. But after years of searching, some patterns began to emerge. Even when I started noticing these patterns, some didn't seem to make sense initially. But, gradually, the evidence built up to the point where I could make some general predictions about the factors affecting the severity of a white canker infection. I'll cover these factors in the following paragraphs. Bark mulch - a blessing and curse! Yet, emotionally, I found it somewhat hard to accept that the highly recommended gardening practice of mulching was in fact destroying my plantings rather than helping them! So I started looking around at other areas of plantings, trying to gather evidence one way or another. One area I often frequented was our local supermarket. Their parking lot had numerous islands that contained young flowering trees. As is often the case in these commercial plantings, they used bark mulch extensively. But as I monitored these plantings over the years, I noticed that their health invariably declined, e.g., branches gradually died off until the entire tree died. Then they would replace it with another tree. And that tree, too, would sicken and die over the span of several years. The evidence was just too strong to ignore - bark mulch, as attractive as it looked, had become a tree and shrub killer. Water - another blessing and curse! As I drove the highways, I kept searching for healthy and diseased trees. After years of this, I began to notice another pattern: trees that seemed in decline due to white canker were generally in lower elevation areas that had plenty of ground water. I seemed to see this correlation over and over again. At first, it didn't seem to make much sense. But after reading up on fungal diseases, the literature said that plant fungal diseases thrive in wet environments. Once again, another piece of the puzzle fit - our zealous watering was both helping our gardens and at the same time making our white canker infection worse! Wind shear At first I surmised that these trees were getting attacked by huge numbers of white canker spores being blown at them by the wind. But my microscope research showed that white canker chokes off the vascular system of the trees, effectively starving them of water. The drying effect of the wind pushes these infected trees over the edge, hastening their decline and death. A consequence of this reasoning is that dense areas of trees should show little decline due to white canker, and I've found that to be true. So while wind doesn't cause white canker, it hastens the decline of trees and shrubs infected with white canker. Vehicle exhaust Then there was a road in our housing development. It had relatively light traffic, and I found no decline in the health of trees abutting the road, in spite of this road being occasionally treated with salt in the winter. But... there was an exception. Some of the overhanging branches of one particular tree were in decline or dead (the rest were in much better shape). It turned out that this tree was about 20 feet from a school intersection, and parents would often park their car there while awaiting the release of their children from the nearby school. Of course, when it was cool outside, they would let their car idle, causing car exhaust to drift up into the adjacent tree. So once again, like with the wind, I don't think car exhaust has anything to do with causing white canker, but car exhaust is stressful to trees (as it is to us), and simply accelerates any decline due to a white canker infection. Yes, there IS hope! Trees and shrubs in the country will have to go it alone, surviving as best they can. That means trees in wet areas will continue to die off. Susceptible trees will also continue to decline and die. In particular, before 2003, I recall that white birch trees were rather common. These days it's rare to see a healthy white birch. |
|
Diagnosis Example - Blue Spruce
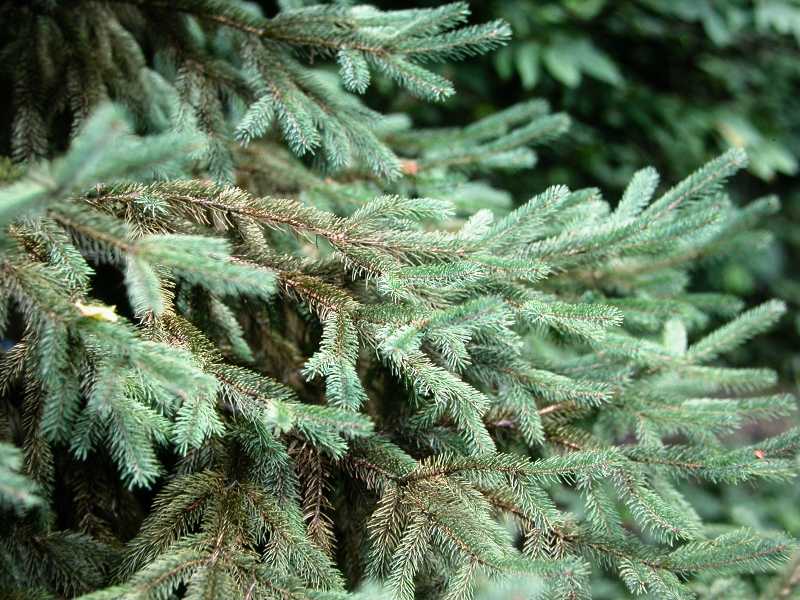
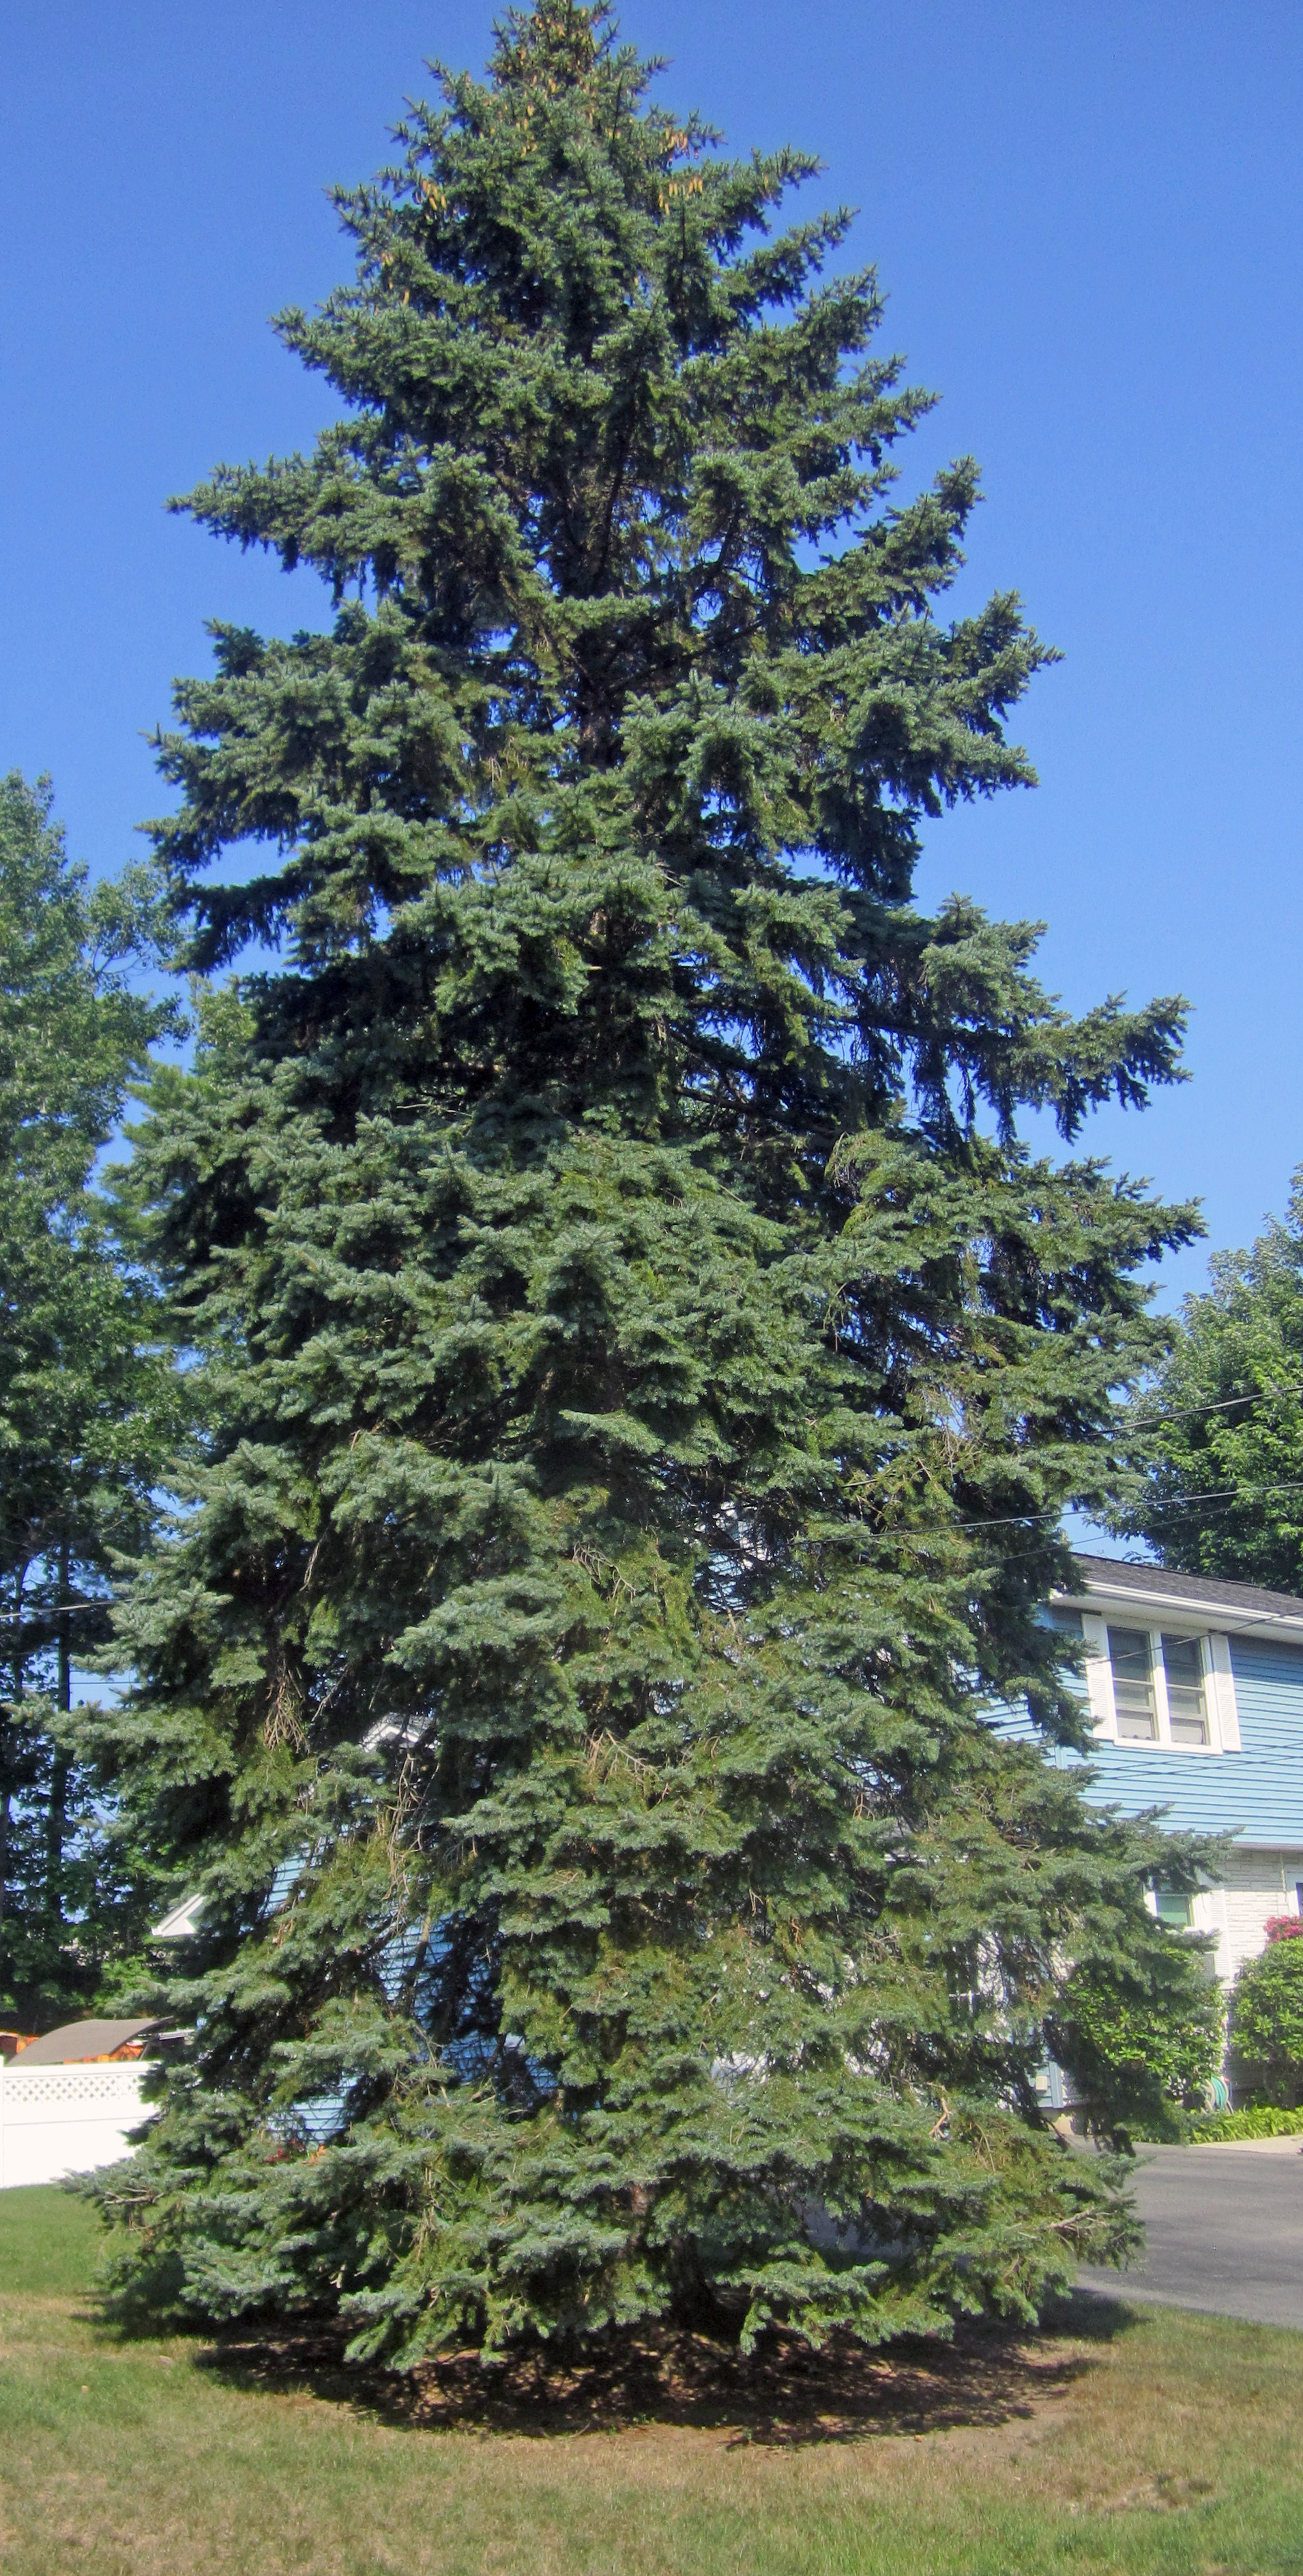
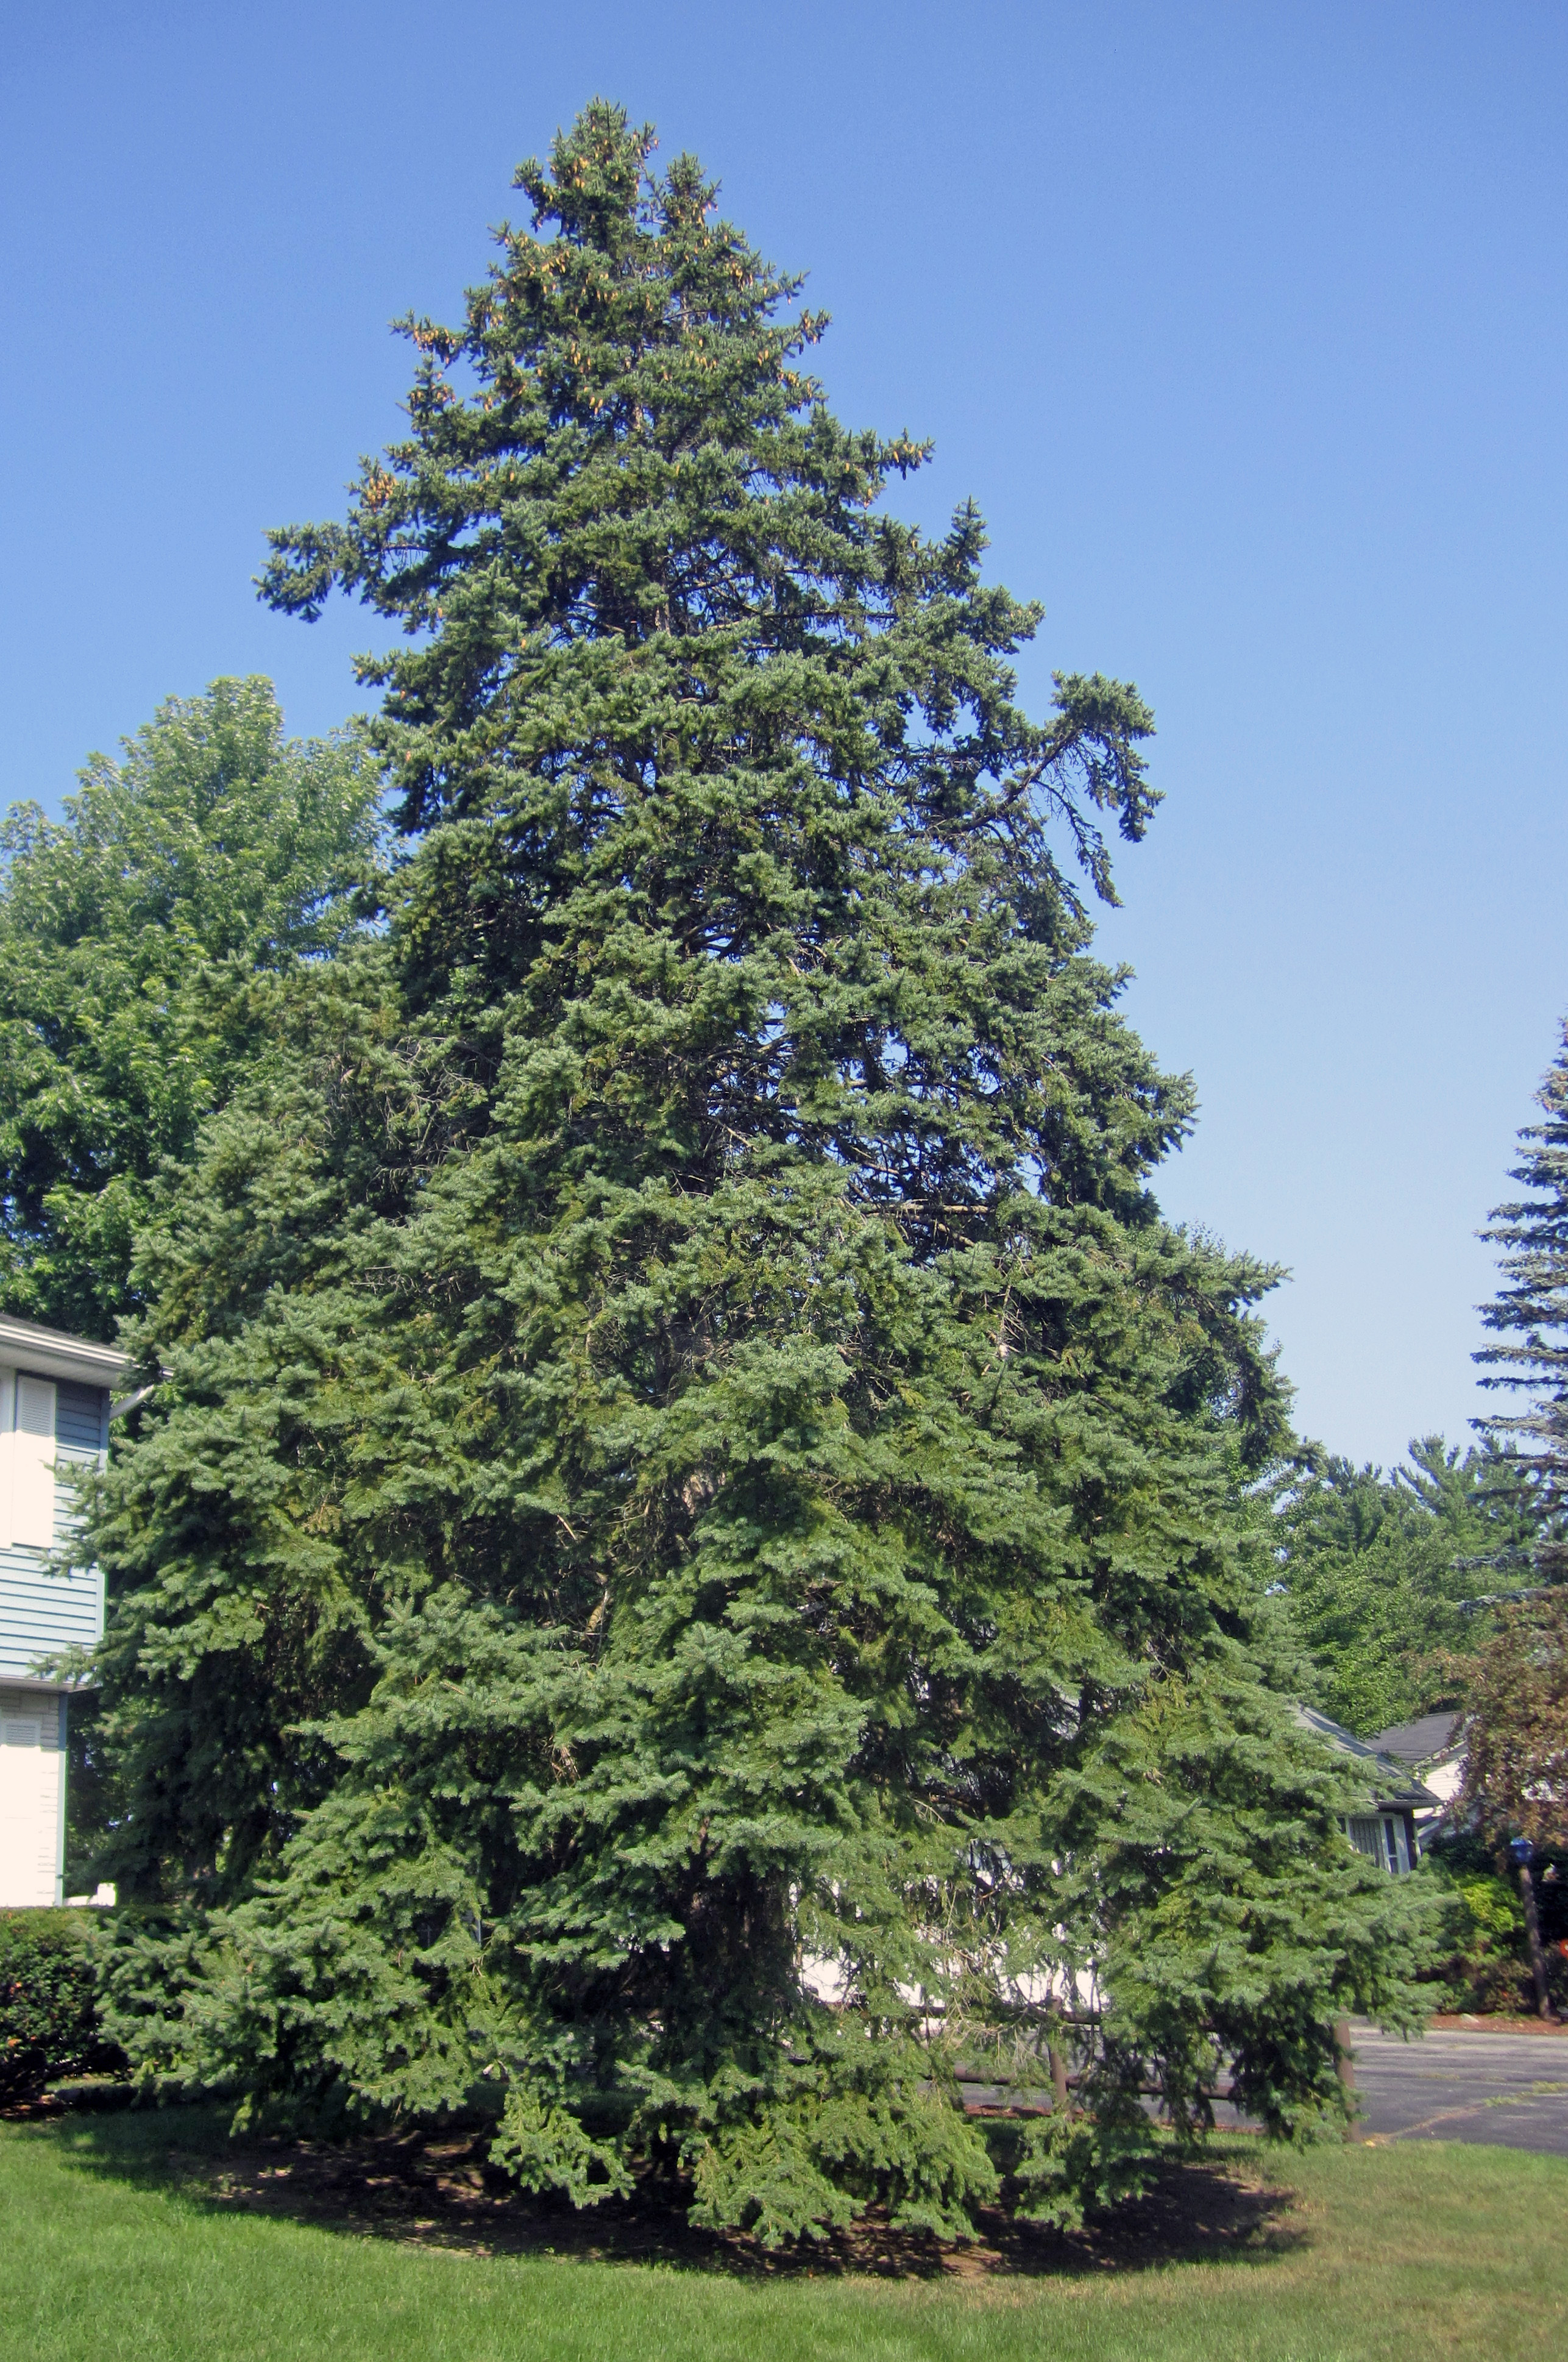
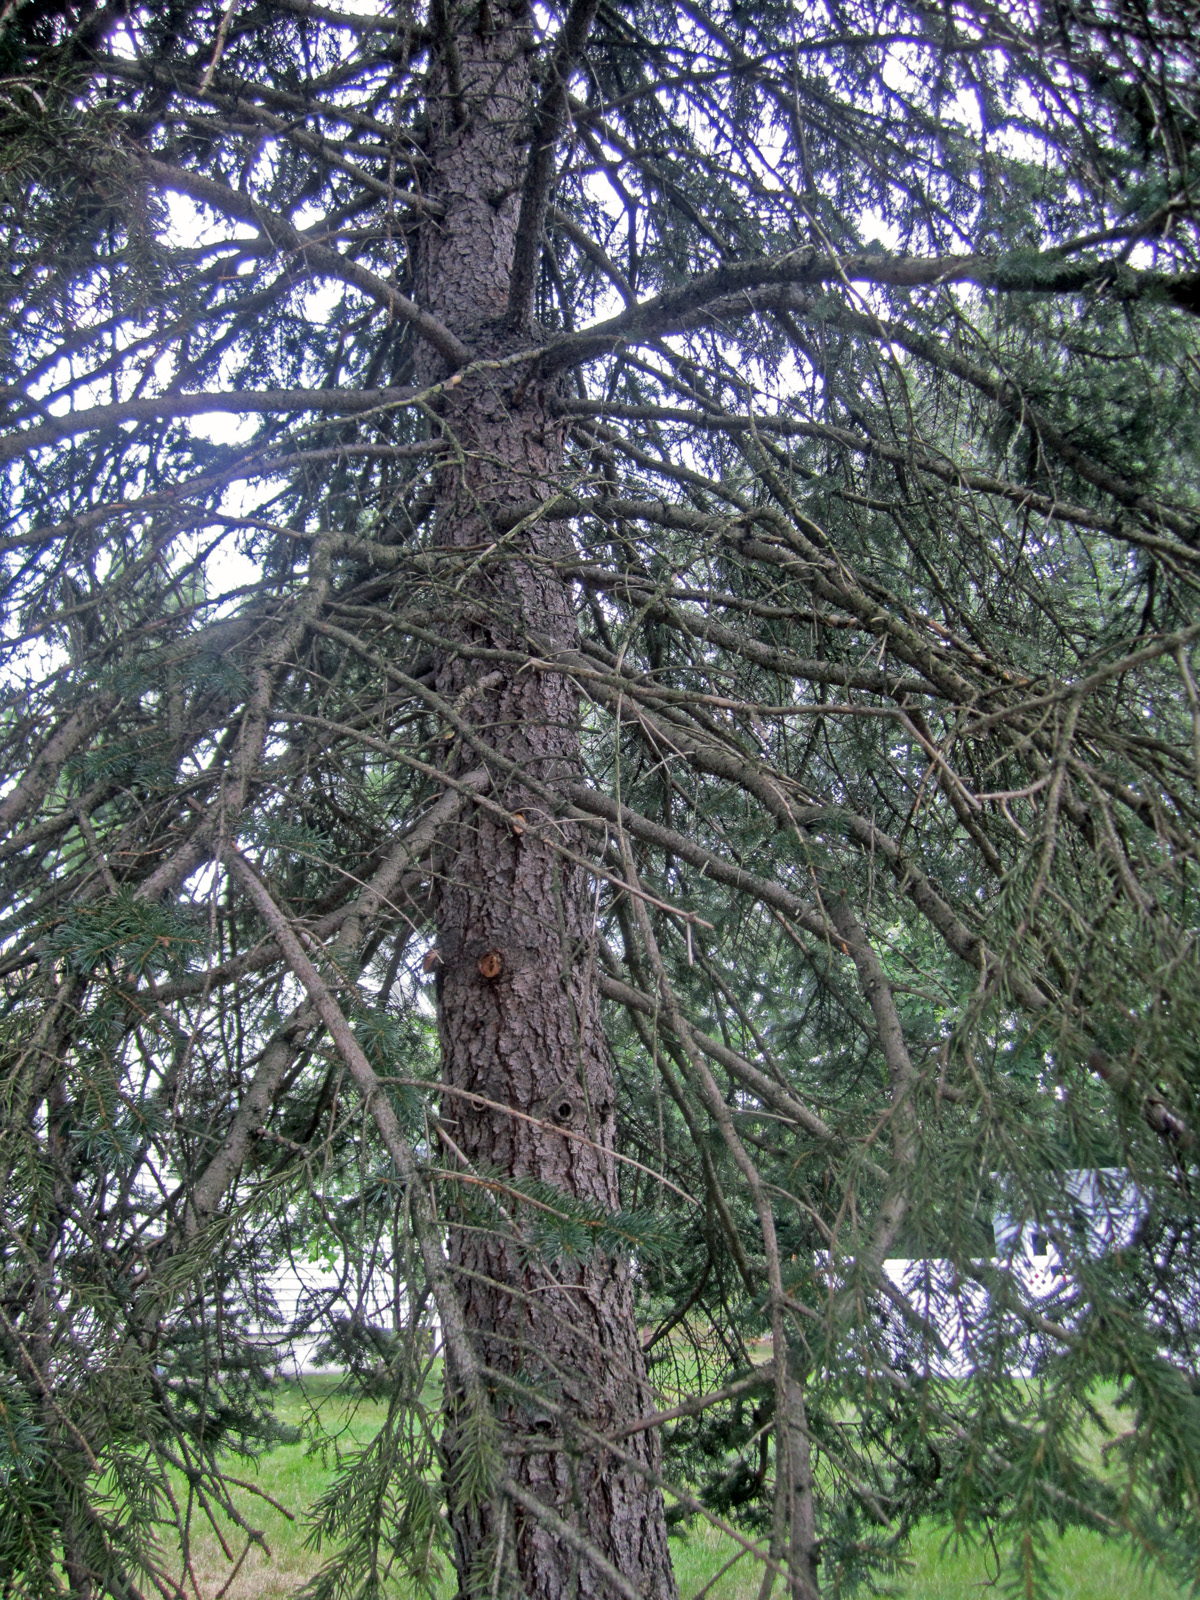
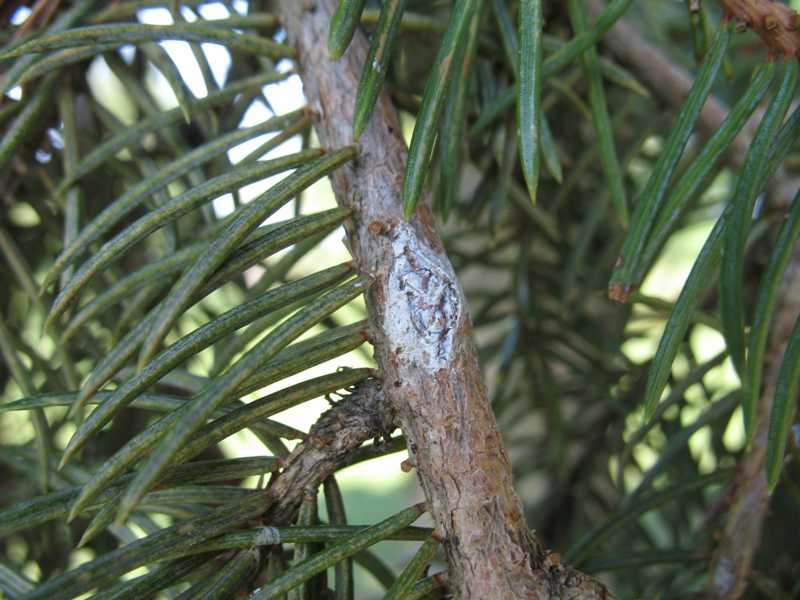
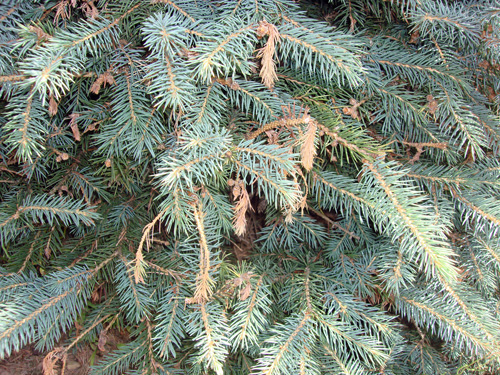
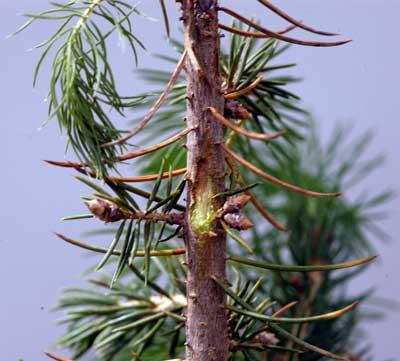
One of the most common ornamental trees in use today is the blue spruce. Its conical shape, blue-green needles, dense foliage, and minimal care requirements make it a highly desirable tree for both homeowners and businesses. Unfortunately, since about 2003, older blue spruce trees have started to go into a slow and steady decline. (Younger blue spruce trees resist this decline.) This decline was so slow that I'm guessing that few people noticed it. But if you look closely, you will notice the following disease characteristics:
You may wonder how common these disease symptoms are. They are very common. Not only that, but most blue spruce trees around the country are currently experiencing these symptoms! Naturally, there is a huge demand for a diagnosis of this disease, along with a need for a way to control this disease. Of course, plant pathology experts have become involved in this major tree health problem. They have suggested that the cause of this disease is one or several of the known diseases of blue spruce trees. When pressed, however, they will admit that none of the known diseases adequately describe the known disease symptoms. Here is a brief rundown of their suggested diseases. My comments follow, based upon an analysis of several declining blue spruce trees in my neighborhood. Cytospora canker (Leucostoma kunzei, formerly Cytospora kunzei)
This is the most prevalent and destructive fungal disease of Colorado blue spruce and Norway spruce. It rarely affects trees less than 15 or 20 years old. It starts on the lowest branches of the tree, and, over a period of several years, progresses upward. At first, needles have a purplish hue, eventually turning brown and dropping, leaving dry, dead, brittle twigs and branches. A conspicuous white resin or "pitch" covers the cankered portion of the branch or trunk, sometimes flowing several feet down the trunk of the tree. Within the cankered area, black, pinhead-size fruiting structures (pycnidia) of the fungus can be seen with a microscope or hand lens and are a positive sign of the disease. Cytospora affects all needles from the tip of the branch to the base. Comments: Good match with the first symptoms. But no white resin was found. More importantly, these black fruiting structures were not found, and all branch needles aren't affected - the branch tip needles are the last to die. Phomopsis (Phomopsis occulta) Strangely, there a very few Phomopsis diagnostic photos.
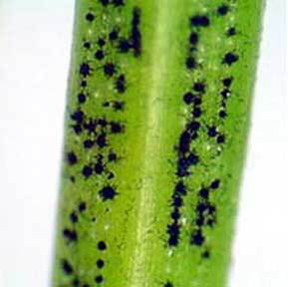
Comments: Good match with needles turning brown and dropping. No match on resinous exudate. No match on this being a young tree. But most importantly, since following these declining blue spruce trees for years, I've never seen new shoots expand, wilt, then die. Rhizosphaera Needle Cast (Rhizosphaera kalkhoffii) The disease can be diagnosed by looking at the discolored needles with a magnifying glass or hand lens. Small black spots (fruiting structures of the fungus) appear in rows in the infected needles. The fungus is actually emerging from the stomata (natural pore-like openings) that occur in lines on all sides of a spruce needle. Green needles may show these small black fruiting structures. Healthy stomata appear white, so the rows of black stomata are a diagnostic feature of Rhizosphaera.
Comments: Excellent match on the first paragraph, which is probably why so many experts point to "needle cast" as the cause. But there is a total match failure on the key diagnostic evidence - the small black fruiting structures. They are simply absent. Stigmina (Stigmina lautii)
Comments: Once again, a mismatch on the small black fruiting structures. They are simply absent. Diplodia (formerly Sphaeropsis)(Diplodia pinea)
Comments: Once again, a mismatch, since this disease doesn't display stunted new shoots with short, brown needles. Spruce Gall Aphids (Adelges cooleyi)
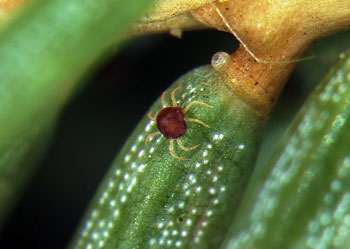
Comments: No match, since no insects were seen, and neither were the galls. Spider Mites
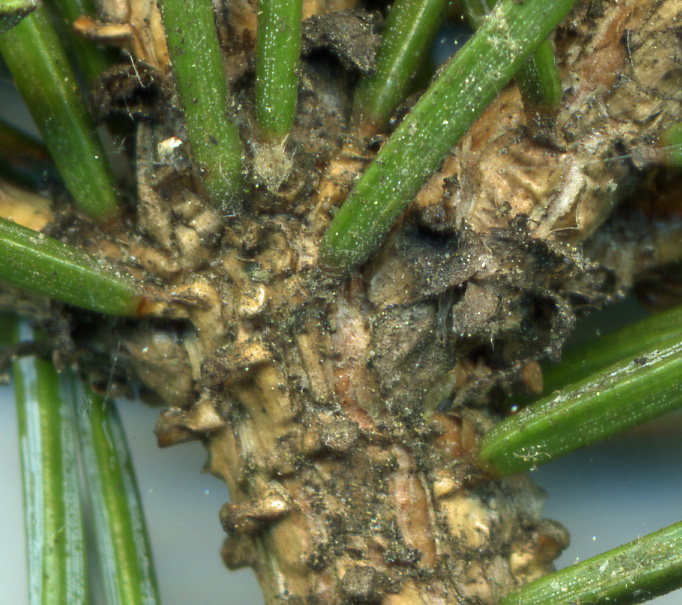
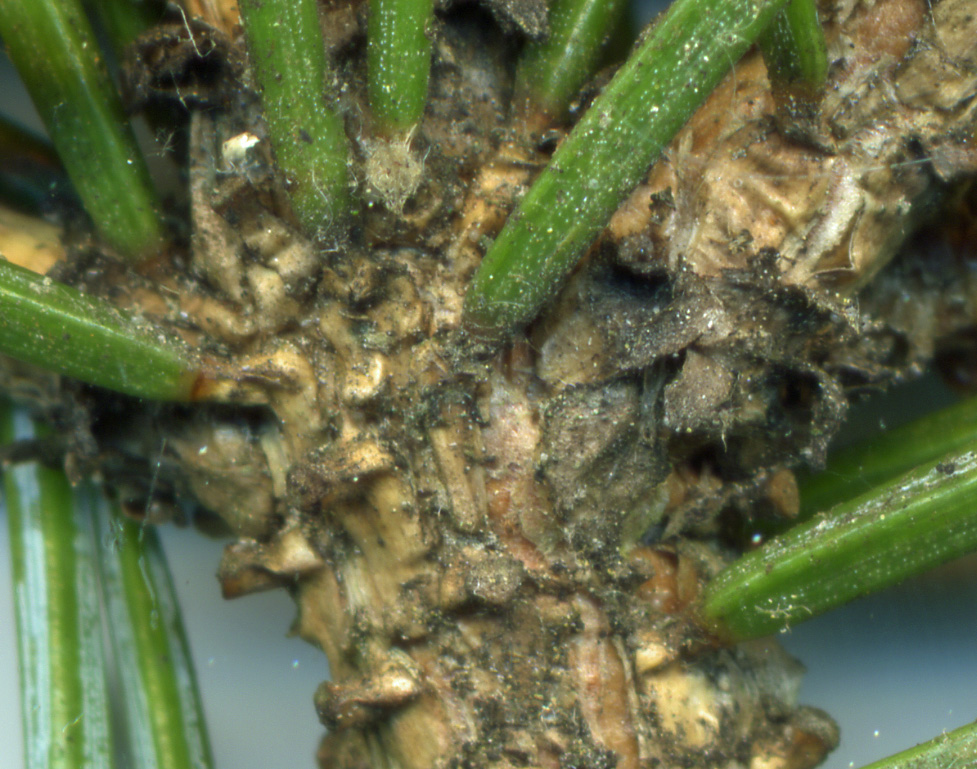
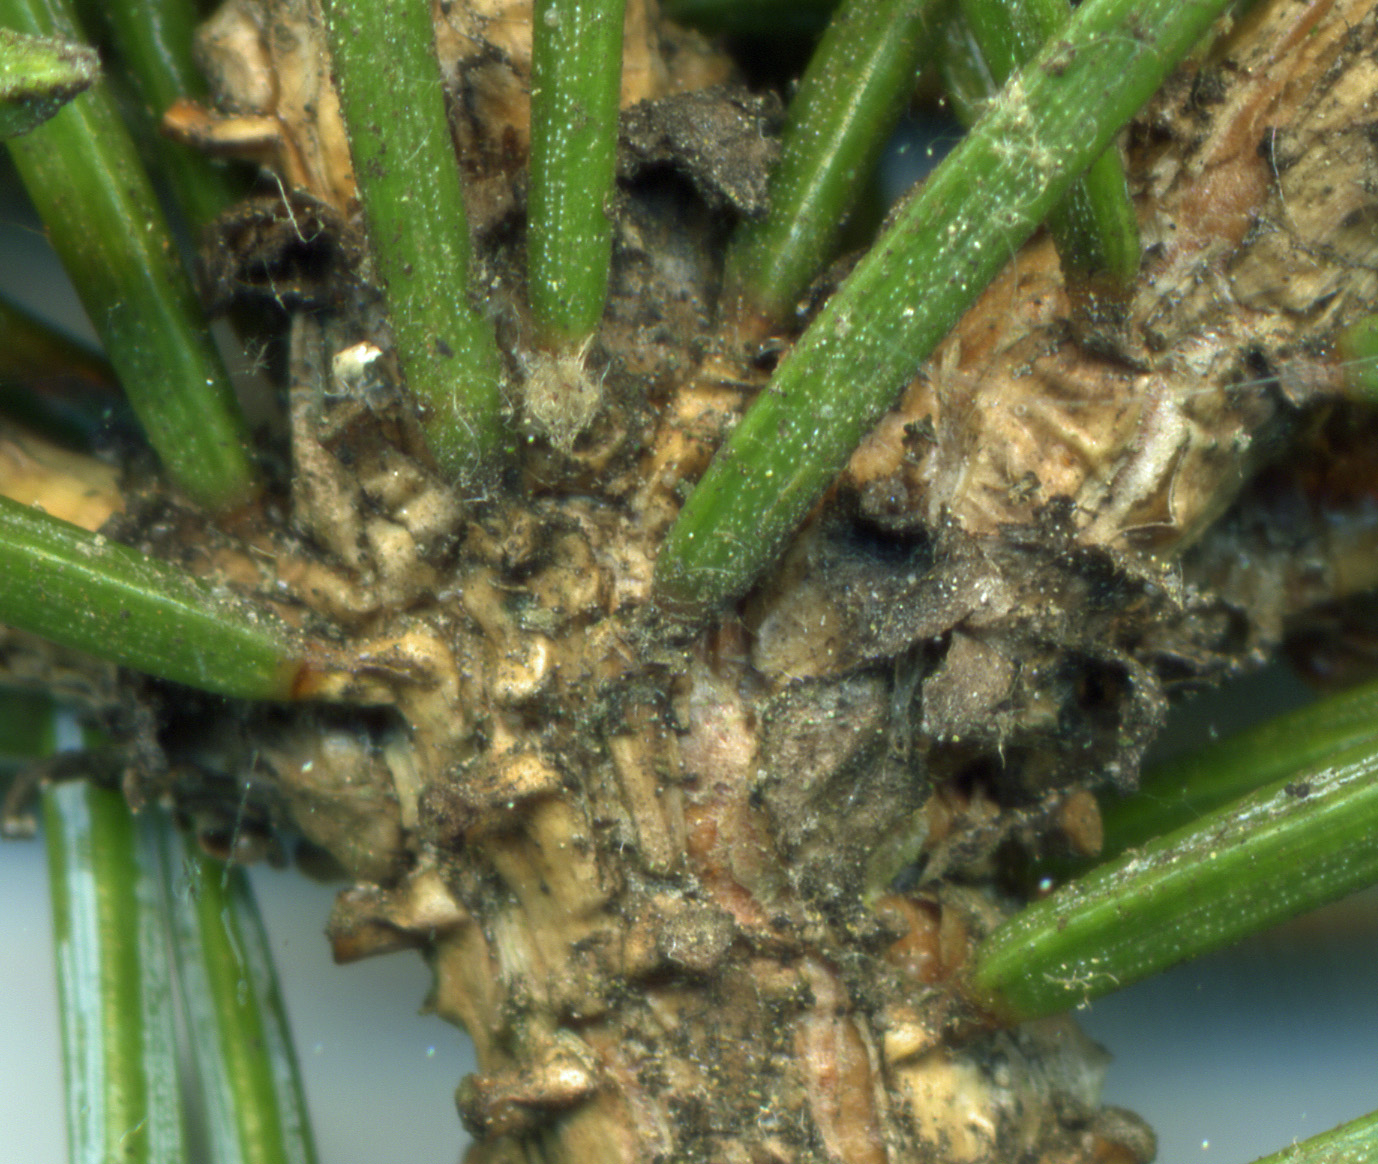
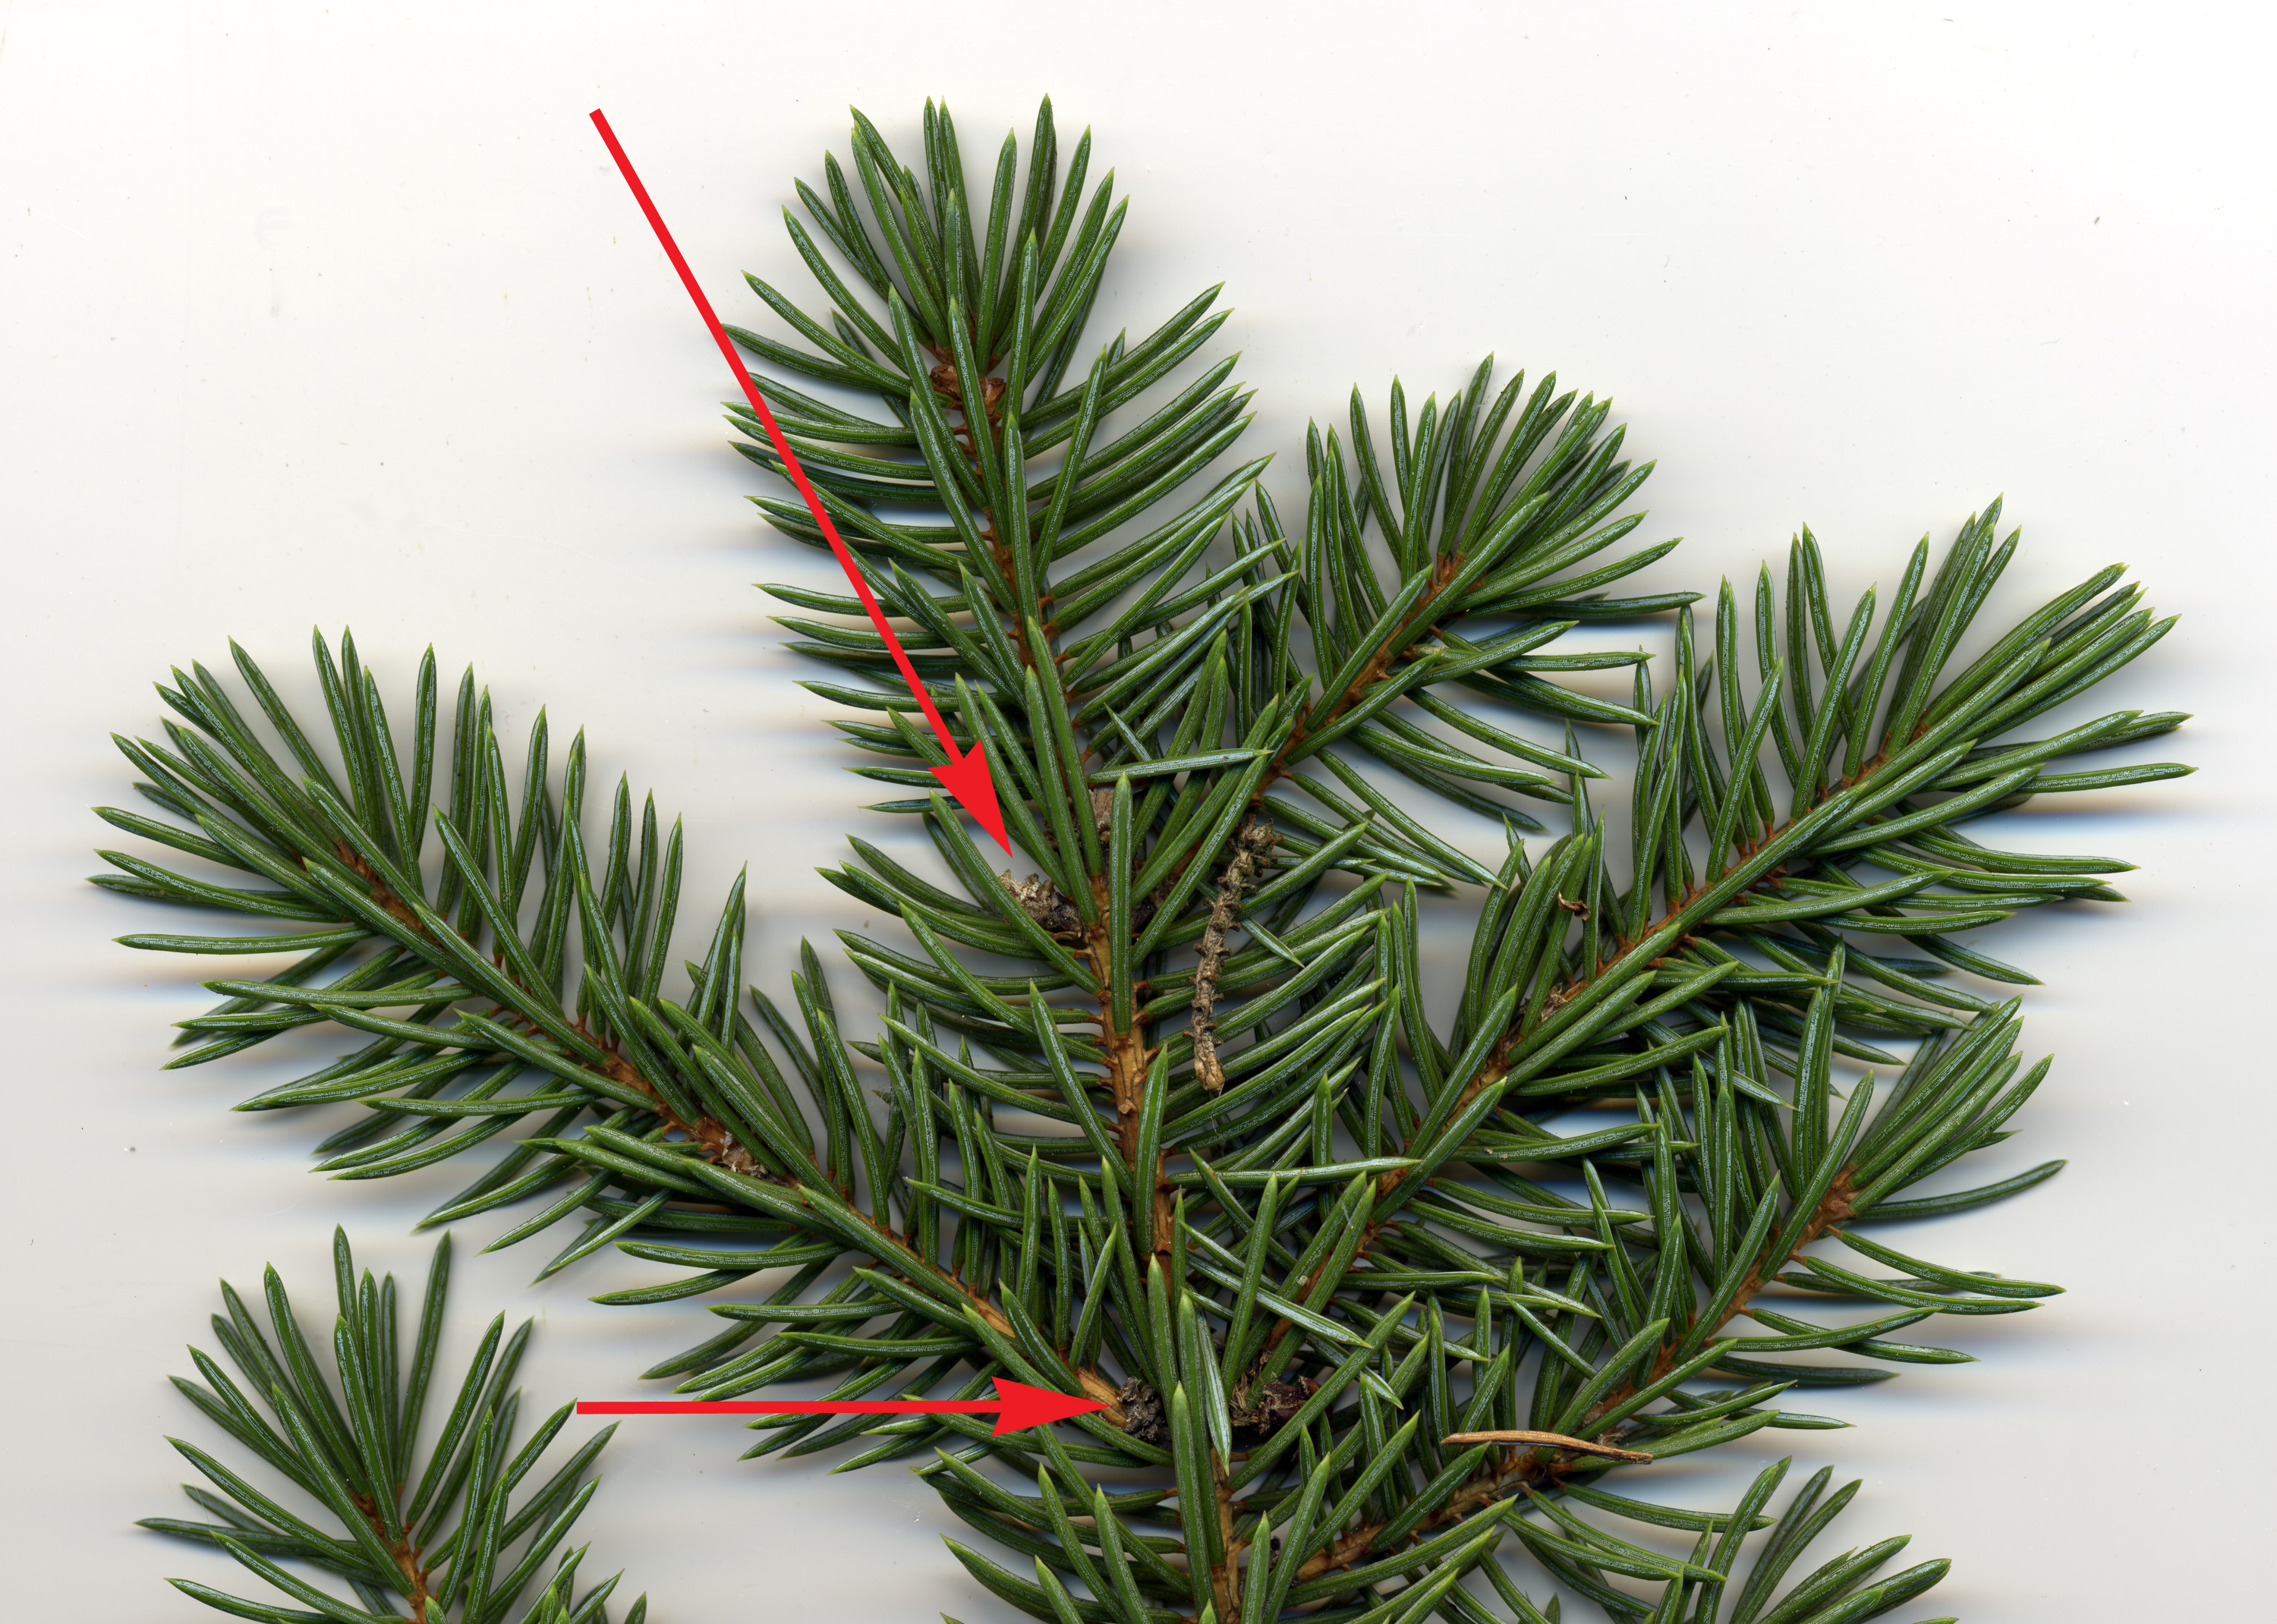
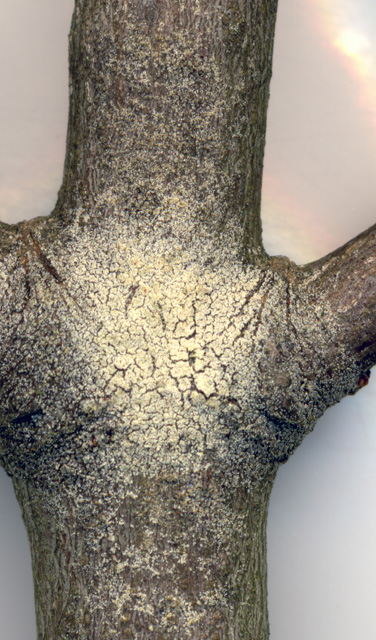
Comments: No match, since no insects were seen, and neither was their webbing. So What is it? As you may note when reviewing the above listed fungal disease symptoms, this particular disease shares many of their symptoms, making diagnosis confusing. Therefore, what's needed is some new and unique diagnostic criteria for identifying this disease. If it's a fungus, it must have fruiting bodies! If you don't have a microscope, but do have a scanner, you might be able to detect them. Figure 8 shows a blue spruce branch junction that is only about 8" from the tip of a branch. The first (left) picture was taken at 1200 dpi (dots per inch), the second at 1800 dpi, and the third at 2400 dpi. If you have good eyesight, you will notice that this junction is sprinkled with tan dots. Each dot is only a few pixels in size, so you might easily mistake them for plain, old dust. (Click on each picture to zoom in.) But a view with a microscope will show them to be typical white canker fruiting bodies.
If it's a bad fungus, it must seriously disrupt the tree! In frustration, I decided to "look into" a diseased blue spruce by cutting a 1/8" diameter branch with a single-edge razor, mount it in a vise, and examine it with a 400x hand-held microscope. I also did this with diseased blue spruce needles. The results were a real eye-opener. After having done the same thing while searching for white canker in other plants, I became fairly proficient at recognizing the symptoms of white canker. And these diseased blue spruces were simply loaded with white canker! But, like the fruiting bodies, if you don't know what you're looking for, you probably won't recognize the fungus. Now that I've tried many diagnostic techniques on hundreds of diseased shrubs, trees, and plants in order to diagnose white canker, I can say that twig cross-sections are by far the most definitive test currently available for the identification of white canker. The other tests mainly lend supporting evidence.
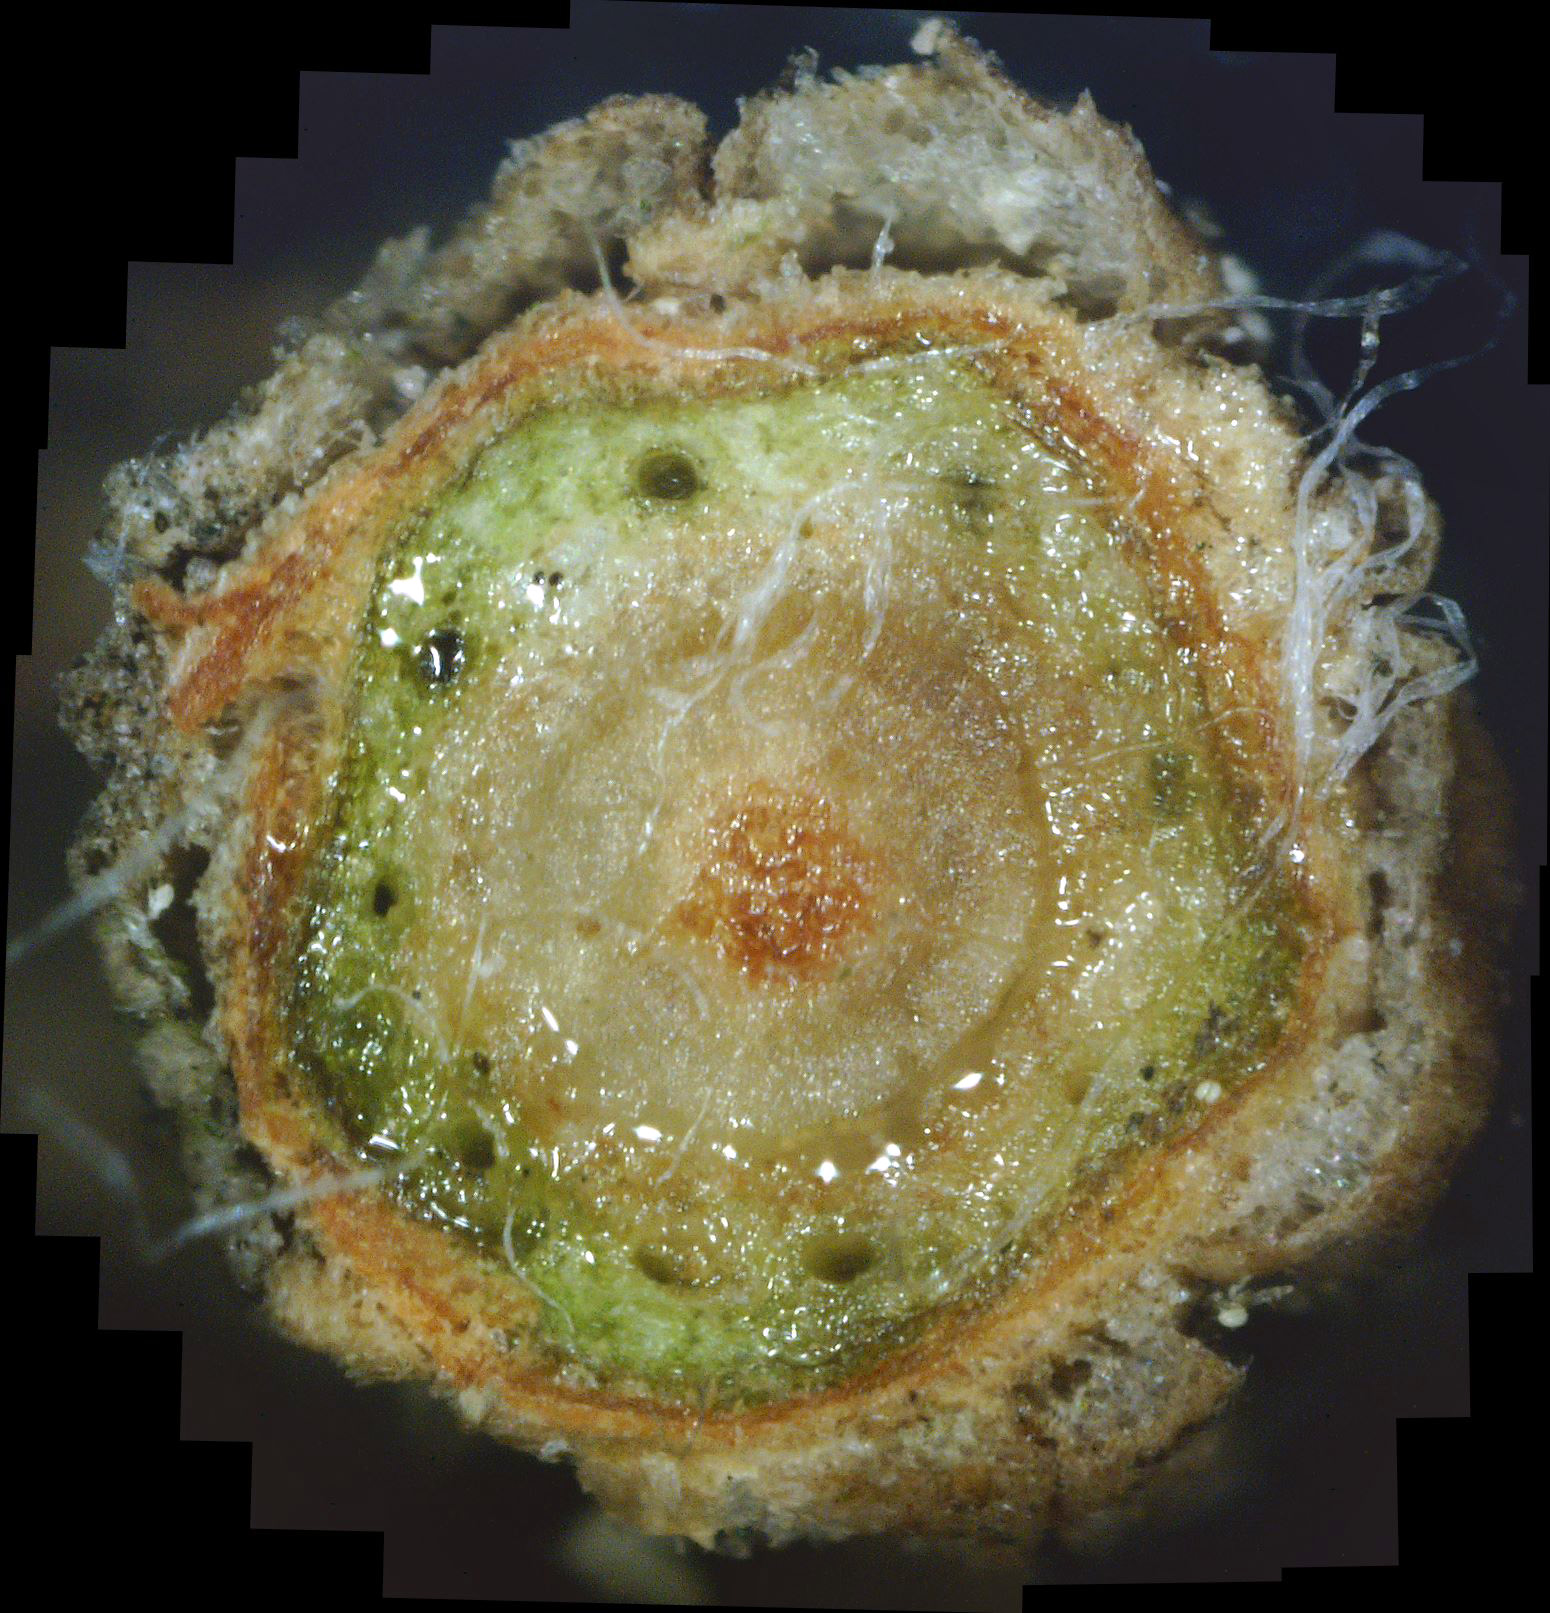
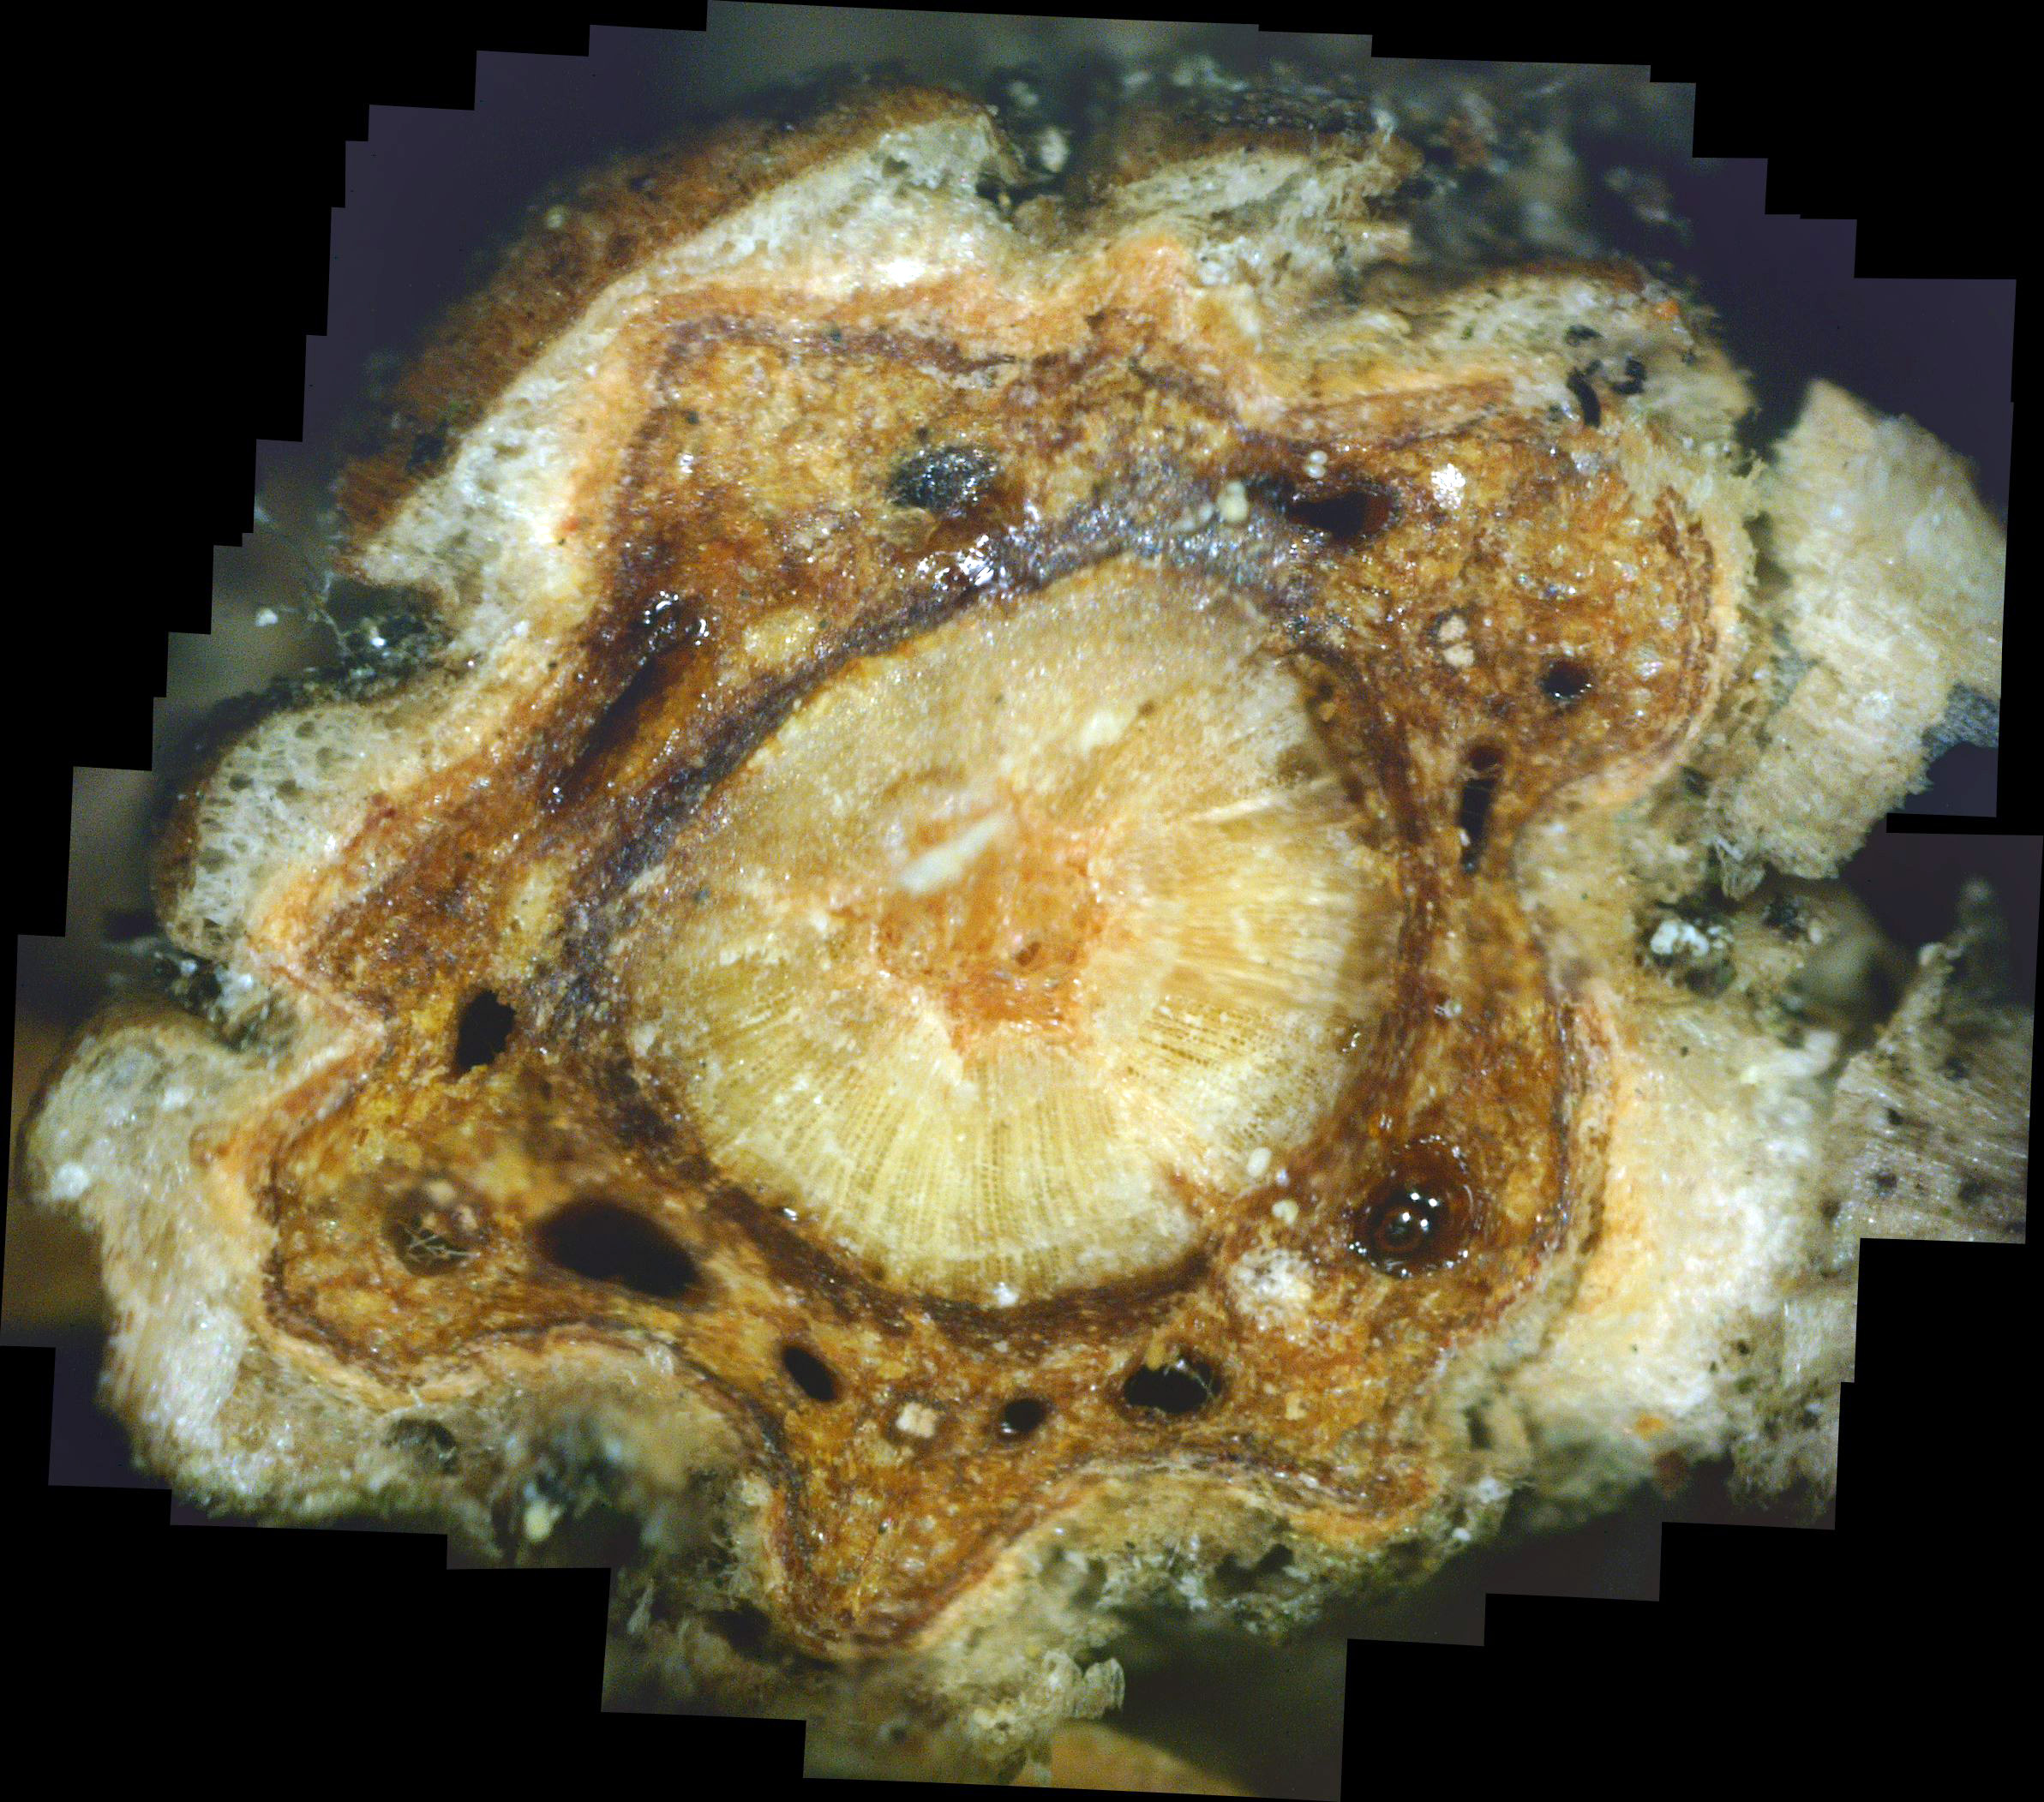
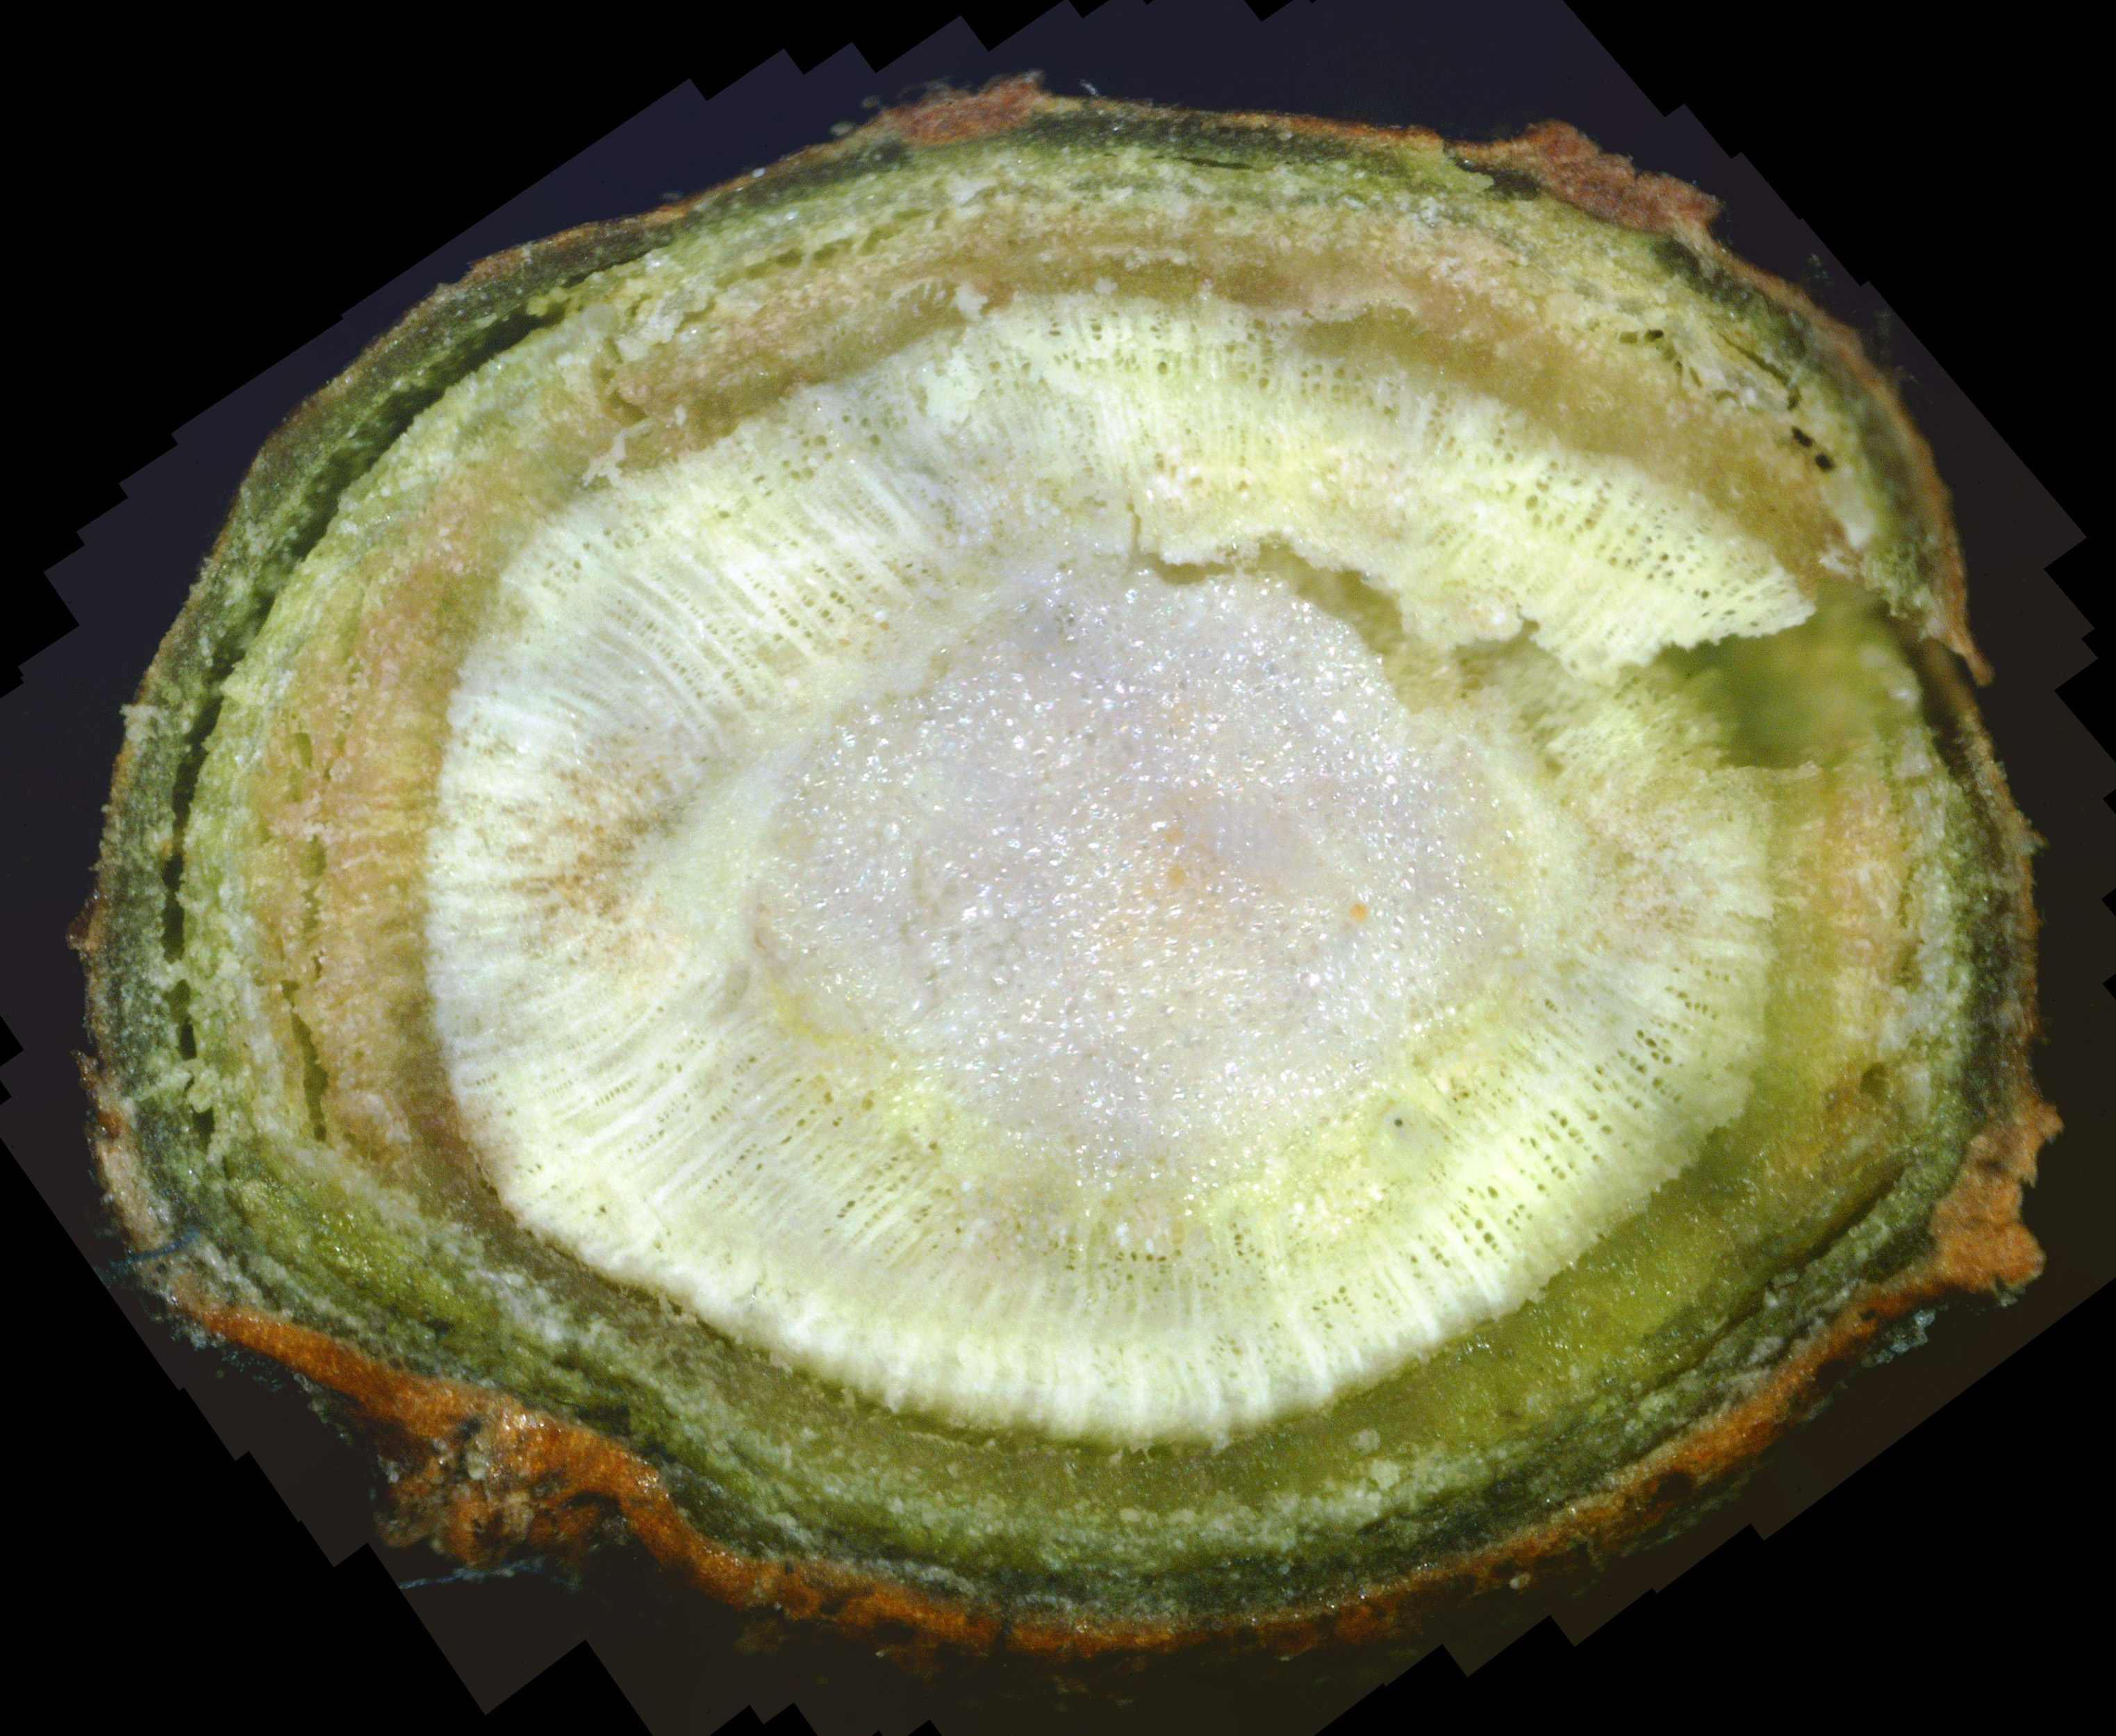
What the White Canker Fungus Looks Like As a reminder, you may recall that a normal, healthy twig will have a nice brown bark, a deep green phloem layer under it, a lighter-green xylem under the phloem, and probably a white pith in the center of the twig. It's important to note that this diagnostic twig was taken from a main branch that had dead twigs from the trunk up to this twig. In other words, this twig was probably going to die very soon. When you examine this cross-section carefully, it's no surprise that death is imminent. First, check out the bark. The outer bark is almost totally overwhelmed by white fungal material just under it. In many areas, this outer bark has broken completely away from the orange-brown inner bark. The inner bark is also almost completely infiltrated with white canker. Still, all that tissue corruption wouldn't kill the branch. Next in should be the solid deep green phloem layer. This is the layer of tree tissue that transports nutrients throughout the tree. Except for a small area in the lower-left, the phloem has almost been totally consumed by white canker. Next in is the xylem, which is typically a light green. But it's almost pure white due to white canker infiltration. This xylem tissue, by the way, transports water and minerals throughout the tree. So the tree is starving for both nutrients and water. Those "holes" you see in the green phloem are vacuoles that transport sap throughout the tree. When I cut this twig with a razor, these vacuoles oozed sap into the cut, which is why the phloem and xylem has a "wet" look. And those thread-like objects scattered about are the fungal hyphae that are growing out of the cankerous material within the twig. Reviewing all this, we can say that the internal appearance of this twig looks as bad as the external appearance of this tree. About the only good thing you can say about this cross-section is that it sure is colorful!
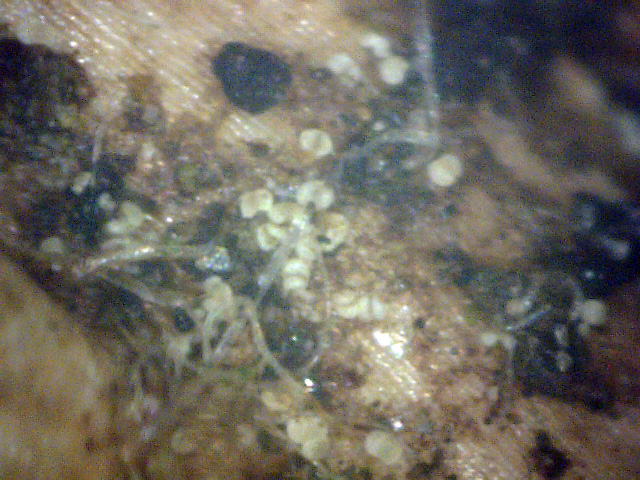
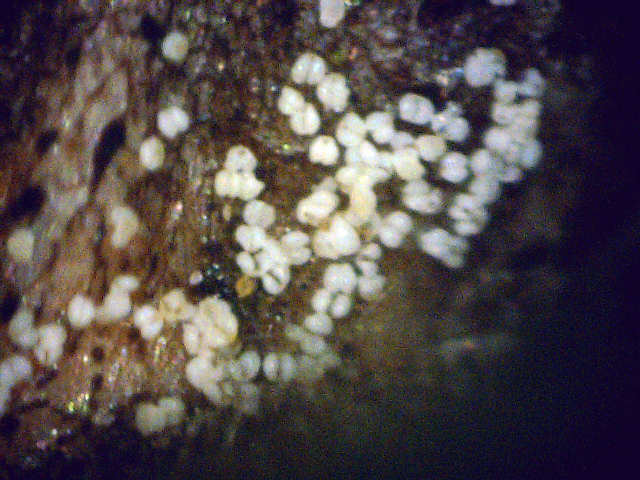
As I said above, this was the first live twig on the branch - prior ones closer to the trunk had already died. So, out of curiosity, I did a cross-section on the adjacent dead twig. Figure 10 shows the result. As you can see, all that's left is some dead tree tissue - most of the tree tissue has been replaced by white canker. Note that a bit of sap still oozed through a few vacuoles, in the branch's futile effort to stay alive. Figure 11 shows another live branch on this tree. I cut this twig near a needle junction (on the left). This twig, too, oozed copious amounts of sap in a vain effort to stay alive. As you can see, there is virtually no green phloem left, having been almost totally replaced with white canker. Furthermore, those white rays radiating out from the center pith - they are rays of concentrated white canker too. Figure 12 shows a 400x photo of a small section of bark. What you see is a field of white canker fruiting bodies intermingled with the hyphae supporting these fruiting bodies. I'm not sure, but I'm guessing that the yellowish stuff within the "jaws" of these fruiting bodies are the reproductive spores of the fruiting bodies. Unfortunately, my microscope isn't powerful enough to resolve them.
Going further, I scanned a needle from this diseased blue spruce at 400x. There were so many photos that I had to stitch them together to make several panorama pictures. Figure 13 shows the base, middle, and tip of a needle. Note that the stomata are white, not black, so none of the common blue spruce diseases are present. As you can see, there is little indication of white canker in these external views of a needle.
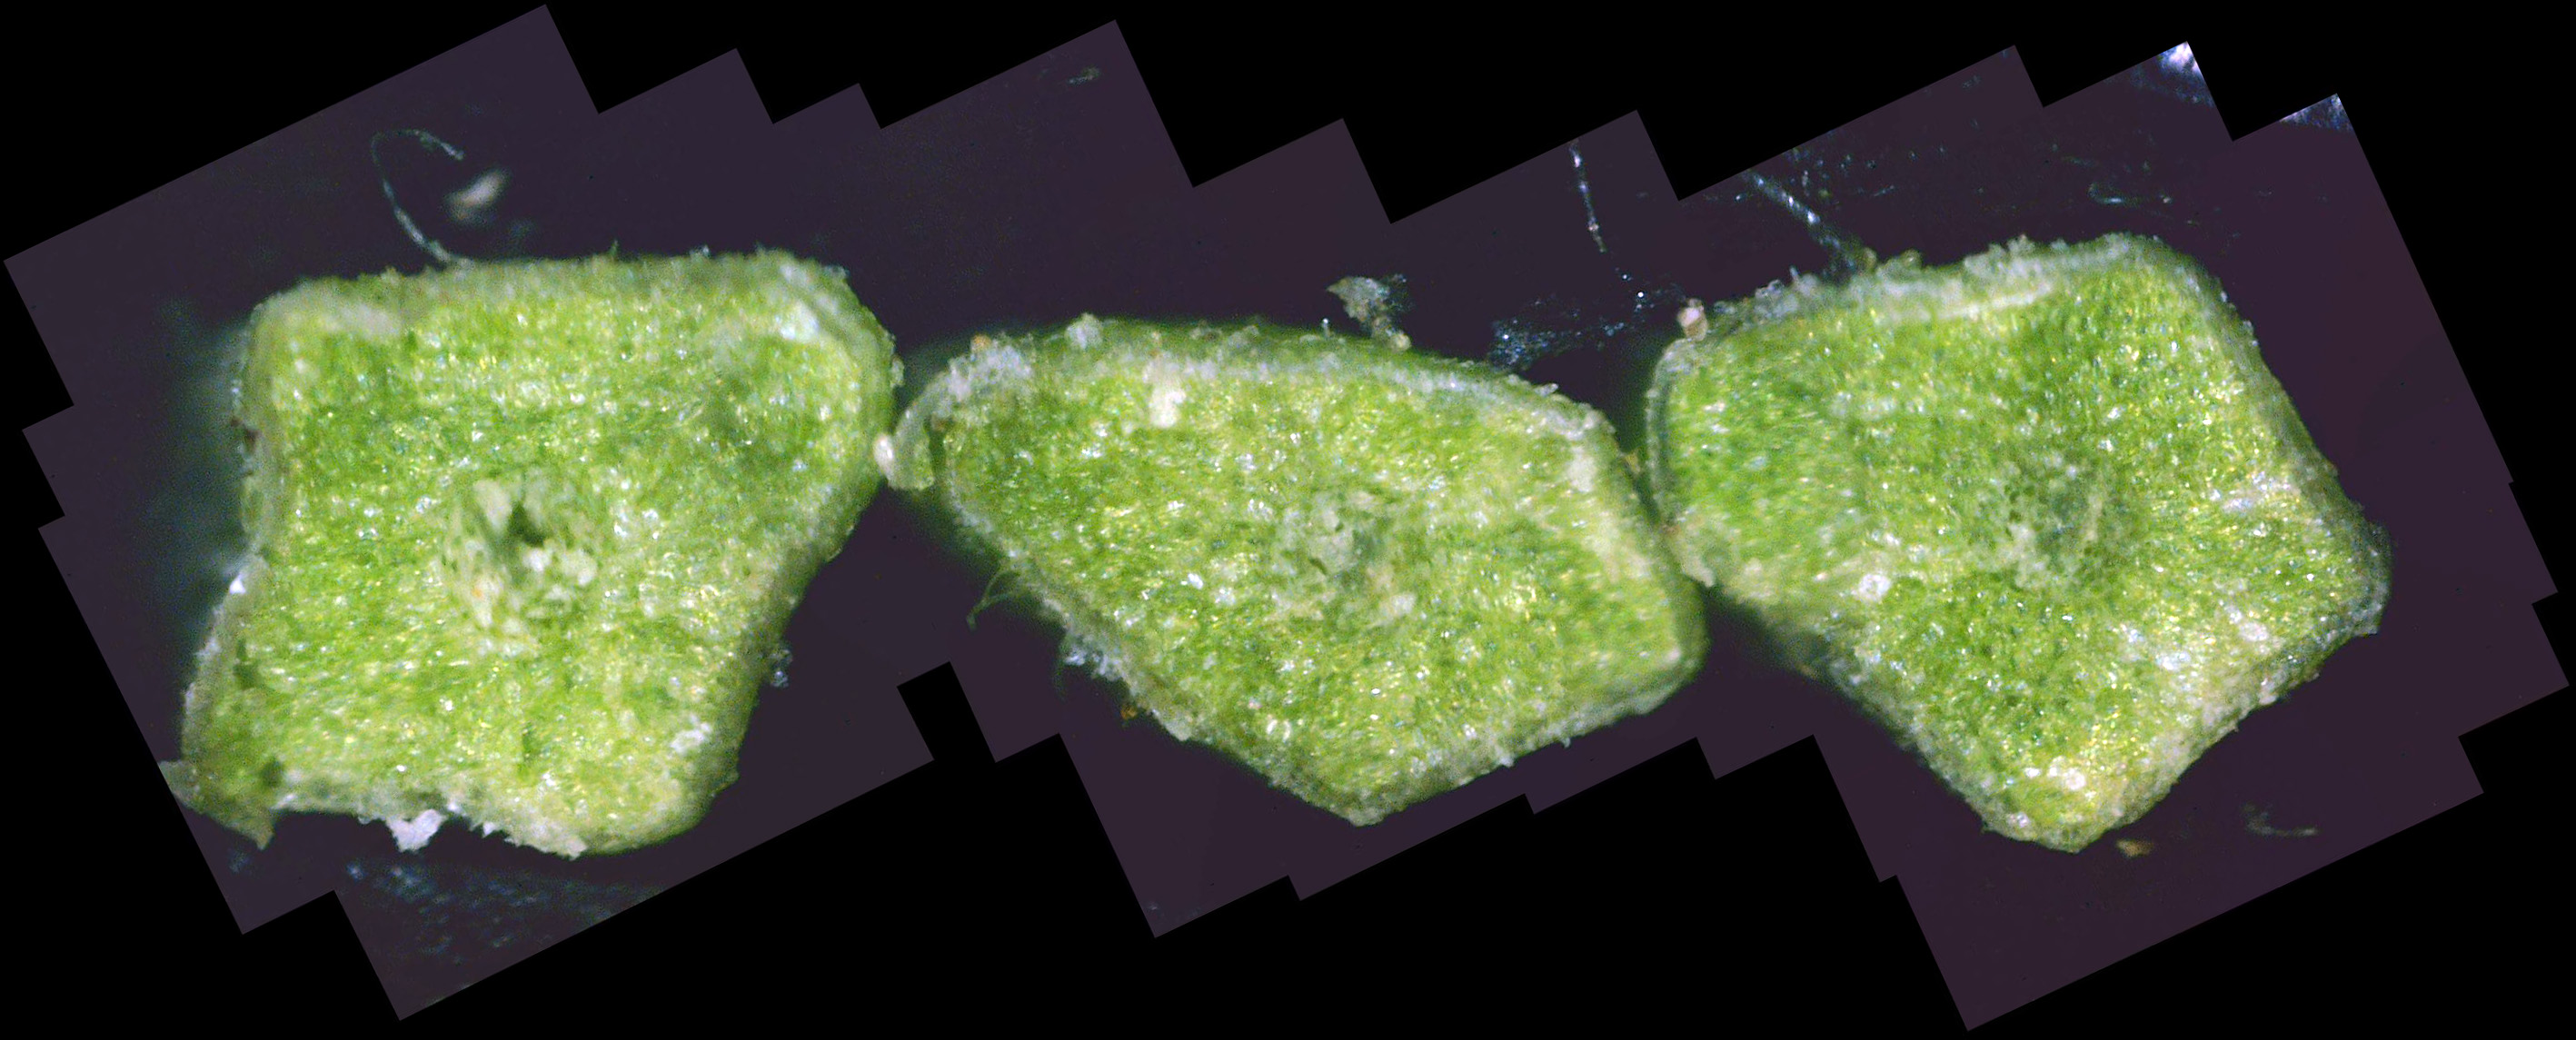
Figure 14 shows a composite 400x cross-section of a set of 3 needles from this diseased twig. While there is definitely white canker present (white blobs), it isn't nearly as obvious as the white canker in a twig cross-section. Summary
| |||||||||||||||||||||||||||||||||||||||||||||||||||||||||||||||||||||||||||||||||||
|
Treatment Example - Blue Spruce
The prior section contains a fairly good discussion of how to determine if a particular blue spruce tree is infected with the white canker disease. Once a blue spruce is determined to have white canker, the question arises as to whether it is possible to do something about it. While I have successfully treated smaller trees and shrubs, I have no large blue spruce trees on my property, and hence no experience with treating them. A friendly neighbor offers his trees for testing
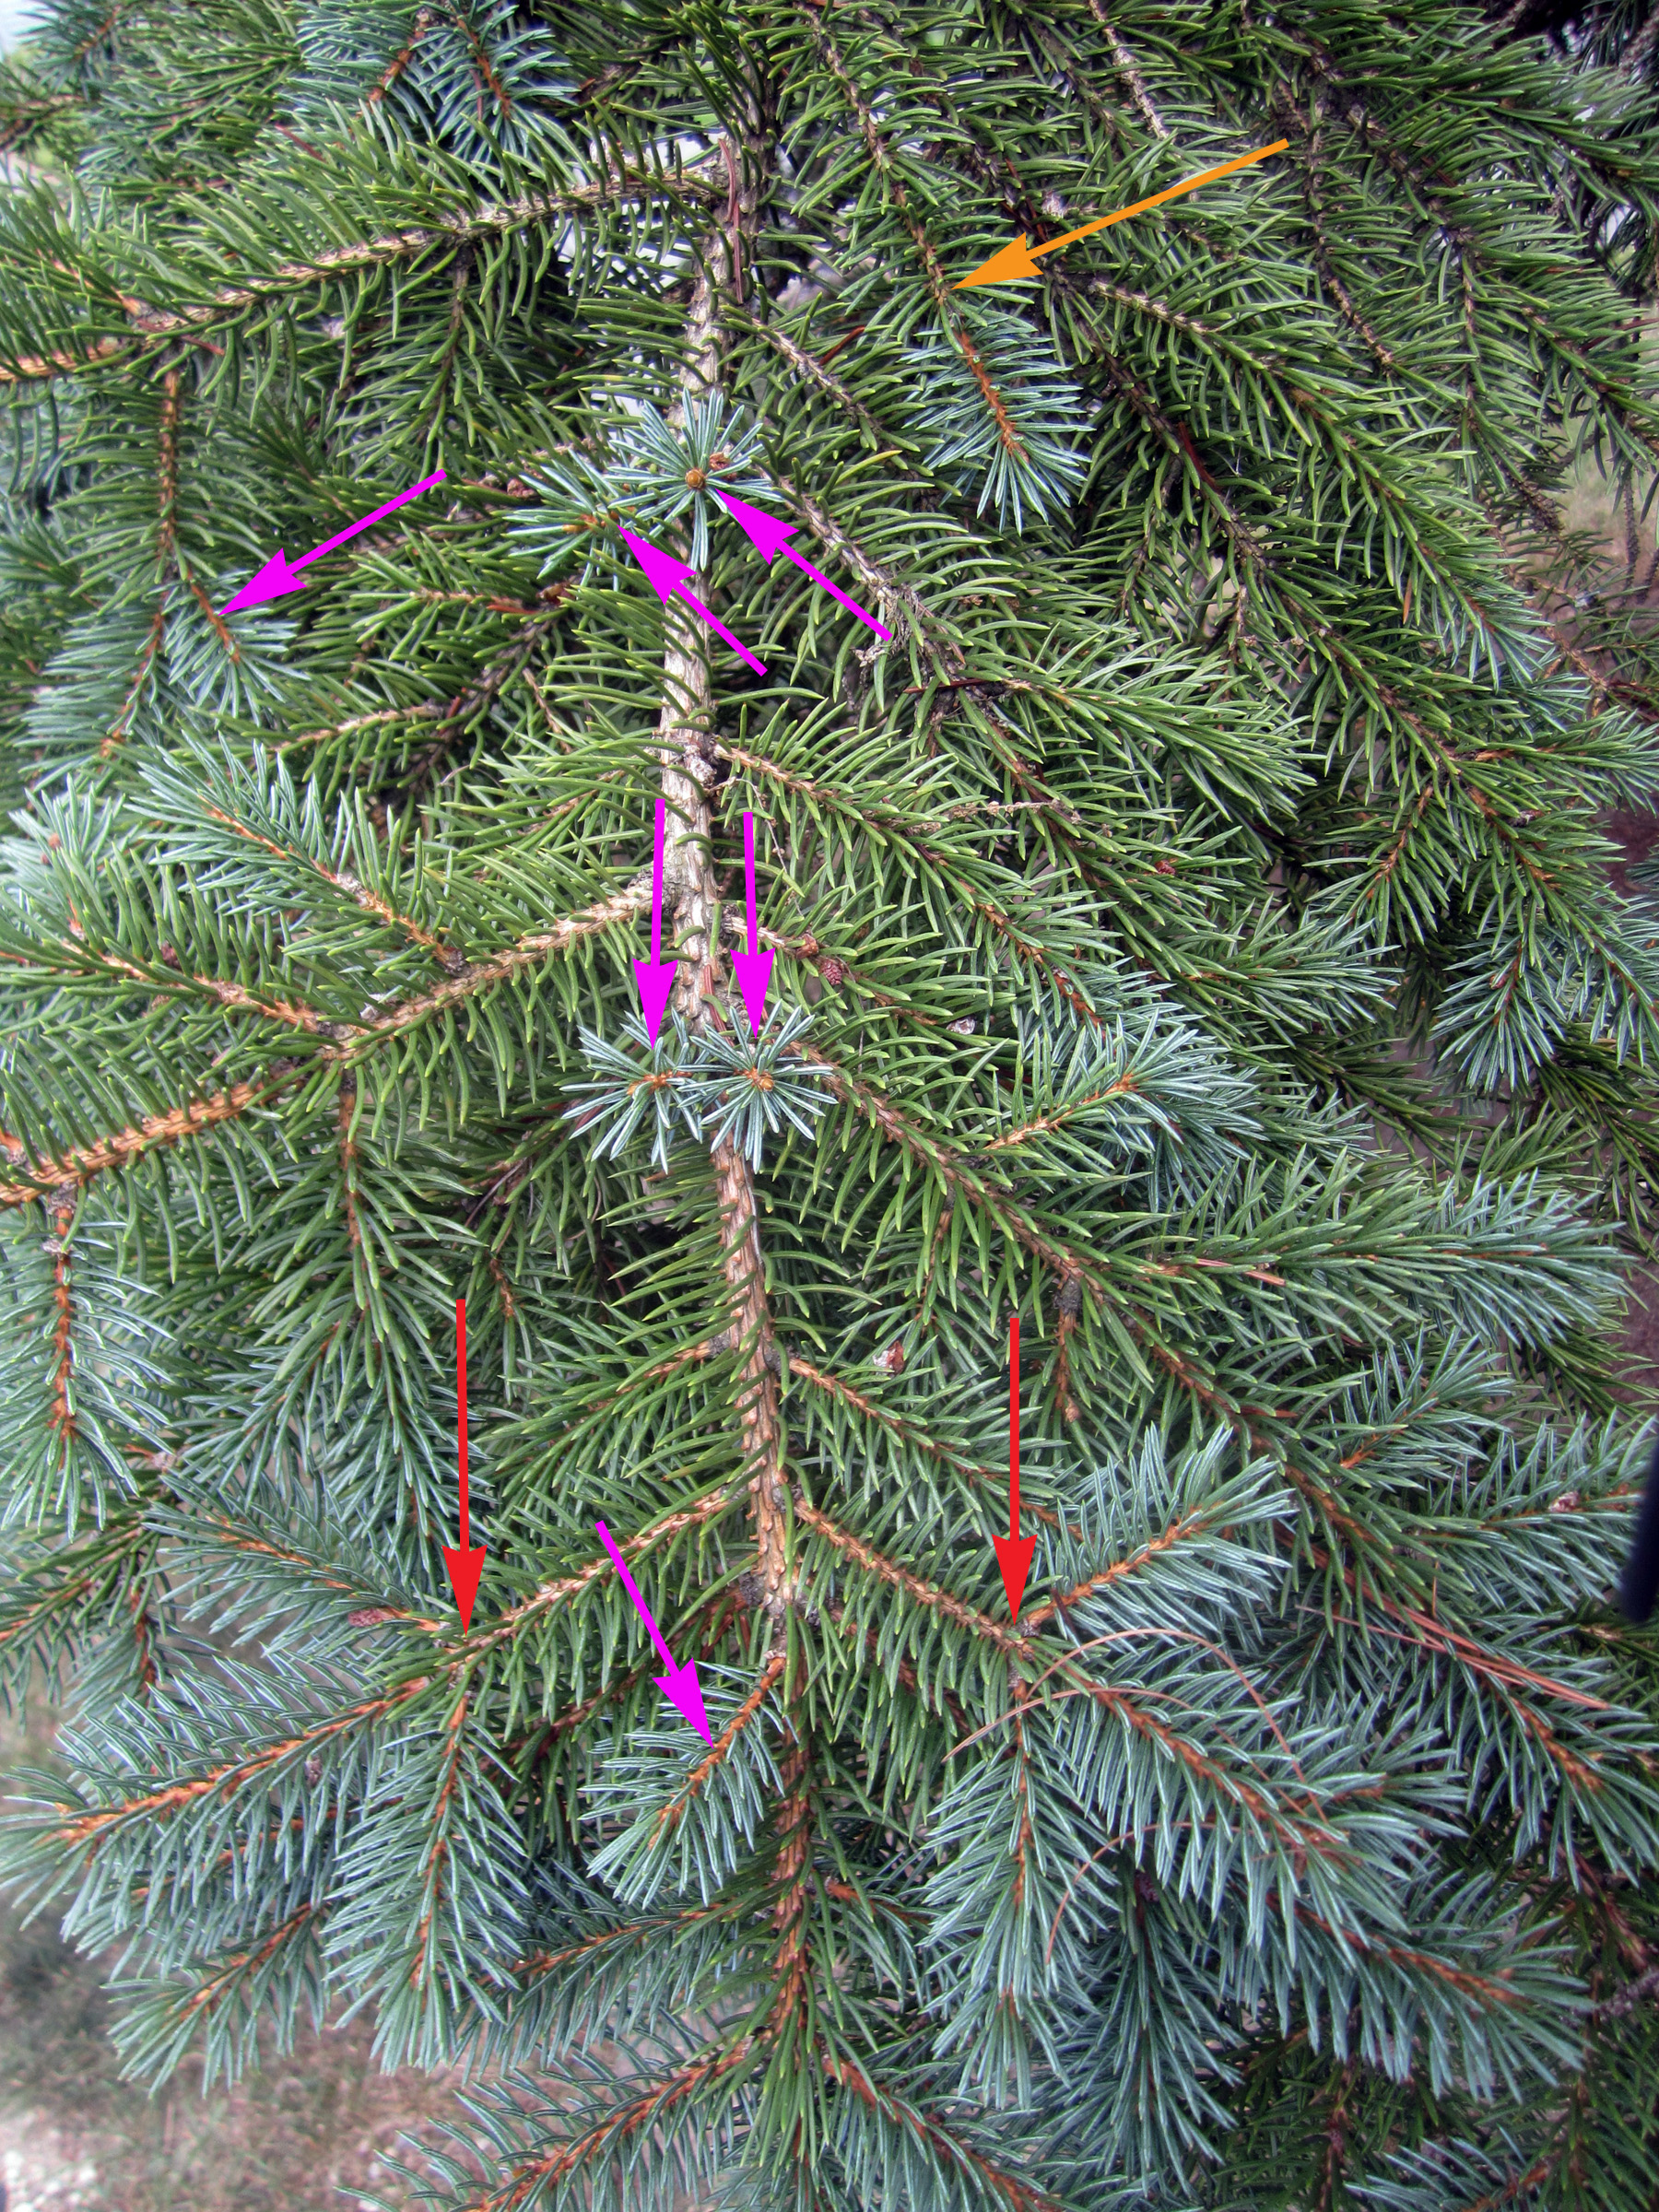
Treatment details The next day there was a moderate rainstorm. I was happy with this since I figured that it would wash the propiconazole down into the roots, where it would then be transported throughout the tree, since propiconazole is "systemic". 4 days later One week later - babies! Figure 3 shows these visual results (click it to get a close-up view). The pink arrows show these new baby shoots erupting from a larger stem. The orange arrow shows a new single shoot erupting from the tip of an existing shoot. The red arrows show three shoots erupting from the tip of an existing shoot. In particular, note that the older foliage was a less-healthy yellow-green color (the entire tree was of that color before the fungicide application), and the new baby shoots are an attractive white-blue-green color. Furthermore, the bark on these new shoots is a distinctive orange color.
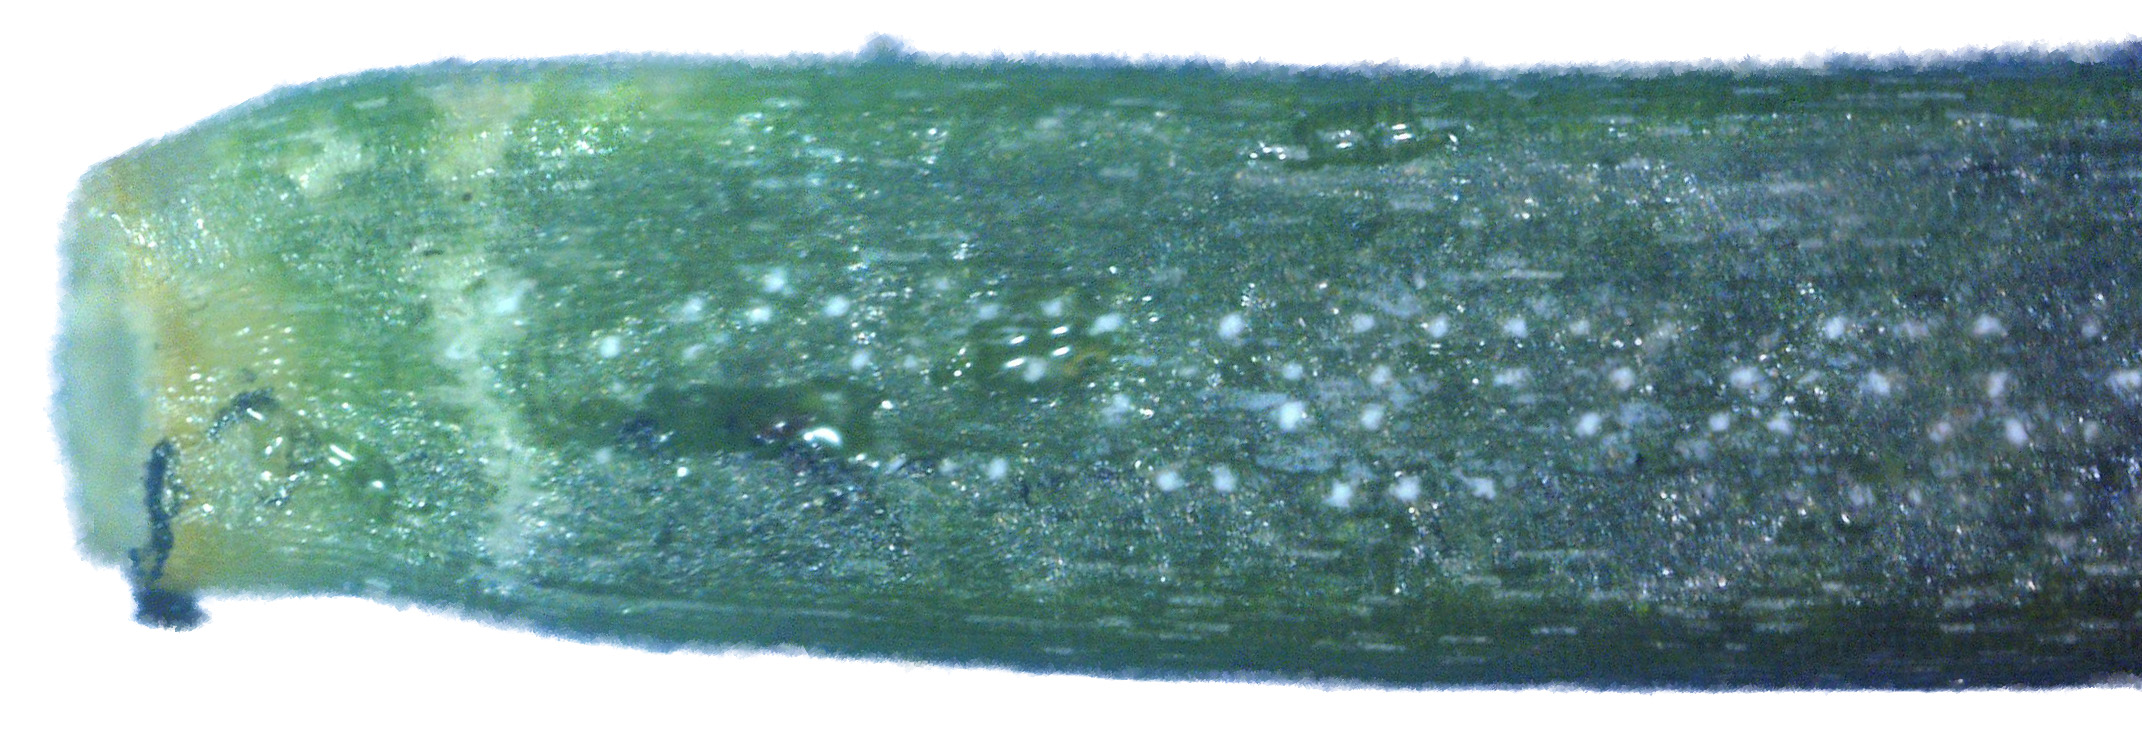
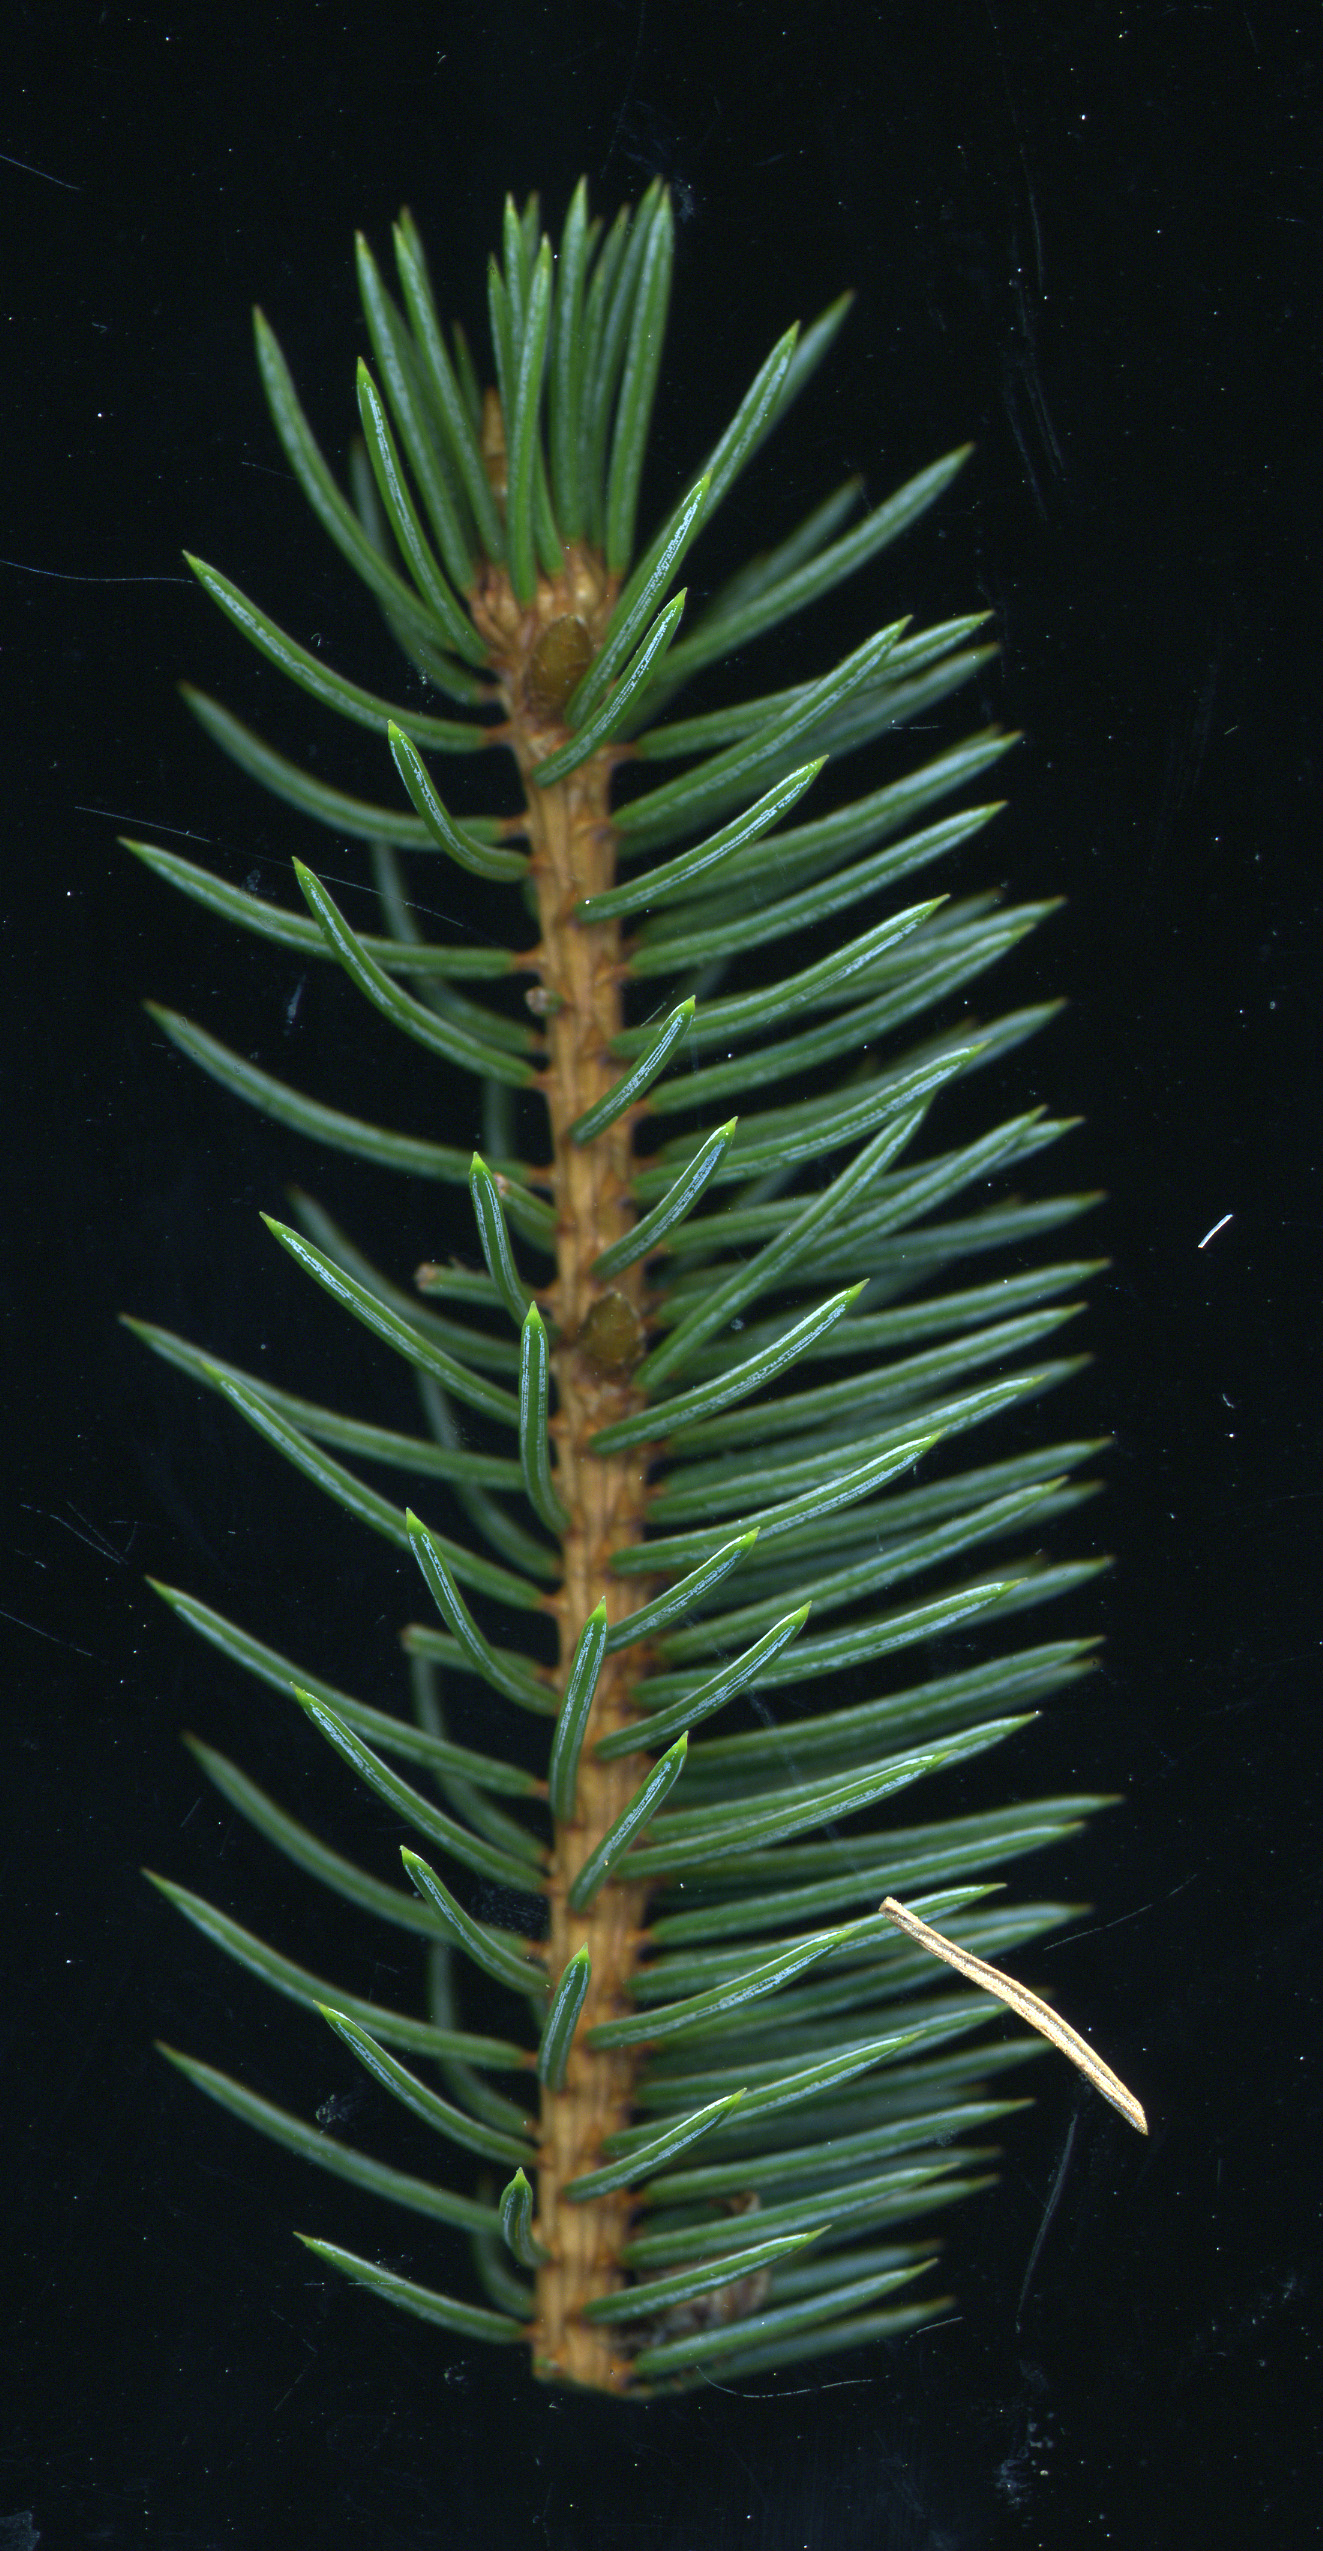
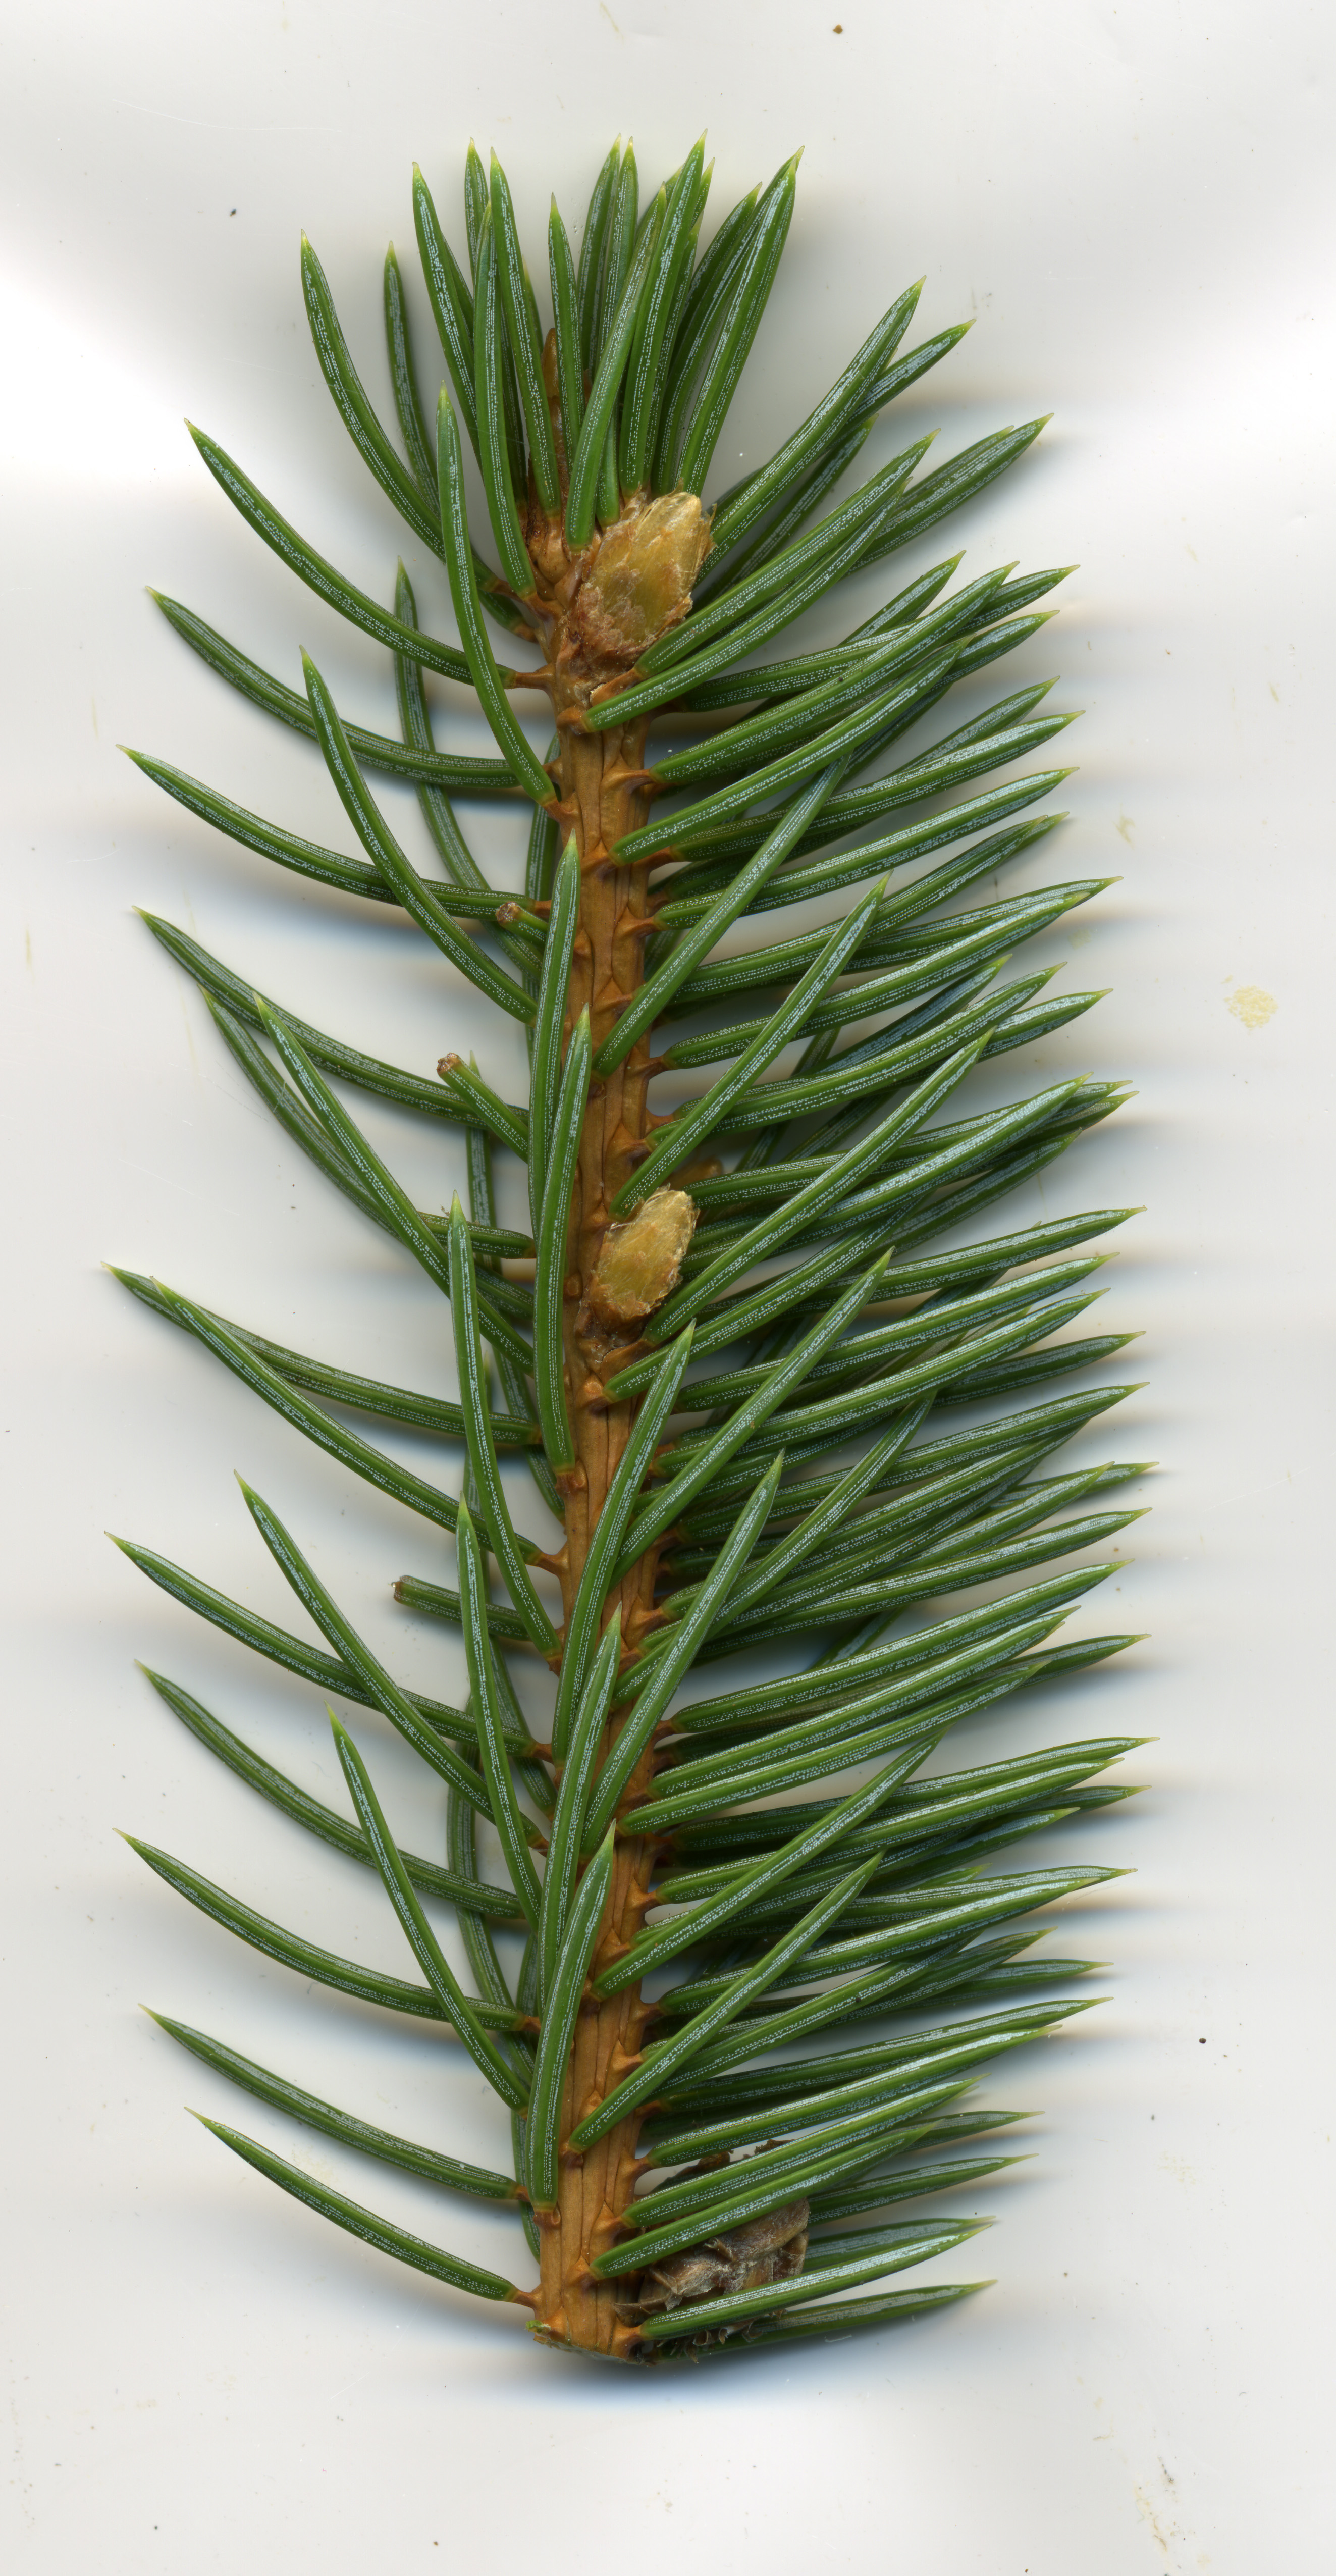
Of course, it's always good to insure objectivity. So after noting the new growth on this blue spruce, I went to the other untreated blue spruce and carefully examined it. As expected, it had absolutely no new growth. An inch a day? No smooth transition? Where did the blue go? Nevertheless, I thought it worthwhile to document a close-up of a blue spruce twig that was created within the previous 10 days. Figure 4 shows a 600 dpi scan of one lying on my flatbed scanner. Since the needles keep the stem raised above the glass surface, parts of this twig are out of focus. Figure 5 shows the same twig, but with the white scanner cover pressing down on the twig, flattening it. You can now see more details, especially since the scanner resolution was upped to 1200 dpi. Yet, in spite of these great views - no blue! Furthermore, that new shoot white outline on the needles is also missing. On the other hand, the white stomata dots on the needles stand out starkly!
The inside appearance
White Canker fruiting bodies - already!?
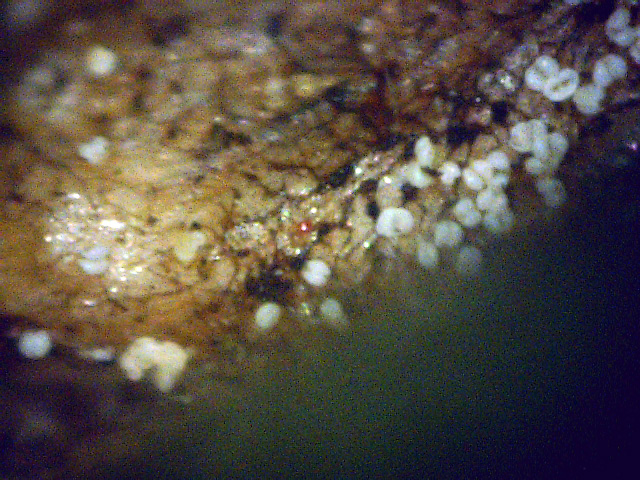
The results are shown in Figures 8 and 9. Each photo in Figure 8 shows a massive field of white canker fruiting bodies. As is almost always the case, they tend to cluster at branch junctions near the tip of the branch. But the real surprise was that they were present at all! The reason is that these fruiting bodies tend to form and get released in early June, when white pine trees shed pollen. This particular branch was only about 10 days old, so these fruiting bodies must have formed within the past 10 days - not two months ago!
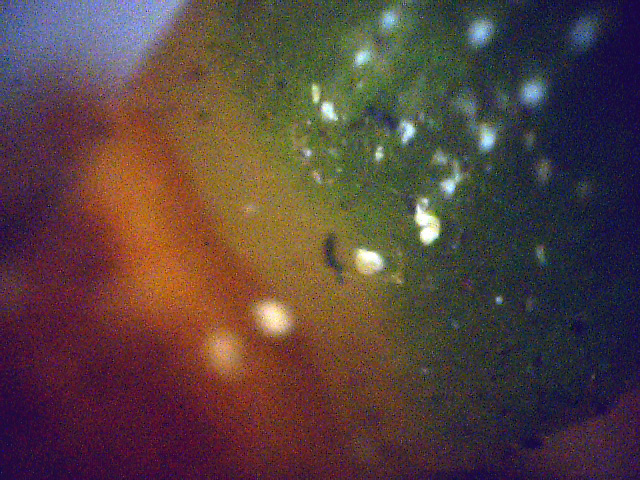
What this indicates is that 1) the fungicide didn't kill or disable all the white canker in the tree, and 2) white canker fruiting bodies form when the branch junctions form, not afterward. Both of these points were somewhat of a surprise to me, and, once again, are more proof that these objects aren't white pine pollen. But that's not all. As Figure 9 shows, these white canker fruiting bodies can also appear at the base of blue spruce needles. Granted, there are few present there, but they DO appear there. I haven't found them at any other location along the length of the needle. And, since these needles have grown within the past 10 days, these fruiting bodies must also have formed within the past 10 days. White canker fruiting bodies really seem to prefer to grow at tissue junctions!
Time will tell what further changes take place in this tree, but for now the exciting news is that a ground application of fungicide propiconazole will result in healthy and vigorous new growth on the diseased branches of blue spruce trees. | ||||||||||||||||||||||||||||||
|
A Bush that had been "Dead" for Years Comes Back to Life!
By accident, I discovered another interesting fact about this disease. About 1998 I bought a small Rose of Sharon bush and planted it in a far corner of our yard. It grew well, getting bigger each year. Then, about 2003 it died over the winter, leaving a dead stick the following spring. I left it alone, hoping it would come back over the summer. It didn't. The following spring I still left it alone, hoping against hope it would come back. It didn't. 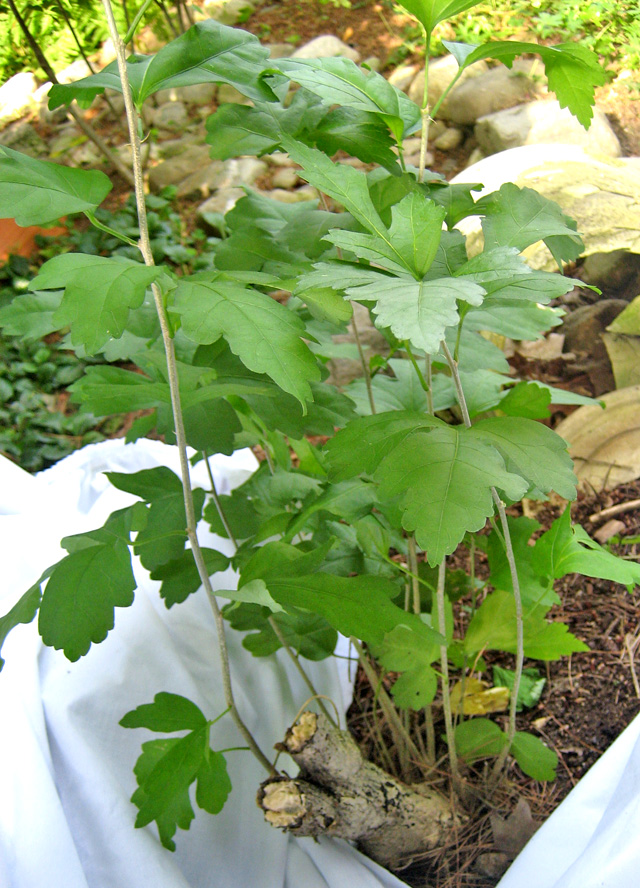 The next year, fed up with my reluctance to discard a dead bush, my wife went to dispose
of it by breaking it off at the base.
But while doing so, she was astonished to find about 8 healthy shoots (one with a bud) coming from
the root collar! In disbelief, I had to agree that this long "dead" plant was looking good!
The picture to the right shows it.
Here's what I assume happened. White canker struck this Rose of Sharon and killed it above the root collar over the winter. But the roots were still alive. Each year it tried to grow, but the new small growth (which was covered by adjacent plants) was almost immediately killed by white canker. A subsequent spring fungicide spraying around 2006 killed off the white canker, permitting the new growth to finally thrive. It has been healthy and growing ever since. And now, in 2014, it is producing an abundance of blooms! I see this as interesting evidence that this disease tends to kill or harm a plant above its root collar, but does not always kill the roots or root collar. That's of particular interest since Phytophthoras are known to attack the roots of a plant. So this is one piece of evidence that says this is not a Phytophthora disease. |
|
Shed Fruiting Bodies
Back around June 9, 2008, I and others noticed what appeared to be a "fog" in the air during a hot and windy day. Someone else commented that when he looked at the trees, they appeared to be "smoking". The cause appeared to be a blizzard of yellow-green "pollen". Curious as to what this "pollen" looked like, I used a strip of cellophane tape to capture some and examine it under a 400x microscope. To my complete surprise, the "pollen grains" looked like the infectious fruiting bodies that I had been seeing on all my diseased branch samples! After this "pollen blizzard" subsided, I walked the neighborhood and noticed that this yellow-green pollen was much denser on the street under some trees than under others. After looking at dozens of trees, I noticed a pattern: the dense pollen was only under some species of trees, and even then it was the densest under trees that seemed to be suffering from white canker (as determined by sparse or diseased foliage and/or sick-looking bark). In particular, these pollen producing trees were white pines, blue spruces, oaks, and maples. The most prolific pollen producers appeared to be Norway maples. But maybe, as some suggested, this was plain old maple pollen. Well, plants give off pollen to pollinate themselves, in order to make seeds that in turn can make a new plant. But as I looked down, I noticed maple seed pods on the ground, indicating that the maples had already gone through their normal reproduction phase. And, oaks had already shed their pollen producing stringy objects. This stuff they were now giving off was not normal pollen! But while all this pollen appeared to be the same color, was it really the same? To find out, I used cellophane tape to gather a pollen sample from under each tree that had a significant amount of pollen under it. True, there would be tree to tree mixing of the pollen, but the majority should have been from the tree directly above it, since the pollen density tapered off as the distance from the tree increased. A 400x view of pollen from a White birch is shown at the right. The grains are numerous. Pin oak pollen is also shown, but in greater detail. The shape is the same. Pollen from a red maple is identical, but notice the semi-transparent octopus object among the grains? That's an important clue. Check out the Norway maple pollen - it too is the same. And note the barely visible semi-transparent worm-like object, which is another clue! White pine pollen is also shown, and it too is the same. It also has the occasional octopus-like growth as shown in the sample. The Silver maple sample also looks identical to the others, including a transparent worm-like object. The blue spruce samples, in spite of being conifers, also have the same pollen. One of these samples also contains both a semi-transparent worm-like and octopus-like object. Finally, there is a lilac sample, which also has identical pollen, and also includes one of these semi-transparent octopus-like objects. In summary, no matter what tree I gathered the "pollen" samples from, they were identical. And, they were often accompanied by translucent ribbon-like growths. So, the evidence is strong that this enormous "pollen" release was not really normal tree pollen, but white canker fruiting bodies. Still, a finding such as this almost defies belief. But if true, in the coming years, this disease may cause a massive decline in the health of our trees and shrubs. |
|
The Trees and Shrubs Most Affected by White Canker
Unlike almost all other diseases, white canker isn't a choosy disease - it will attack almost any woody plant. In fact, in addition to shrubs and trees, it will also attack vines and plants! It seems to know no bounds. While it attacks most everything having a woody stem, the set of symptoms and disease severity varies somewhat. Specifically, the most disease prone woody plants appear in the following order:
|
|
Photos of Trees and Shrubs Infected with White Canker
Since white canker isn't formally recognized as a plant disease, there is no literature available on it. Likewise, no lab test so far devised can detect it. Nevertheless, it is real, it behaves like a fungus, and we can characterize it through a variety of detailed observations of its effects.
The evidence supporting this disease grows stronger when we check several plants of a species rather than just one. The evidence grows even more convincing when we make these observations on dozens and dozens of different tree and shrub species. Finally, the case becomes even more airtight when we show that these common symptoms appear over a wide geographic area. As they say, "seeing is believing". The following list of trees and shrubs contains over 500 pictures that depict white canker. These pictures were obtained from a digital camera, a computer scanner, and a high power USB digital microscope. Each viewing technology enables us to see a different set of disease characteristics. Each of the pictures referenced in the list below is hyperlinked to a parent picture that shows increased detail. So, if you can't quite make out the details of a picture, simply click on it to zoom in for a more detailed view.
|


.jpg)
